Easter Fruity Rice Krispies Treats

Fruity Rice Krispies Treats @rachmccarthy7

Happy Tuesday, friends! I know I had mentioned that I was going to be sticking to healthier recipes here on ABM, but with Easter just around the corner, I couldn’t help but share a cute sweet treat idea that is fun for not only kids, but adults too!

Easy Easter Dessert for Kids @rachmccarthy7

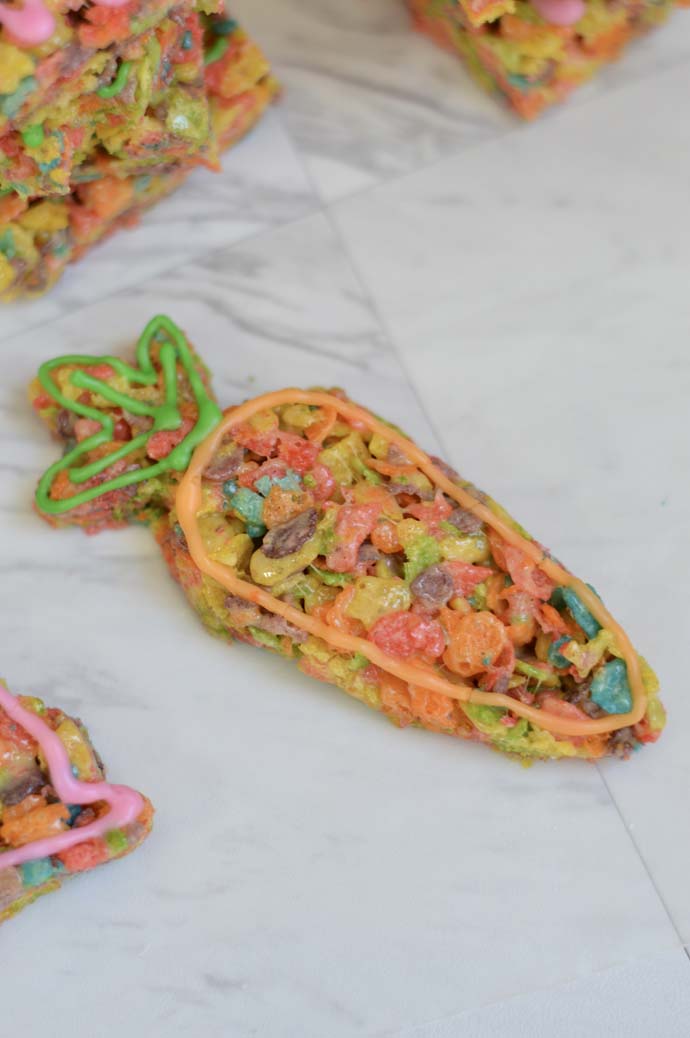
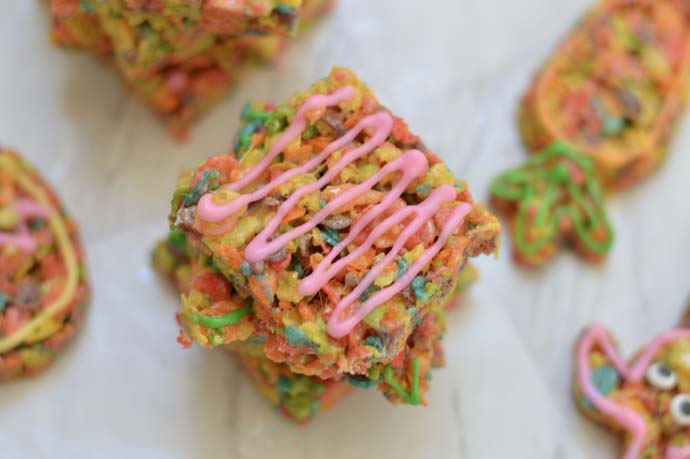
Growing up, Rice Krispie Treats were always a favorite of mine. Not only were they delicious to eat, but also something that I could help out with in the kitchen at a pretty young age. Originally, I was planning to use the plain crispy cereal, but then discovered the fruity version and thought it would be perfect for spring and the approaching Easter holiday. And instead of using just the traditional marshmallows, I also added lemon instant pudding powder to just enhance the fruity flavor. It gave it a super light and fresh taste! You can easily cut them into squares {like I did for the majority of them} or use cookie cutters depending on the holiday or occasion. A simple and fun recipe that will be easy for kids in the kitchen and even fun for adults! My mom and I made these a few weekends ago and had the best time decorating the shapes. It was like Christmas sugar cookies in the spring! 
Fruity Rice Krispies Treats Recipe @rachmccarthy7

print recipe
Easter Fruity Rice Krispies Treats
Ingredients
  • 6 cups fruity rice crisps cereal
  • 4 tablespoons butter
  • 10 ounce bag marshmallows
  • 5 tablespoons lemon instant pudding powder
Instructions
Melt the butter and marshmallows in a saucepan over low heat until smooth. Add the pudding powder and stir until completely combined. Place the cereal in a large bowl and pour the marshmallow mixture over the cereal, stiring quickly to make sure all the cereal is coated. Spread the cereal into a rimmed baking sheet. Allow to cool completely. Cut and decorate as desired. Store in an airtight container and enjoy!

…. 
Thanks for stopping by, friends! Have a wonderful Tuesday!
This post is linked up with: Tasty Tuesdays | Tickle My Tastebuds Tuesday | Two Cup Tuesday | Weekend Potluck  | SITS Girls 

Healthy Snack: Peanut Butter Energy Bites

peanut butter energy bites recipe
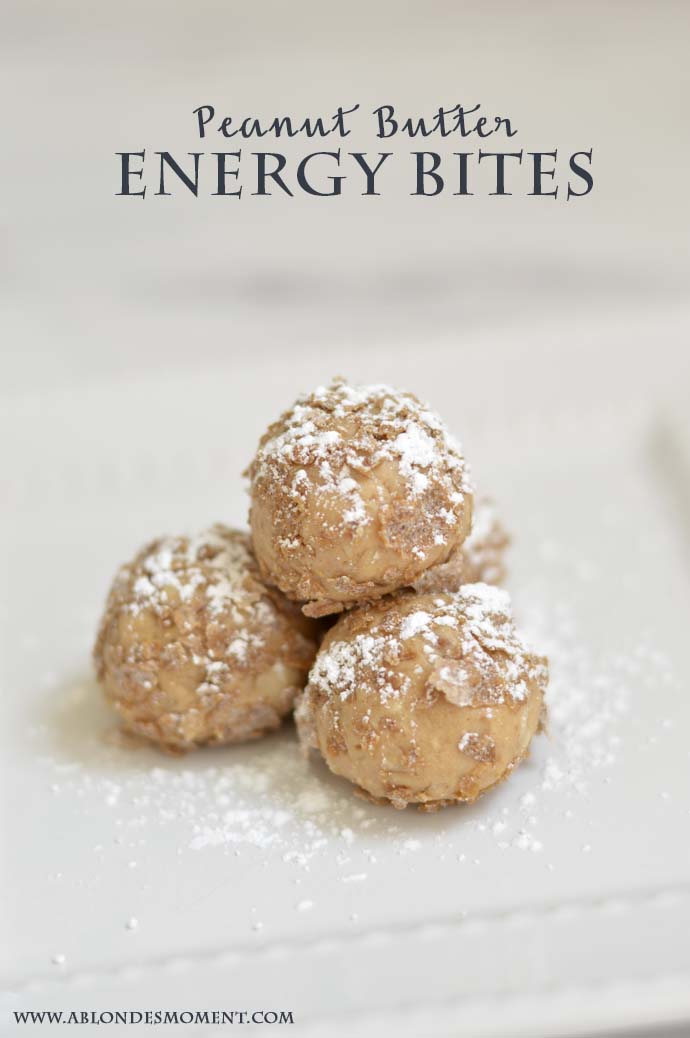
With my serious weakness for peanut butter, I can’t believe it’s taken me this long to share this quick snack idea with you! It was a staple in our house when I was growing up — my mom made them for just about every tennis match through college and they were always a fan favorite.

healthy peanut butter snack recipe

When we were on the no carb diet a few weeks ago, coming up with “take to work” snacks was a real challenge. Although I am back to eating carbs {thank goodness!} my husband is still doing pretty well with the no carb eating — I have been making his breakfast and lunches for the week ahead of time and no carb dinners for both of us. Anyways, back to these delicious peanut butter bites. Whether you are on a diet or not, I think everyone can appreciate a recipe for a snack, especially when you hit a wall around 3pm! With only a few healthy ingredients {there are old fashioned oats in these, just an FYI for the no carb dieters!}, they are quick and easy to make over the weekend and you can enjoy them all work week long. That is, if they make it through the week. I have a hard time limiting myself to just one. 

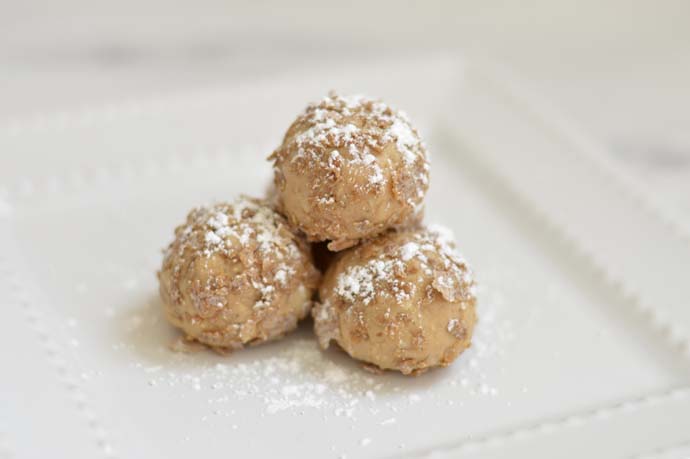
I finished the energy bites off with a little dusting of powdered sugar for the pictures. If you are looking for the healthier version of these, I would just skip the powdered sugar dusting 🙂 Check out the recipe below — you won’t be able to just eat one!

print recipe
Peanut Butter Energy Bites
Ingredients
  • 1/2 cup creamy peanut butter
  • 1/2 cup honey
  • 1 cup dry milk
  • 1 cup old fashioned oats
  • 1 cup bran flakes, crushed
  • 2 TBS powdered sugar
Instructions
Mix together the peanut butter, honey, dry milk and old fashioned oats. Roll into balls. Mix the crushed bran flakes and powdered sugar together in a shallow bowl. Roll the peanut butter balls in the mixture. Dust with additional powdered sugar, if desired. Store in airtight container and enjoy!

…. 
Thanks for stopping by, friends! Have a great Tuesday!
This post is linked up with: Tasty Tuesdays | Tickle My Tastebuds Tuesday | Two Cup Tuesday | Weekend Potluck  | SITS Girls 
Mediterranean Breakfast Quesadillas

freezer friendly breakfast recipes A Blonde's Moment

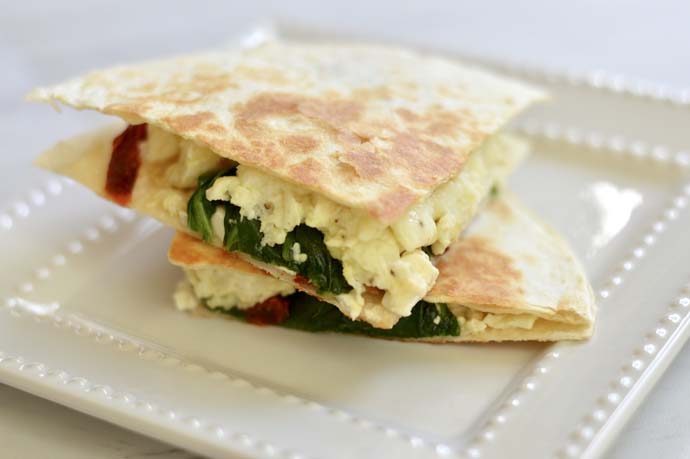
After reading through the reader surveys, make ahead and freezer friendly breakfast recipes were one of the most requested kind of recipes. And I totally get it because I struggle with ideas too! Everyone has a busy schedule, and coming up with healthy and quick meals can be a challenge. Going forward, I will be sticking to mostly quick and healthy recipes: breakfast, lunch, snack and dinner recipes that are perfect for the busiest of schedules. Although, there could be a splurge-worthy treat every once in a while, especially around holidays 🙂 Without further ado, here is the latest freezer friendly breakfast recipe: Mediterranean Breakfast Quesadillas.

breakfast quesadillas recipe A Blonde's Moment


It’s probably pretty obvious by now that we really like Mexican food in our house and finding a way to incorporate one of our favorite cuisines into breakfast had me oh so excited. For me, there are only so many ways to eat an egg sandwich. Yeah, you can switch up the toppings or have it on an English muffin instead of toast or a bagel, but that has been done and re-done so many times. 

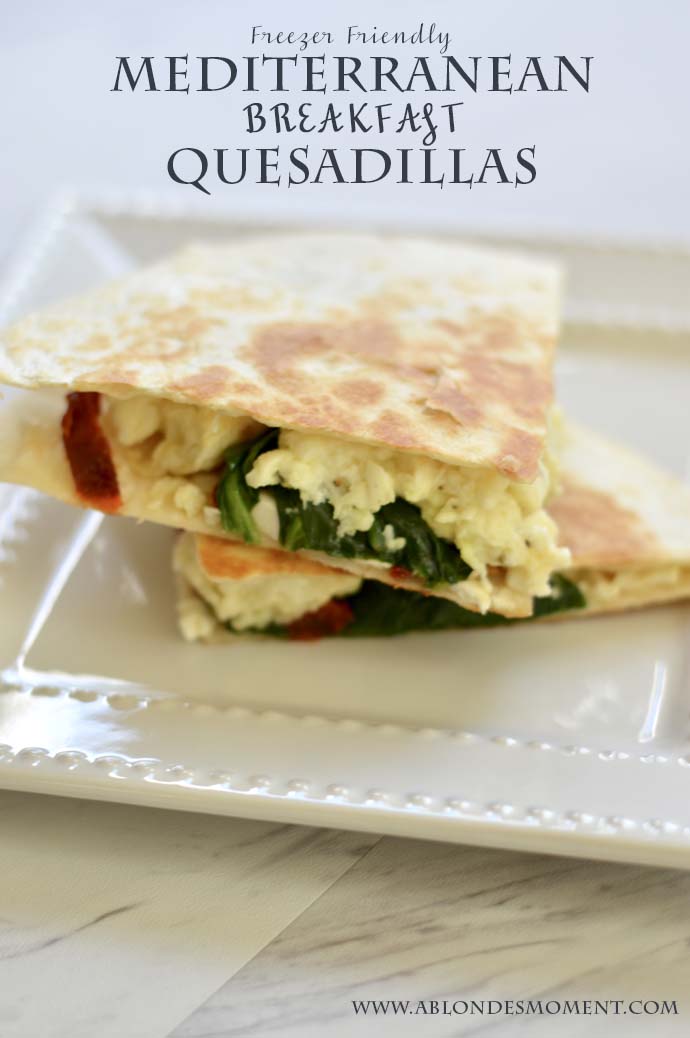
Since we have Mexican at least once a week for dinner, I typically have tortillas on hand, looking for a way to use them up before they expire. Sometimes, I will make homemade chips, but a few weeks ago when I realized that I needed to use these tortillas sooner rather than later, I thought of making breakfast quesadillas. Not that breakfast quesadillas are by any means an earth shattering idea, but it was definitely different from the usual toast and other breakfast breads. And instead of the typical eggs, cheese and bacon, I thought I would put a Mediterranean spin on these and add spinach, sun-dried tomatoes and feta cheese. Check out the recipe below. Once these are cooled, you can easily wrap them in plastic wrap and foil and store them in the freezer for a quick, on the go breakfast!

print recipe
Mediterranean Breakfast Quesadillas
Ingredients
  • 10 ounce bag fresh spinach
  • 8 – 8 inch tortillas
  • 1/2 cup sun-dried tomatoes, drained
  • 16 ounces egg whites
  • 1/3 cup feta cheese
  • 2 tablespoons olive oil
Instructions
Spray large skillet with cooking spray. Cook egg whites, scrambling, over medium heat. Transfer cooked egg whites to a clean plate. In the same skillet, add olive oil and cook spinach just until wilted; season with salt and pepper. To assemble quesadillas, place one tortilla on flat surface and top with enough egg whites to cover the tortilla, leaving a border around the edge. Top with desired amount of spinach, sun-dried tomatoes and feta cheese. Heat a clean skillet over medium heat and spray with cooking spray. Transfer quesadilla to skillet and brown on each side, about 2-3 minutes per side, or until golden brown. Repeat with the remaining quesadillas. Once cooled, wrap the quesadillas in plastic wrap and foil and place in the freezer until ready to eat. To warm frozen quesadillas: wrap quesadilla in damp paper towel and microwave for about 2 minutes, or until warm. Enjoy!
….

Thanks for stopping by, friends! Have a great Tuesday!


This post is linked up with: Tasty Tuesdays | Tickle My Tastebuds Tuesday | Two Cup Tuesday | Weekend Potluck  | SITS Girls 
Reuben Dip with Shamrock Chips

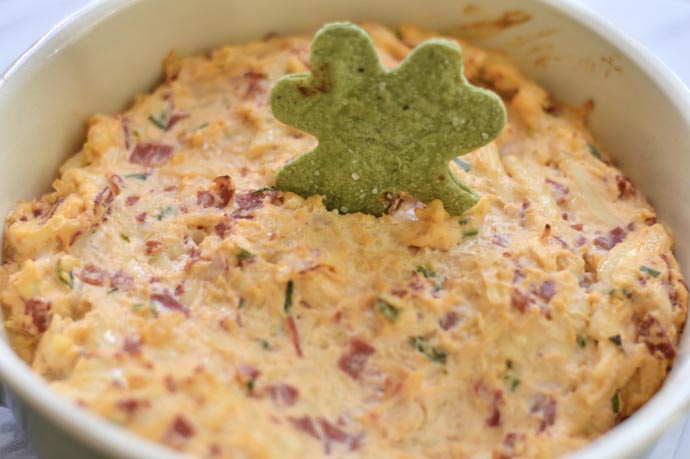
Reuben dip with shamrock chips

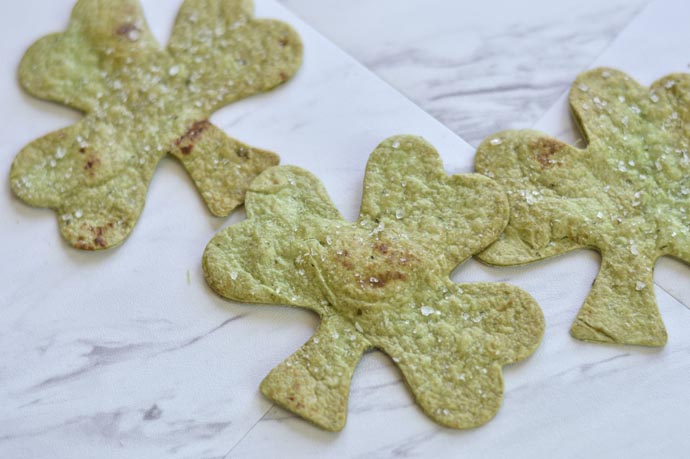
With St. Patrick’s Day on a Friday this year, I thought it would be fun to share with you a quick and easy appetizer that would be perfect for a party or even just family while celebrating over the weekend. And, a St. Patrick’s Day recipe would not be complete without the cutest homemade shamrock chips!

easy Reuben dip recipe

For as Irish as I am {my maiden name also begins with a “Mc”!}, I’ve never been a huge fan of Irish food. One of my first experiences at an Irish restaurant was after moving into my freshman dorm room at college. My parents and I went out to dinner before orientation was to start and I got so sick after eating at that restaurant! I don’t know if it was food poisoning, but since then, I’ve kept my distance from Irish food. Not to mention, I’m not a huge meat eater and never really cared for corned beef or Reuben sandwiches. I decided that it was just a cuisine I didn’t care for…

Let’s just say this dip completely changed my mind about corned beef and made me feel like a true Irish girl! My mom made this dip a few weekends ago and she suggested sharing it with all of you since it was a quick and easy dish {thanks, mom!}. Ironically, I had already decided to share these cute shamrock chips for a St. Patrick’s Day post and this dip would complement the chips perfectly.

The dip is warm, creamy and delicious {a combination you truly can’t beat!} and the shamrock chips add just the right amount of crunch to every bite. You could easily serve the dip with vegetables, regular tortilla chips or other crackers, but with St. Patrick’s Day right around the corner, what better way to eat an Irish dip than with shamrock chips! Check out both easy and festive recipes below…

how to make homemade tortillas recipe

print recipe
Reuben Dip with Shamrock Chips
Ingredients
  • 8 ounces cream cheese
  • 1/2 cup mayo
  • 4 tablespoons Thousand Island dressing
  • 2 cups shredded Swiss cheese
  • 2 ounces deli corned beef
  • 1/2 cup sauerkraut, drained
  • 1/4 cup chives, chopped
  • 1 package spinach tortillas
Instructions
Preheat oven to 375 degrees. Combine cream cheese, mayo and Thousand Island dressing in a food processor until smooth. Transfer to a medium-sized bowl and stir in the Swiss cheese, corned beef, sauerkraut and chives. Spread mixture into baking dish and bake for 15 minutes. For the chips: Using a shamrock cookie cutter, or any other shape, place on the spinach tortillas to cut into shapes. Transfer to baking sheet and spray the chips with cooking spray and add a little salt. Cook about 10 minutes until crunchy.
….

Thanks for stopping by, friends! Have a wonderful Tuesday!

This post is linked up with: Tasty Tuesdays | Tickle My Tastebuds Tuesday | Two Cup Tuesday | Weekend Potluck  | SITS Girls 
Homemade Peanut Butter Granola

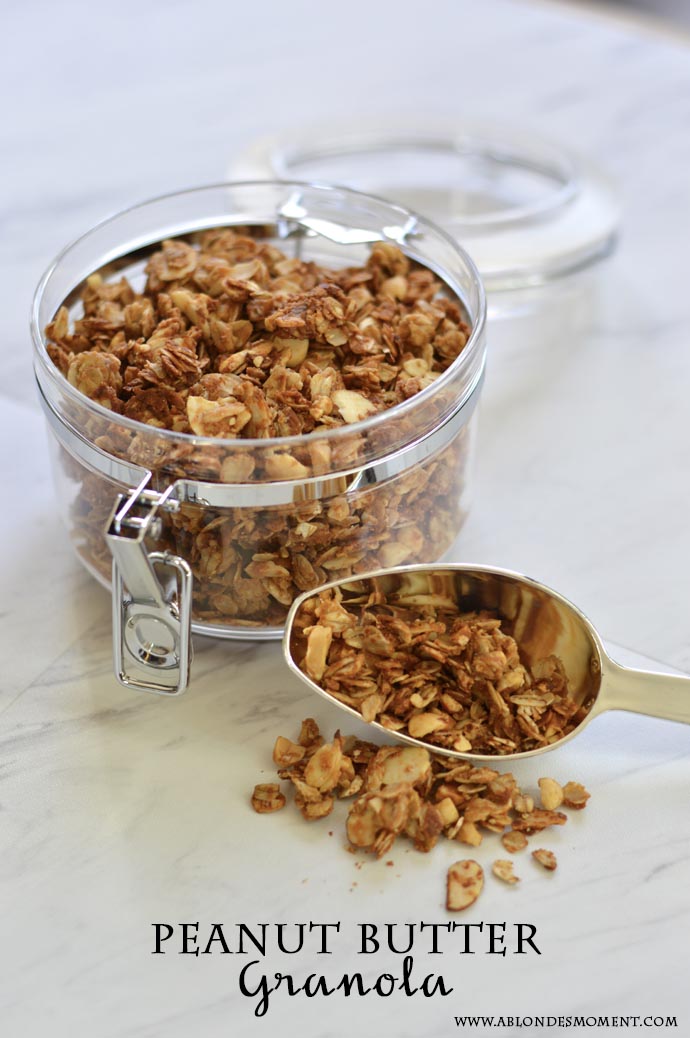
peanut butter granola recipe

One of my favorite ways to mix up yogurt is to add granola. In the past, I was quick to purchase store bought granola because homemade granola seemed too daunting. But after sharing THIS granola recipe with you last year, I decided to switch up the ingredients for a different twist on this yogurt topping.

easy homemade granola recipe

After realizing how simple it was to make homemade granola {and how much healthier it is than the store-bought version} I decided to experiment with different flavors. I’m sure I have mentioned my love for peanut butter at least once or twice — I’m truly addicted! I thought why not take this obsession to a completely different level and make peanut butter granola! I typically eat vanilla yogurt so the peanut butter worked well with it. I haven’t tried it with a fruit flavored yogurt so I can’t say how that would taste. And although this is probably not as healthy as the original homemade granola I made, it compliments my morning routine {that is, before I went on the no carbs, no sweet diet yesterday!} perfectly. Just a heads up: the peanut butter flavor is pretty intense — it’s definitely a recipe for the peanut butter lover! Check out the simple recipe below. It’s freezer friendly so you can store it there until you are ready to eat it!

how to make homemade granola

print recipe
Peanut Butter Granola
Ingredients
  • 3/4 cup honey
  • 3/4 cup smooth peanut butter
  • 4 cups old fashioned oats
  • 1 ½ cup peanuts, chopped
  • 1 cup almonds, sliced
Instructions
Preheat oven to 350 degrees. In a medium-sized saucepan, mix the peanut butter and honey together over low heat until smooth and combined. Add the old fashioned oats, peanuts and almonds to a large bowl. Pour the peanut butter and honey mixture over the dry ingredients and mix well. Spread the mixture out onto a baking sheet that has been lightly sprayed with cooking spray. Bake for 15 minutes, stir the granola and then bake for an additional 10 minutes. Allow the granola to cool before storing. Top your favorite yogurt with peanut butter granola. Granola can be stored in a plastic freezer bag for up to 1 month.
….

Thanks for stopping by, friends! Have a great Tuesday!


This post is linked up with: Tasty Tuesdays | Tickle My Tastebuds Tuesday | Two Cup Tuesday | Weekend Potluck  | SITS Girls 
Mexican Chicken Burrito Bowls

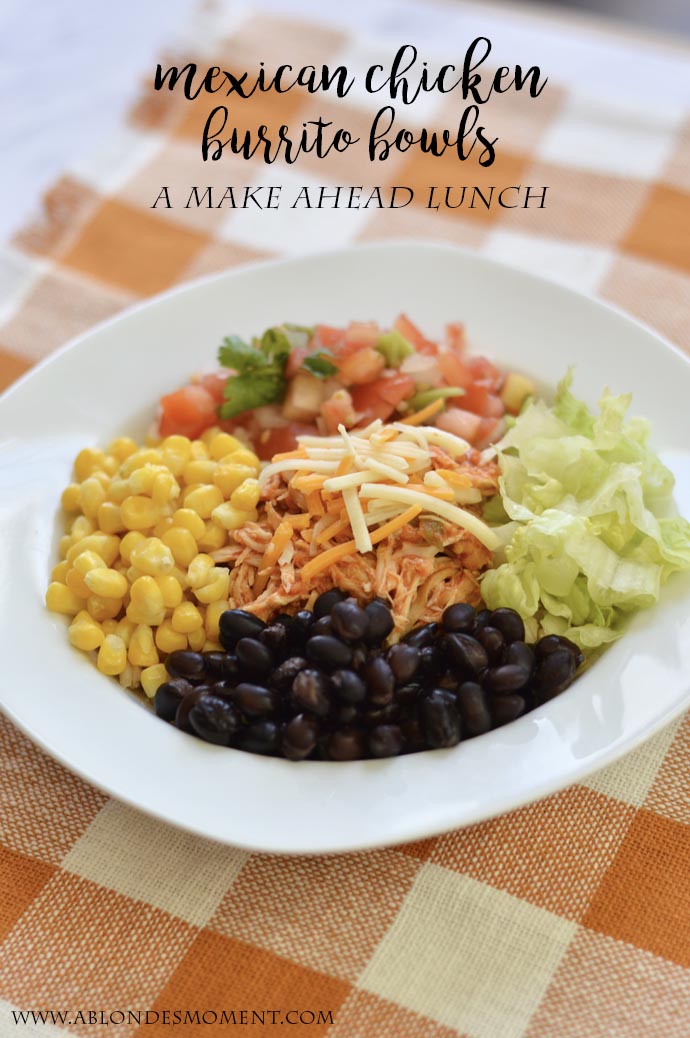
easy mexican chicken burrito bowl recipe crockpot
 
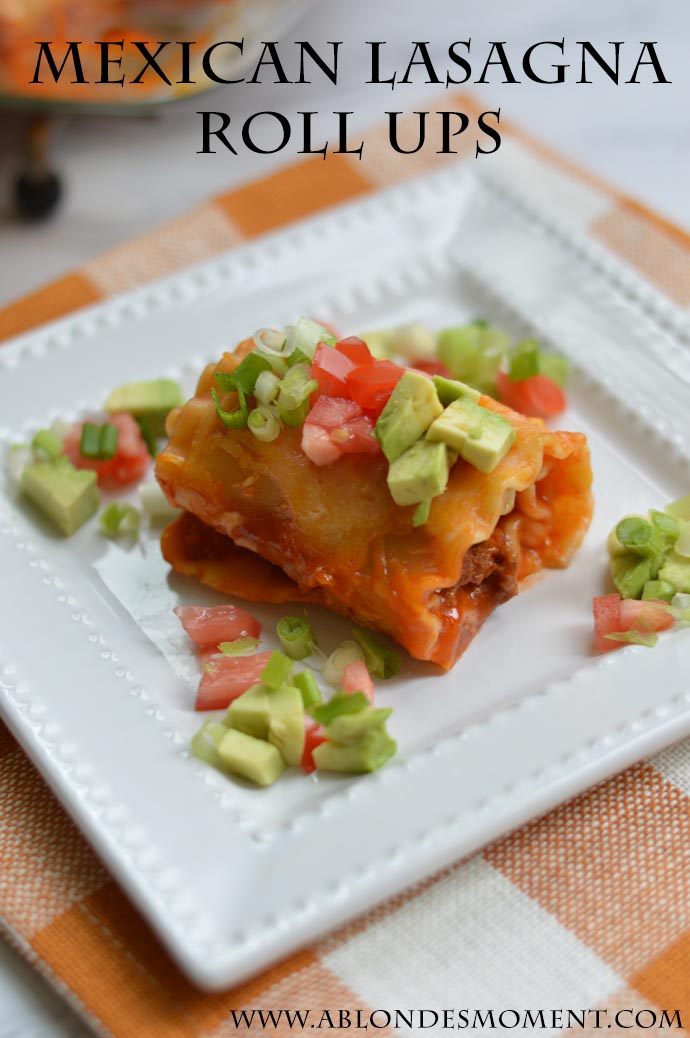
After reading through the reader surveys {thank you again for filling those out!} there was definitely a trend when it came to food posts: make ahead lunches and quick dinners were the clear winners. I can’t say that I’m too surprised about this because this is the stuff I’m always trying to come up with too! In this spirit, I came up with a Mexican Chicken Burrito Bowl that is not only a make ahead lunch, but also the perfect crockpot dinner!Read More

Make Ahead Frozen Smoothie Packs

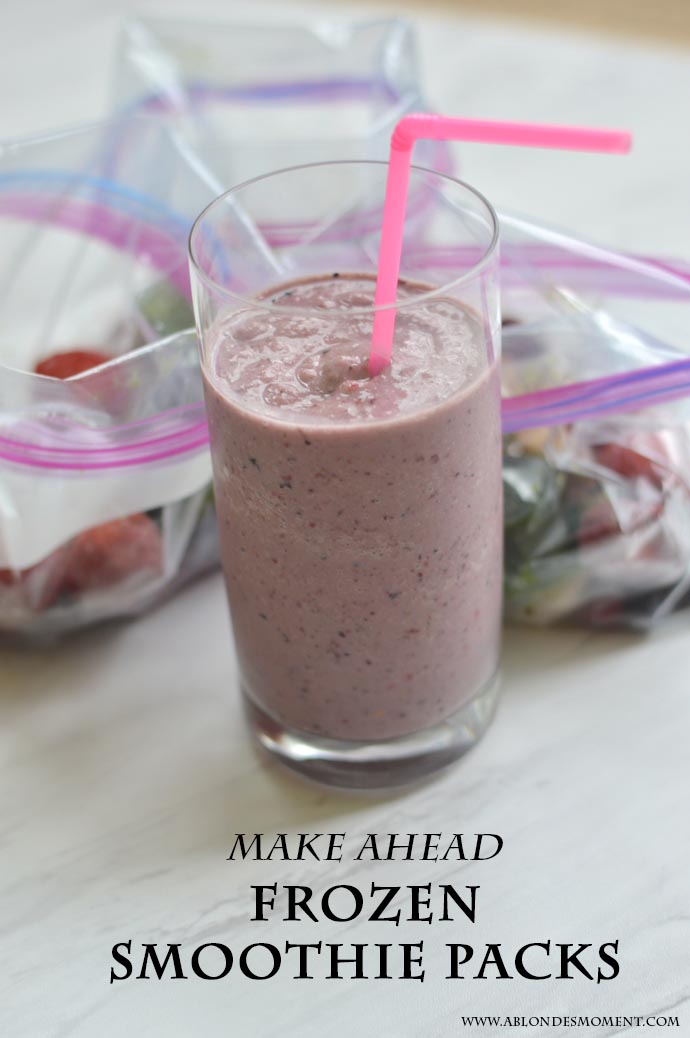
make ahead smoothie packs A Blonde's Moment @rachmccarthy7

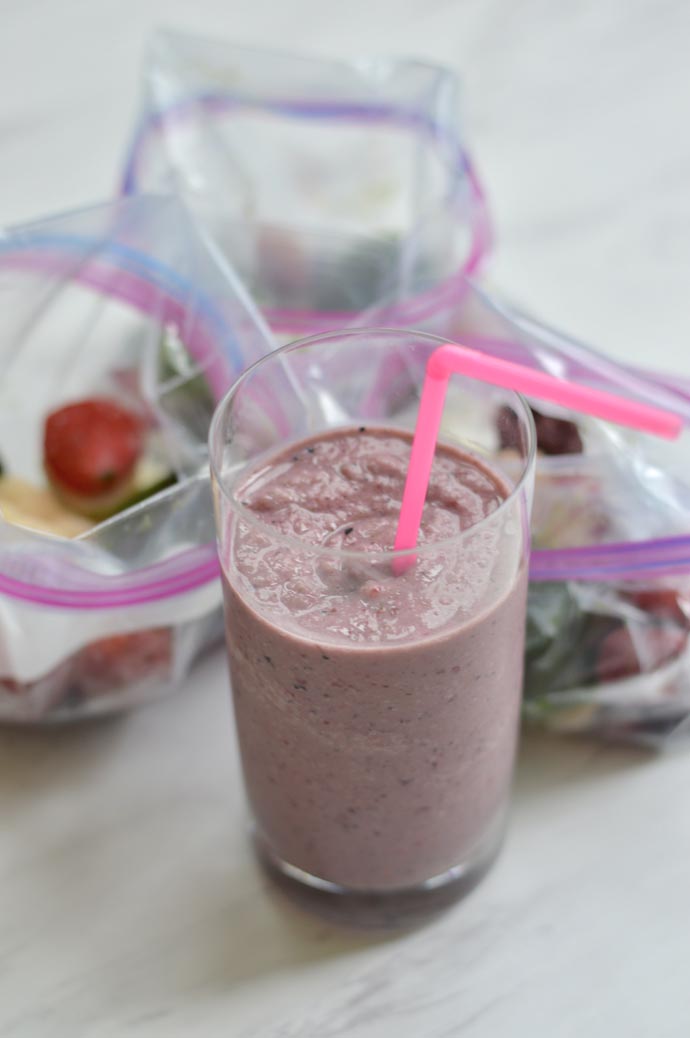
Smoothies are one of my favorite weekend treats. I love mixing and matching with different fruit and trying different ingredients. Unfortunately, I haven’t been able to get my act together during the weekdays to enjoy them but I recently thought of a shortcut to make healthy smoothies during the week and I had to share it with you!

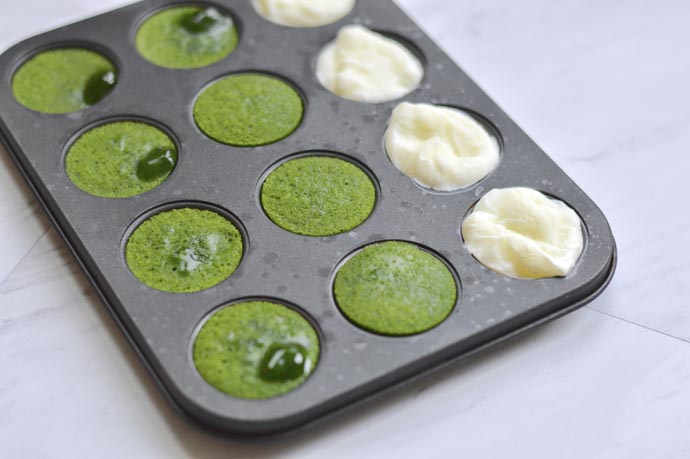
how to freeze spinach for smoothies A Blonde's Moment @rachmccarthy7
 I know there really isn’t anything revolutionary about a smoothie, but not only did I want to share the idea about dividing all the frozen fruit up right when you come home from the grocery store, but also taking care of the spinach and greek yogurt ahead of time too. I can’t even begin to tell you the number of times I have bought a bag of spinach for smoothies, forgot about it, and discover it in the fringe once it has gone bad. To try and avoid this waste, I decided to puree the bag of fresh spinach, with a little water to help with the consistency, and freeze the liquid in mini muffin tins and add those to the bag of frozen fruit! I also divided the greek yogurt into the muffin tins to freeze and add to the packs as well.

This made the smoothie prep SO much easier! When you are ready to enjoy a smoothie, grab a fruit, spinach and greek yogurt pack out of the freezer, toss it in the blender with a little almond milk and you are set! I’m always looking for shortcuts on weekday mornings, and I’m so glad that I now don’t have to wait for the weekend to enjoy a healthy drink. 
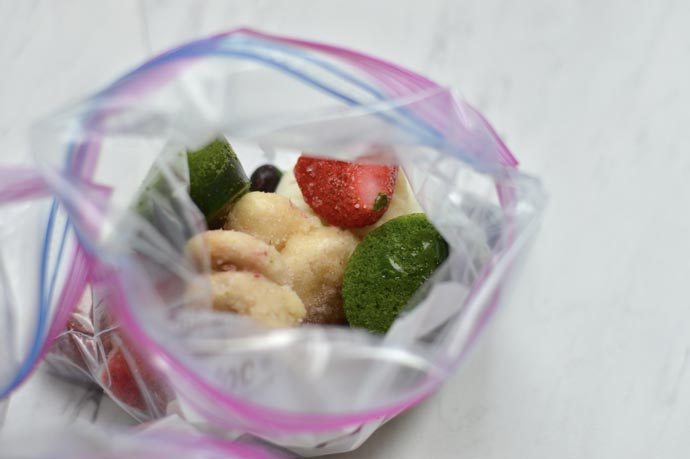
how to make smoothie packs A Blonde's Moment @rachmccarthy7

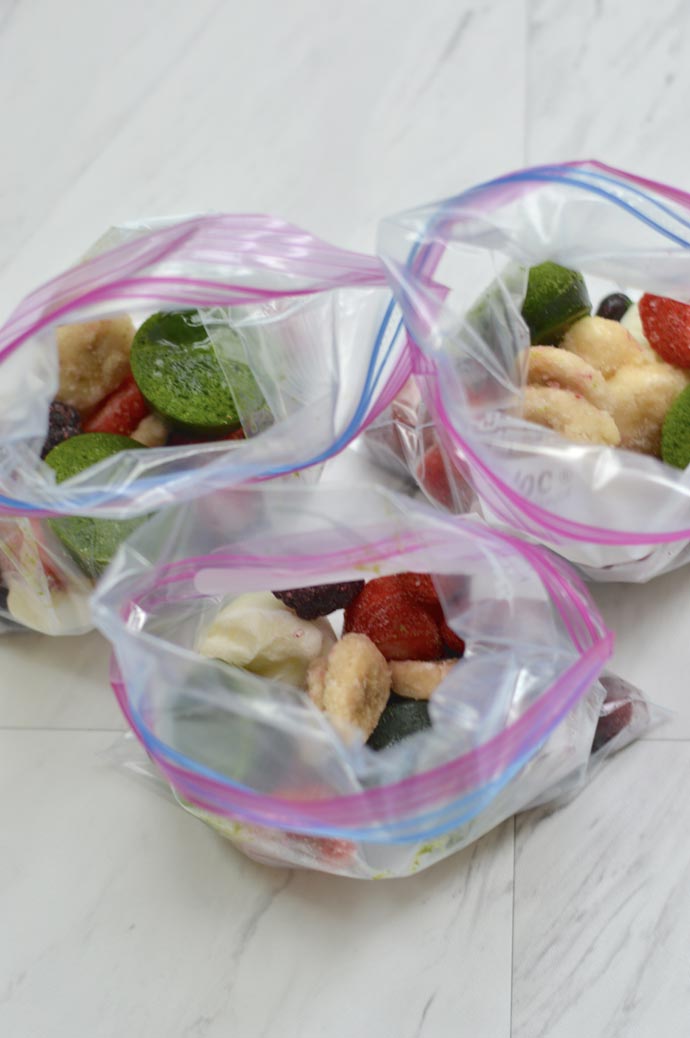
make ahead smoothie bags recipe A Blonde's Moment @rachmccarthy7

easy weekday morning smoothie recipe A Blonde's Moment @rachmccarthy7

Make Ahead Frozen Smoothie Packs

{ingredients, for one smoothie pack}

1 cup variety of frozen fruit {I used berries and bananas}
2 frozen spinach discs
1 frozen greek yogurt disc
1 cup almond milk, once ready to eat

{directions}
To make the frozen spinach discs: Add fresh spinach to a blender or food processor and turn it on. Gradually add water to the spinach while the blades are running until a smooth liquid mixture forms. Transfer the liquid spinach to mini muffin tins, filling almost to the top. For the frozen greek yogurt, add the greek yogurt to the mini muffin tins, smoothing the top. Place the muffin tins in the freezer until the spinach and greek yogurt have had a chance to set, at least 30 minutes. Once the spinach and yogurt discs are frozen, divide the frozen fruit into plastic bags, placing in each bag: 1 cup frozen fruit, 2 frozen spinach discs and 1 frozen greek yogurt disc. Place in the freezer until ready to use. To make the smoothie: add the contents of the plastic bag to a blender with 1 cup almond milk. Blend until smooth and enjoy!

….

You can customize how many spinach and greek yogurt discs you add to the plastic bags — I went with the 2:1 ratio because I really like spinach in my smoothies. If you aren’t a huge fan of spinach, you can reverse the ratio and have a creamier smoothie with more greek yogurt.

Thanks for stopping by and happy smoothie making, friends!

This post is linked up with: Tasty Tuesdays | Tickle My Tastebuds Tuesday | Two Cup Tuesday | Weekend Potluck  | SITS Girls 
Valentine’s Day Brownie & Raspberry Trifle

brownie-raspberry-trifle-recipe

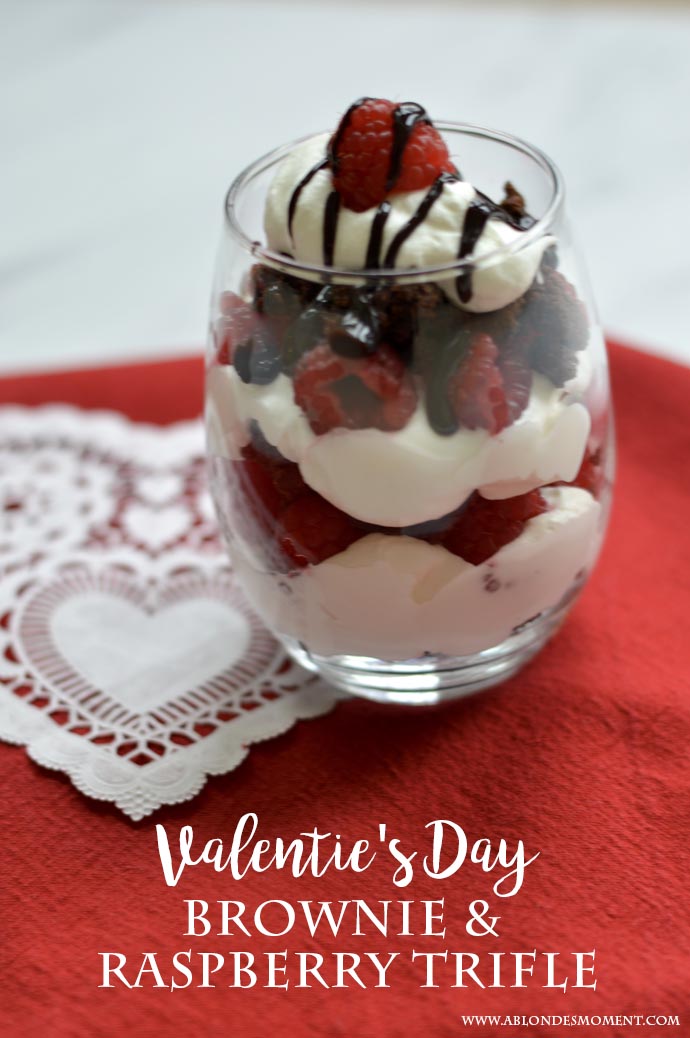
Happy Valentine’s Day, friends! Since sweet treats and Valentine’s Day go together like peanut butter and jelly, I’m sharing a quick and easy dessert that you can throw together in under 10 minutes. 

easy-valentine's-day-dessert-recipe

easy-trifle-dessert-recipe

When Valentine’s Day falls on a weekday, it makes coming up with a special dinner or dessert difficult. And since here we are on a Tuesday, having a fancy dessert after a long day of work is probably a little out of the question for most of us. 

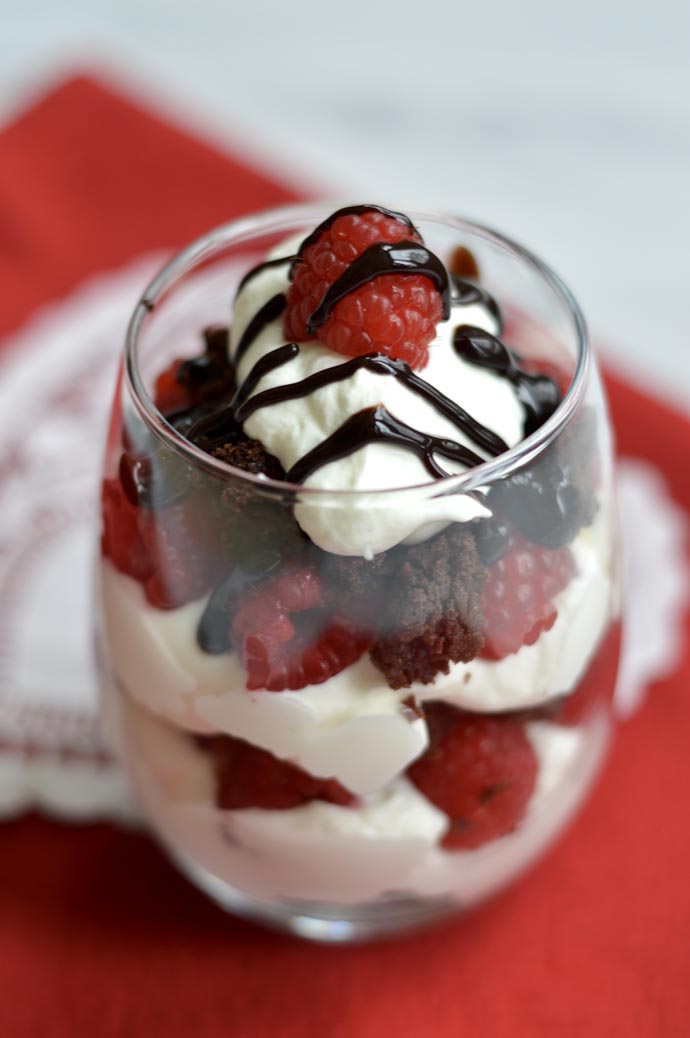
I whipped these cute trifle desserts up in under 10 minutes a few weeks ago and I’m ashamed to confess that I ate one entire bowl. Coming from someone who doesn’t even like whipped cream, this is so bad! But there is something about the mixture of brownies, raspberries and chocolate sauce that make a dessert too good to resist. And although I did make my own whipped cream {it doesn’t take too long and tastes SO much better} the other ingredients are easy to pick up on your way home from work and throw together after dinner. Just a quick note on the whipped cream: I used the ratio of 1 cup whipping cream to 2 tablespoons of sugar. Depending on how much you like whipped cream, you can also double that ratio and use 2 cups whipping cream to 4 tablespoons sugar.

Check out the simple recipe below. It’s a delicious treat that will give off the appearance of taking forever when in reality, it’s an under 10 minute dessert! 
brownie-raspberry-dessert-recipe


Valentine’s Day Brownie & Raspberry Trifle


{ingredients}

1 package store bought brownies {I bought the bite-sized}
1 pint raspberries
1 cup heavy whipping cream
2 tablespoons sugar
Chocolate syrup, for garnish

{directions}
To make the whipped cream: Place the sugar and whipping cream in the bowl of a mixer and whisk until stiff peaks begin to form. To assemble the trifle: place a dollop or two of whipped cream in the bottom of the glass dish followed by raspberries and brownie bites {I tore the brownies in half to make them even smaller}. Repeat with another layer ending with the brownies. Top the brownie with a dollop of whipped cream, 1 raspberry and a drizzle of chocolate syrup. Serve immediately. 

….

I ended up using individual bowls for this recipe {actually, they are stemless wine glasses!} but you could also use a large glass bowl if you are feeding a larger crowd. I do always like to use glass serving pieces so you can see the distinct layers! 

Do you have any fun plans for Valentine’s Day? We have the same tradition every year: we eat dinner at Qdoba. In college, I always had a tennis match scheduled on Valentine’s Day and since there was a Qdoba close to the tennis facility, my husband {then boyfriend} would run out to pick up dinner to have after the match back on campus. It was a tradition that stuck and 9 years later, we will be celebrating Valentine’s Day at our local Qdoba haha!

If you missed yesterday’s post, I shared a reader survey and would love to know your input on how to make A Blonde’s Moment better in 2017. I am also giving away a $25 Nordstrom gift card to one lucky reader who completes the survey! 


Thanks for stopping by and have a great Tuesday! 


This post is linked up with: Tasty Tuesdays | Tickle My Tastebuds Tuesday | Two Cup Tuesday | Weekend Potluck  | SITS Girls 
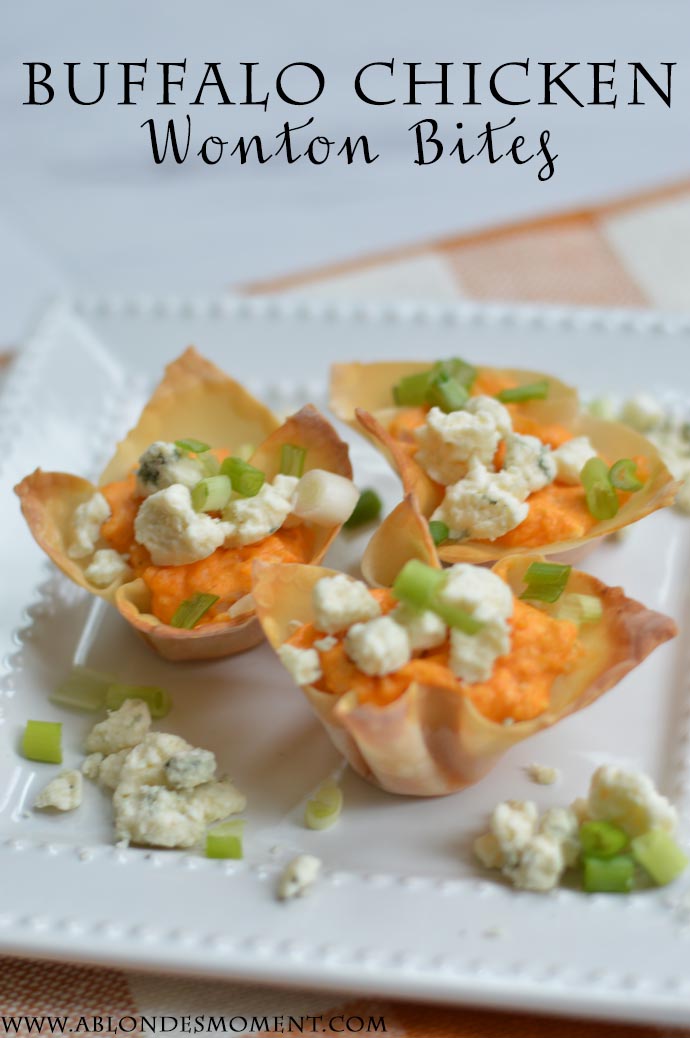
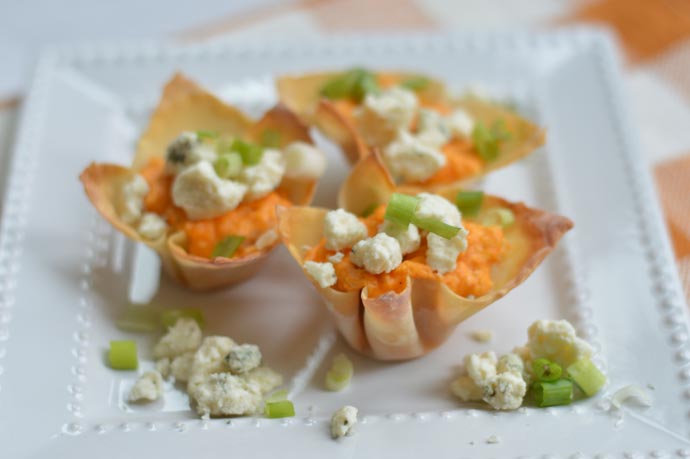
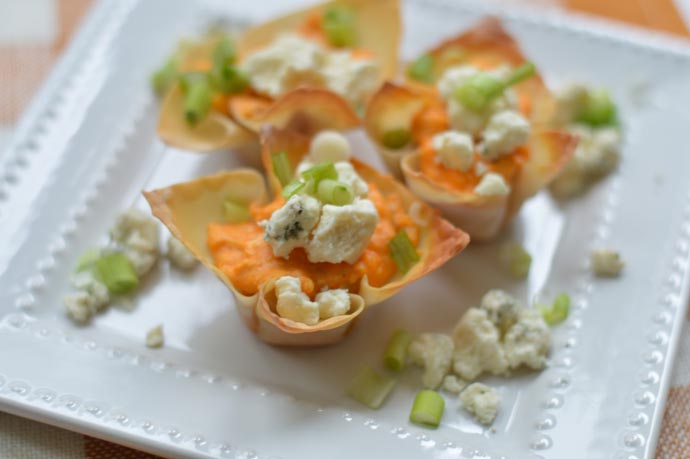
Buffalo Chicken Wonton Bites

Can you believe the Super Bowl is only just a few days away? Since my Steelers will not be playing in the big game this year, I’m looking forward to cooking up a few of our favorite football appetizers {I told my husband that if the Steelers did make it to the Super Bowl, we were ordering takeout because I didn’t want to miss a second!} 

Buffalo chicken goes together with football like peanut butter and jelly, and this bite-sized recipe is the perfect simple and quick appetizer that will let you sit back and enjoy the game.


If you have been following along for awhile, you may remember that I shared a similar recipe last year around Super Bowl time. And as much as I loved the bite-sized tacos then, these buffalo chicken ones might just take the cake. The buffalo sauce is creamy and the wonton wrapper give each bite the perfect crunch. 

I know I’m always looking for quick and easy recipes during the Super Bowl — if you don’t have a team in the game, you at least want to see the commercials! What I love most about these bite-sized appetizers is that the buffalo chicken filling and the wontons can be made and “toasted” ahead of time so it only requires about 10 minutes right before you are ready to serve them. 

Buffalo Chicken Wonton Bites

{ingredients}
2 cups Rotisserie chicken, finely chopped
8 ounces cream cheese, softened
1/2 cup Frank’s hot sauce
1/2 cup Ranch dressing
1/2 cup shredded cheddar cheese
24 wonton wrappers
Blue cheese crumbles, for garnish
Green onions, diced for garnish

{directions}
Preheat the oven to 350 degrees. Place the wonton wrappers in a mini cupcake pan; cook for 5 minutes to “toast”. Meanwhile, in a large bowl, combine the cream cheese, hot sauce, Ranch dressing and cheddar cheese. Add the chicken and stir until completely incorporated. Add a small scoop of the chicken mixture to each wonton cup and cook for an additional 10 minutes or until the wrappers are just golden brown. Garnish with blue cheese crumbles and diced green onions, if desired. Makes 24 wonton bites.

….

Do you have any fun plans for the Super Bowl? What food is on your football menu for the weekend? Thanks for stopping by and happy cooking!

This post is linked up with: Tasty Tuesdays | Tickle My Tastebuds Tuesday | Two Cup Tuesday | Weekend Potluck  | SITS Girls