Green Smoothies for a Healthy 2016

green-smoothie-jif-powdered-peanut-butter
As we begin a new year, many people vow to start exercising more, eating better or just committing to a healthier lifestyle. For me, smoothies are the perfect way to incorporate fruits and vegetables into your diet with ease. And, there is no denying my love for smoothies: admittedly, I actually had two green smoothies this past Saturday {insert monkey covering mouth emoji here}. 

I have been a fan of powdered peanut butter for about a year now, typically sticking with PB2. But, when I heard JIF was introducing a new peanut butter powder, I was eager to give it a try. Not only because it was something new, but also because it can be conveniently found on your grocery store shelf. {Does anyone else have a hard time finding PB2? I’ve had luck at GNC and just recently saw it advertised at Sam’s Club, but unfortunately our location didn’t have it in stock! I would love to know where you find your PB2 in stores!}

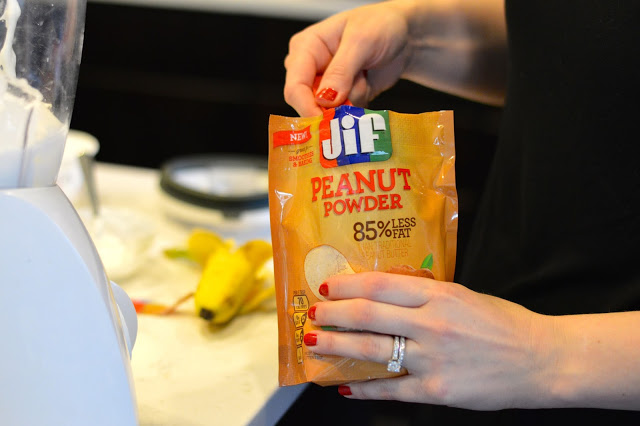
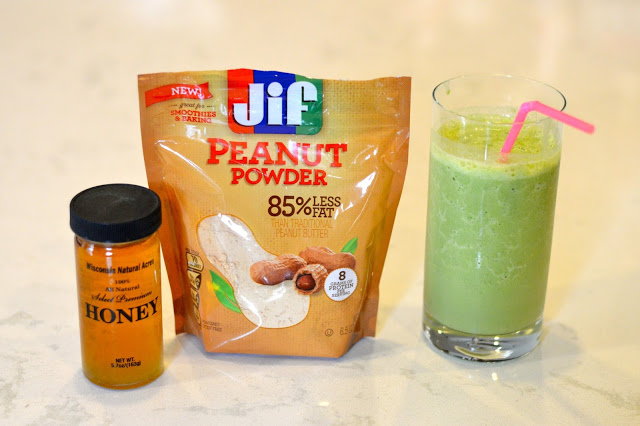
Interesting fact about the JIF powdered peanut butter: you don’t just add water like PB2, you have to also add a sweetener, such as honey. If I would have read the directions before making the first smoothie, I would have discovered that, but I just assumed it was the same as PB2!! Hence the above picture with the powder peanut butter AND honey. 

Overall, the JIF and PB2 are pretty comparable by my estimates, as long as you add the honey to the JIF! But, when it comes to smoothie making, it’s a lot easier to just add the powdered peanut butter than have to remember the honey {or be like me and not have any honey in the house!}. Regardless of what powdered peanut butter you use, it’s a healthy and easy way to add protein to your smoothie. 

**You can read about the first time I experimented with powdered peanut butter in my smoothies here**

There are plenty of ways to stay healthy and start the new year off on the right foot — smoothie making is just one of them! What is your favorite way to start the year off healthy? Stay tuned for a special healthy for 2016 Wednesday Wishes tomorrow!

how-to-make-green-smoothie

jif-powdered-peanut-butter-smoothie

powdered-peanut-butter-smoothie

how-to-make-green-smoothie

how-to-make-green-smoothiehow-to-make-green-smoothie

peanut-butter-powder-green-smoothie


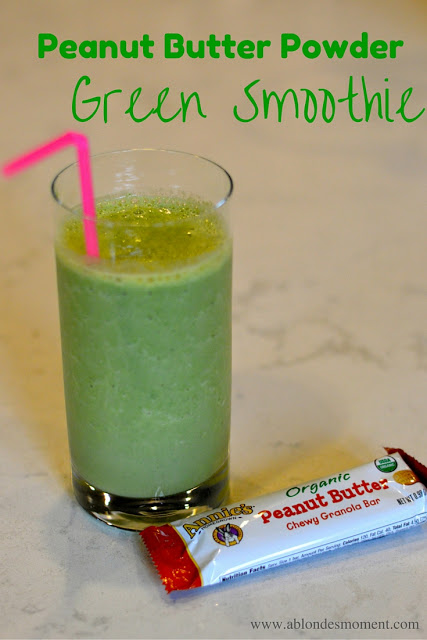
Powdered Peanut Butter Green Smoothie


{what you will need}

1/2 cup spinach
1/2 banana
2 tablespoons powdered peanut butter
1/2 cup skim milk {you could also use almond milk}
1/2 cup non-fat plain Greek yogurt
Handful of ice cubes
1 teaspoon of honey {if using JIF powdered peanut butter!}

{directions}
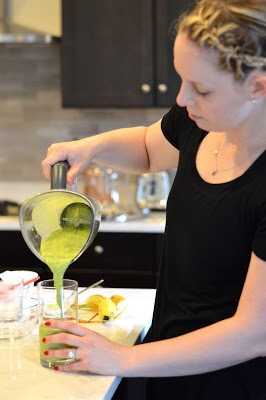
Add all the ingredients to a blender, placing the spinach on top. Mix until completely combined and smooth. 

Thanks for dropping by and here is to a healthy 2016! Happy smoothie making! 😉

the best sugar cookies

the-best-sugar-cookie-recipe


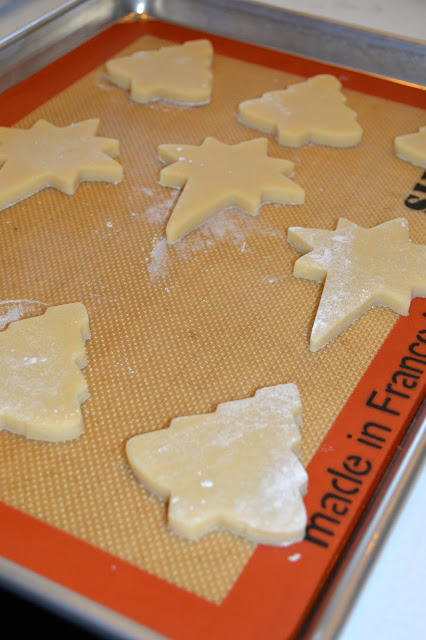
I know, it’s a big statement to make. How can you rank something as the BEST? But when it comes to cookies, there is nothing that beats this sugar cookie cookie recipe! Truthfully, I’m not a big cookie eater, except when it comes to these sugar cookies at Christmas! 

There is no doubt that my love for cooking and baking comes from my mother — she is the best cook I know! Although I love everything she makes, this probably takes the cake. Or the cookie 😉 She has been making these cookies for years: from birthday parties, to graduations to showers, this cookie recipe is definitely a keeper and it’s not limited to Christmastime.

What I love most about the recipe is that it’s not your average sugar cookie recipe, which I find to be most of the time too sweet. This cookie resembles more of a shortbread in it’s taste and texture and can be eaten without icing {which is actually the way I prefer it!}

A couple weekends ago, my mom and I started making Christmas cookies and I asked her if I could share this recipe with you because it’s my very favorite. She agreed and I’m so excited to share it with you today. If you are still looking for a cookie to add to your rotation or looking for a delicious sugar cookie recipe, you should definitely give this a try! 

the-best-sugar-cookie-recipe

the-best-sugar-cookie-recipe

the-best-sugar-cookie-recipe
The BEST Sugar Cookies

{what you will need}
3 cups flour
1 teaspoon powder sugar
1/2 teaspoon salt
1 cup butter
3/4 cup sugar
1 egg
2 tablespoons milk
1 teaspoon vanilla

{directions}
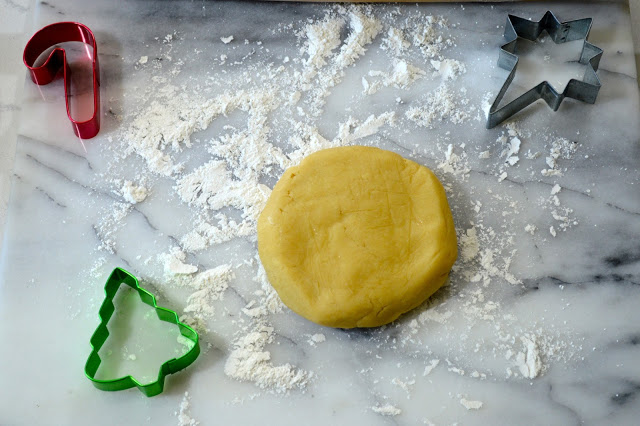
Preheat the oven to 400 degrees. Mix all of the ingredients together. Wrap in plastic wrap and place in the refrigerator overnight. Roll dough and cut into desired shapes. Bake 5-7 minutes. Allow the cookies to cool completely before icing.  

the-best-sugar-cookie-recipe
Thanks for stopping by and happy holiday baking!

hot cocoa cookies with crushed peppermint

hot-cocoa-cookies-crushed-peppermint
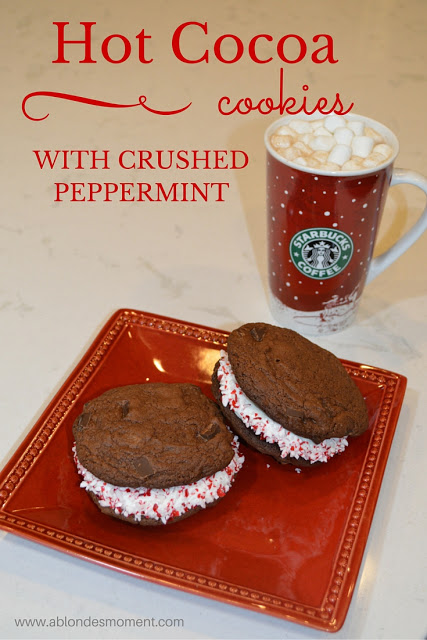
Happy Tuesday! Holiday baking is officially in full swing and today I am sharing with you a fun spin on a traditional holiday beverage: hot cocoa in the form of a cookie sandwich! 

There is just something about the combination of chocolate, marshmallows and peppermint around the holidays…and what better way to combine flavors of the season than in a cookie! I love making Christmas cookies each December, but so many of the recipes are time consuming and complicated. The beauty of this hot cocoa sandwich cookie is that it’s a quick recipe with only a few ingredients that is easily mistaken for a “from scratch” dessert! It’s simplicity will allow you to incorporate these cookies into your holiday making rotation! 


Hot Cocoa Cookies with Crushed Peppermint

{what you will need}
1 pouch double chocolate chunk cookie mix {plus ingredients on the back}

{directions}
Bake cookies according to package directions. {I went with the larger cookie sandwiches, but you can easily make small or medium sized cookies as well.} Once the cookies are baked, allow to sit for 5 minutes on the baking sheet before transferring to a cooling rack. Be sure that the cookies are completely cool before adding the marshmallow frosting. Take a spoonful of the marshmallow frosting and place on one side of the cookie in the center. Spread the frosting out to the edges to make a clean line. Sprinkle desired amount of peppermint candies on the marshmallow frosting before topping with the other cookie. Makes 6 large cookie sandwiches. 

Thanks for stopping by and happy holiday baking!

….

SHOP THE POST INGREDIENTS

Holiday Gifting: Homemade Lemon Olive Oil

homemade-lemon-olive-oil

It’s hard to believe it is already December and it’s time to start thinking about holiday gifting. One of my favorite things about this time of the year is making homemade gifts for friends and family. Last year, I made a few desserts and boxed them in cute containers, but this year I wanted to try something different.

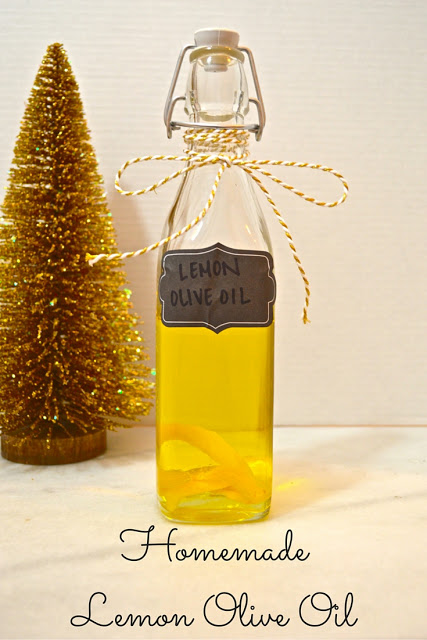
I love cooking with olive oil. Recently, we bought flavored olive oil from a speciality store and just love it! Not only can you use the oil as a base to a salad dressing or use it to sauté vegetables, you can also toss the oil with your favorite pasta. One night while cooking dinner about a month ago, I thought homemade olive oil would make the perfect gift for a holiday gift basket!

Although the recipe is super easy, I must mention an important warning when working with infused olive oils. If the lemon, or any herb you decide to use, is not cleaned and completely dried, bacteria can grow on the lemon or herbs and can be very dangerous. If you decide to keep the lemon peel in the oil {for a more robust flavor} be sure that the oil is covering the lemon peel completely. Also, it’s important to keep the infused olive oil in the refrigerator. You can read more about creating safe homemade oils here. Be sure to include these instructions with your gift basket if you are handing these out this holiday season. The olive oil should be good, in the refrigerator, for about a month. 

Lemon Olive Oil
{what you will need} 
Zest of 1 lemon {completely cleaned and dried}
1 1/2 cup light olive oil

{instructions}
Clean the lemon and allow to dry completely, about 1 hour. Using a vegetable peeler, zest the lemon in long pieces, but try to avoid the bitter, white part of the lemon. Place the olive oil and the lemon peel in a small saucepan and heat on medium for about 5 minutes, just until the oil begins to bubble. Allow to cool before transferring to decorative container. 

Thanks for dropping by and have a wonderful weekend!

Holiday Bar Decorations & A Festive Cocktail

holiday-bar-decorations

cranberry-moscow-mule
holiday-bar-decorationschristmas-bar-decorations

wine-cork-decorations

cranberry-moscow-mulecranberry-moscow-mule

cranberry-moscow-mule

holiday-bar-decorholiday-bar-decor

Crate & Barrel Bar | Gold Christmas Tree | Festive Paper Coasters | Deer Figurine | Glitter Spray | Copper Mugs

Have you started thinking about Christmas decorations yet? Or have you already started to decorate your home? I typically like to wait until after Thanksgiving for the outside lights and tree to go up, but I did start a little early with bar decorations so I could share some ideas with you! If you have a bar, a bar cart or another small space in your home, I have some ideas that can add the perfect amount of holiday cheer, not matter what size your space is!


A few years ago for Christmas, my parents bought us this bar for our house. While I saw it more as a piece of furniture, my husband saw it for what it really was and completely embraced his inner mixologist! In the three years we have lived in our house, he has successfully filled the bar with basically anything you could ever dream of. You name it, he has it! And it’s a good thing he is an expert when coming up with festive cocktails, because he is sharing one below!


*Decorating Tips*


* For me, less is more. I know that clutter is difficult to avoid during the holiday decorating season, but when decorating your bar, it’s important to keep things relatively simple. I don’t know about you, but I have visions of bottles, glasses and/or decorations being knocked over and spilling all over the floor and furniture, and that would be a complete mess! I think when you are working with liquids close to furniture, it’s best to limit the number of items displayed.


*Festive coasters. I’m a stickler when it comes to coasters. We have our everyday ones that are always present on our living room table, but I love these festive coasters, especially if you are having a holiday party. Not only are they cute, but they are paper and can be easily tossed once used!


*Wine Corks. My husband and I have been collecting wine corks since we first started dating. I have a vase in our dining room of hydrangeas that I have filled with the collected wine corks, which makes a great display for all year round. But, for the Christmas season, I like to move the vase over to the bar and add festive glitter spray, which adds the perfect holiday touch.


*Holiday Cocktail. The Moscow Mule is one of the hottest drinks right now. It’s one of my husband’s favorite to make and even one that I enjoy! To put a Christmas spin on this new favorite, he created the Cranberry Moscow Mule. Not only is it festive in color, it truly is a taste of the season!

cranberry-moscow-mule

Cranberry Moscow Mule


{what you will need}

1 1/2 ounces vodka
1/2 ounce cranberry infused simple syrup {see recipe below}
Juice of 1/2 of lime
6 ounces ginger beer
Handful of fresh cranberries
Lime peel, for garnish
Ice cubes


{instructions}

In a copper mug, combine the vodka, simple syrup and lime juice. Fill the glass with ice and top with ginger beer. Garnish with cranberries and lime peel. For the cranberry infused simple syrup: Combine 1 cup sugar with 1 cup water in a small pan and bring to a boil, whisking constantly. Add 1 1/2 cups fresh cranberries and remove from heat. Allow the mixture to sit for 5-10 minutes. Transfer syrup to a bowl, cover and refrigerate overnight. The next day, strain the cranberries from the simple syrup and place syrup in glass container. 

….


More Inspiration….


festive-bar-accessories

cocktail napkins | old fashioned glasses | ice bucket | snowflake bottle stopper | glitter coasters | wine bottle tags | gold dot shaker


Thanks for dropping by and happy decorating!

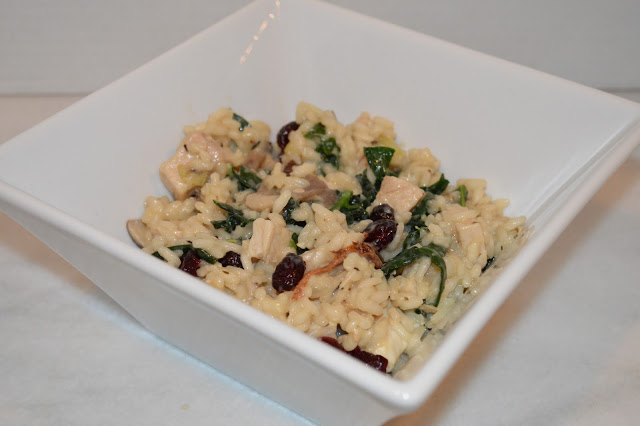
Thanksgiving Leftovers: Kale, Cranberry & Turkey Risotto

thanksgiving-leftover-ideas

Can Thanksgiving really be next week already?! Although it’s hard to believe, it’s coming whether we are ready for it or not! I know we haven’t even had Thanksgiving dinner yet and I’m already talking about leftovers, but I wanted to share this with you ahead of time so you can bookmark it and save it for next Friday when you are looking for something to do with all that leftover food! I know next week is going to be crazy with final preparations! P.S. Did you check out my Thanksgiving Planning Guide from last week? You can check that out here in case you missed it! 

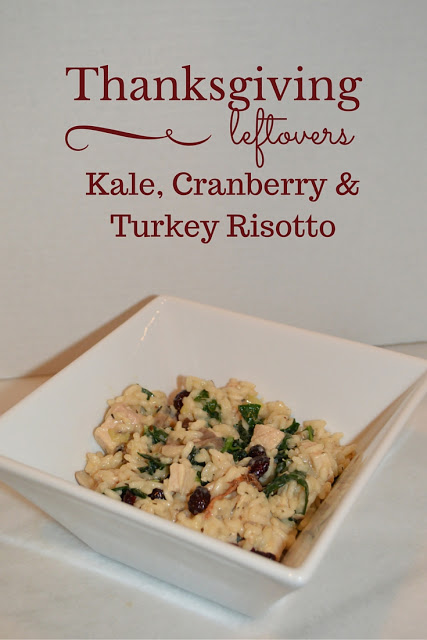
Leftovers are always an issue at Thanksgiving. For my family, it seems like you can pretty much guarantee there will be leftover turkey. I wanted to come up with a recipe that would help with this excess turkey problem, but wanted something a little more interesting than a turkey sandwich! Enter this Thanksgiving Risotto. Risotto is one of my favorite fall and winter meals to make. I love testing out different combinations for a warm and delicious dinner on chilly nights.

Not only is this risotto recipe ideal for the leftover turkey and cranberries, but it is something that can be made for a hearty fall dish any day of the week! What dishes do you typically have leftover after Thanksgiving? Do you have any special recipes that you make with the leftover food? I would love to hear in the comments below!

kale-cranberry-turkey-risotto
Kale, Cranberry & Turkey Risotto

{what you will need}
2 tablespoons olive oil
1 small yellow onion, chopped
2 garlic cloves, minced
2 cups cooked turkey, chopped
1/2-3/4 cup kale, stems removed
1 1/2 cups arborio rice
32 ounces chicken stock 
1 tablespoon butter
1/4 cup Parmesan cheese
1/4-1/2 cup cranberries
Salt and pepper to taste 

{directions}
Begin by placing the chicken stock in pan and keep the heat on low to warm the stock. Meanwhile, heat the olive oil in large pan over medium heat and cook the onion and garlic until soft and fragrant  about 2 minutes; season with salt and pepper. Add the rice and stir to coat. Add about 1/2 cup of warm chicken stock at a time until absorbed. Continue to stir and add the stock 1/2 cup at a time until the liquid is absorbed; repeat until the rice is fully cooked, about 20 minutes. {I used just about all my stock and tasted the rice at this point to check it’s “doneness”} Reduce the heat to low and stir in turkey and kale; cook until the kale is just wilted. Remove from the heat and stir in the butter and Parmesan cheese into completely combined. Garnish with cranberries, if desired. 

…. 

Thanks for stopping by and see you tomorrow for an all new Wednesday Wishes!

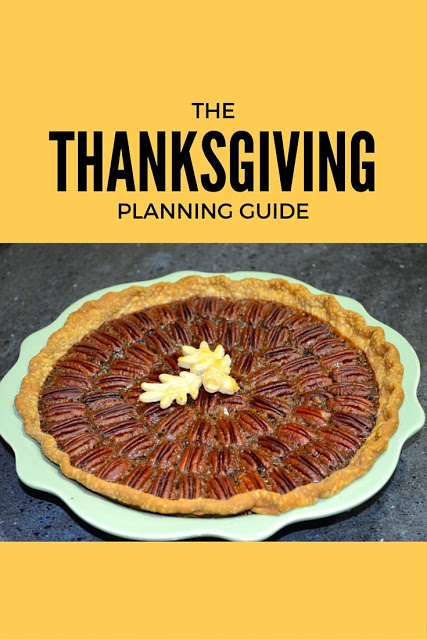
thanksgiving planning guide

thanksgiving-planning-guide

Can you believe it’s already time to start thinking about Thanksgiving?! Although we are a little more than two weeks out, it will be sneaking up on us, so I wanted to share with you some planning ideas, along with a few of my favorite recipes for the celebration. 

After some research, I have compiled a fabulous “Thanksgiving Checklist” to help you get through the next two weeks!

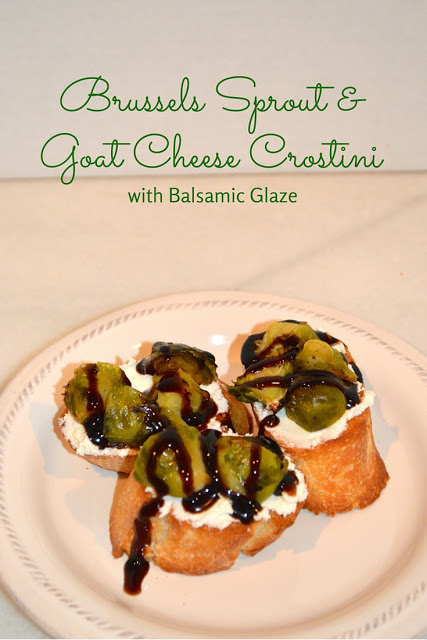
1) If you haven’t already, start planning the menu. The turkey and desserts are no-brainers, but also come up with a drink and/or small bite to serve guests upon their arrival. Whether it is wine, a specialty cocktail or just soft drinks, it’s good to start planning for that now. As for the small bites, you don’t want anything too heavy since there will be a ton of food for dinner, but something like this Brussels Sprout & Goat Cheese Crostini is a light appetizer to offer guests. 

Brussels Sprout & Goat Cheese Crostini with Balsamic Glaze

brussels-sprout-crostini
{what you will need}
1 French baguette, sliced diagonally
4 ounces goat cheese, room temperature
16 ounces frozen Brussels sprouts, thawed & quartered 
Olive oil
Salt and pepper
Balsamic glaze

{instructions}
Preheat the oven to 400 degrees. Place slices of French baguette on a baking sheet; lightly brush the tops with olive oil. Bake for 10 minutes. Flip the baguettes and lightly brush the other side with olive oil; bake an additional 5 minutes. Set toasted baguettes aside. In a bowl, combine the Brussels sprouts, enough olive oil to coat the Brussels sprouts and salt and pepper to taste. Spread mixture out onto a clean baking sheet, making sure the Brussels sprouts do not overlap. Bake for 20-25 minutes, tossing once, until crispy. To assemble, spread the goat cheese on the baguette and top with the roasted Brussels sprouts. Drizzle with balsamic glaze. 

**If you aren’t a fan of goat cheese, ricotta cheese could be easily substituted!**
2) Make your shopping list. Besides your food list, don’t forget to include any decorative items or supplies that you may have needed last year. I’ve included some of my favorite tablescape items below for inspiration:


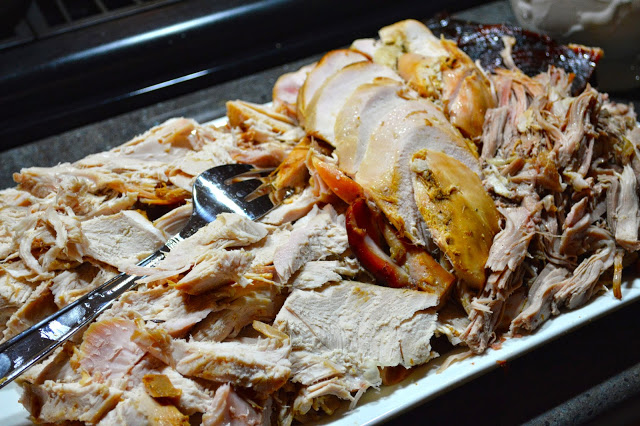
3) Order your turkey. From my experience, it’s pretty safe to assume 2 pounds for each adult and 1 pound for each child. And if you do order too much, it is perfect for leftovers! P.S. Stay tuned for next Tuesday’s post on the perfect leftover idea!
Thanksgiving-turkey

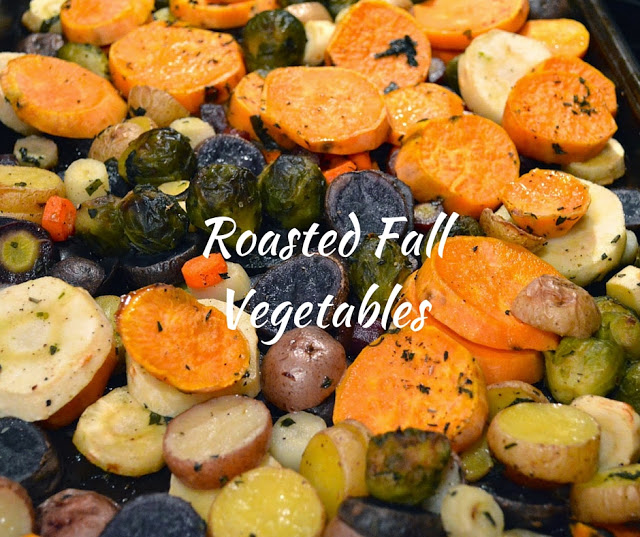
4) One Week Before: Shop for non-perishable food items, develop a cooking schedule and pick up your turkey! It’s good to get the non-perishable items out of the way the week before, which will allow you to have a shorter list the following week. We all know how crazy the grocery store is the week of Thanksgiving! Also, start developing a cooking schedule — what can be made ahead of time? Is there any food prep you can get out of the way early, like chopping vegetables? And, most importantly, don’t forget to pick up the turkey! Speaking of vegetables, here is one of my favorite vegetable side dishes. Simply roasted fall vegetables: all you have to do is slice them and stick them in the oven. It makes for a super easy, and delicious, side!

Roasted Fall Vegetables

roasted-fall-vegetables

**I cut all my vegetables into circles with about a 1/2 inch thickness
so they didn’t shrink too small once baked**
{what you
will need}
2 sweet potatoes, peeled and sliced
2 parsnips, peeled and sliced
24 ounces baby potatoes, sliced
4 medium-sized carrots, peeled and sliced
12 ounces frozen brussels sprouts, cooked according to package
instructions
1/2 tablespoon dried oregano
1 tablespoon fresh rosemary
1 tablespoon fresh thyme
6 (about) basil leaves, chopped
Salt and pepper to taste
Olive oil

{instructions}
Preheat the oven to 400 degrees. Toss the vegetables with a few tablespoons of olive oil, oregano, rosemary, thyme, basil, salt and pepper. Spread vegetables out onto a baking sheet in a single layer. Bake for 35-40 minutes.

5) Three Days Before: You can start defrosting your turkey by placing it in the coldest area of your refrigerator. Also, gather your perishable shopping list and head to the store!
6) One – Two Days Before: It’s a great time to make any side dishes and/or pies that can be prepared ahead of time, such as cranberry sauce and preparing the bread for your dressing/stuffing! You can also work on your tablescape and other festive decorations you have planned. 


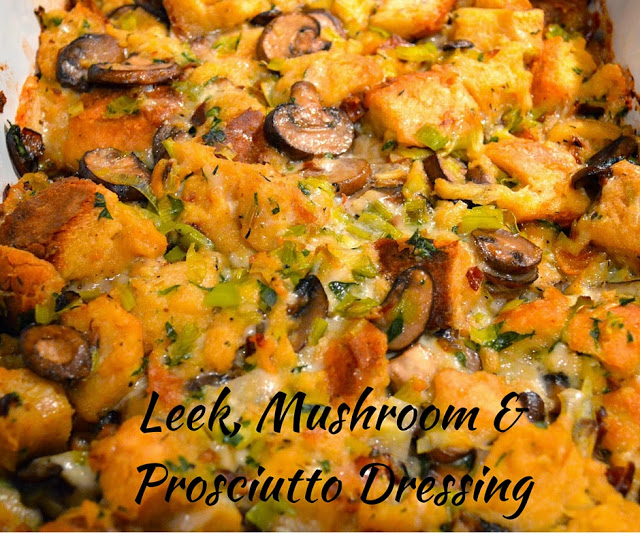
thanksgiving-stuffing-recipes


Leek, Mushroom and Prosciutto Dressing
{what you
will need}
1 loaf of day-old Italian bread
1/2 stick + 3 tablespoons unsalted butter
2-3 leeks, cleaned and chopped
1 teaspoon thyme
16 ounces sliced baby bella mushrooms
2 ounces prosciutto, chopped
1/4 cup fresh parsley, chopped
2 eggs, beaten
3 cups chicken broth
1 cup gruyere cheese, shredded
{instructions} 

Preheat the oven to 375 degrees. Cut bread into 1/2
inch cubes {If the bread is still fresh, place bread cubes on dry baking sheet
and cook at 300 degrees for 15-20 minutes to dry them out}. Transfer bread
cubes to a large bowl. Heat 1/2 stick of butter in a large skillet. Add the
leeks, thyme and salt and pepper. Cook for 5 minutes. Add chicken stock and
bring to a simmer. Remove from the heat. Meanwhile, in a separate skillet, heat
a few tablespoons of olive oil over medium heat and cook the mushrooms,
stirring occasionally, until all the liquid is absorbed, about 10 minutes. Transfer
mushrooms to small bowl and set aside. In the same skillet, heat a few
tablespoons olive oil over medium heat and cook the prosciutto until crispy,
about 5 minutes. Transfer crispy prosciutto to a separate small bowl and set
aside. In a medium-sized bowl, beat 2 eggs and add the parsley, stir to
combine. Add the egg and parsley mixture to the bread cubes, stir to coat. Add
the leek and chicken broth mixture and the mushrooms to the bread mixture and
stir to fully incorporate. Add the prosciutto and the gruyere cheese. Transfer
to baking dish that has been sprayed with cooking spray and scatter 3
tablespoons of butter on top of dressing. Cover with foil and bake for 30
minutes. Remove foil and bake for another 20 minutes until golden brown.


7) Thanksgiving Day: Preheat the oven in the morning and begin to prepare other side dishes while the turkey roasts! Now it’s time to sit back and enjoy family, friends and food!

….

How do you prepare for one of the biggest food holidays of the year? I would love to hear in the comments section below! Thanks for stopping by and Happy Thanksgiving planning and cooking!

pumpkin pasta with crispy sage

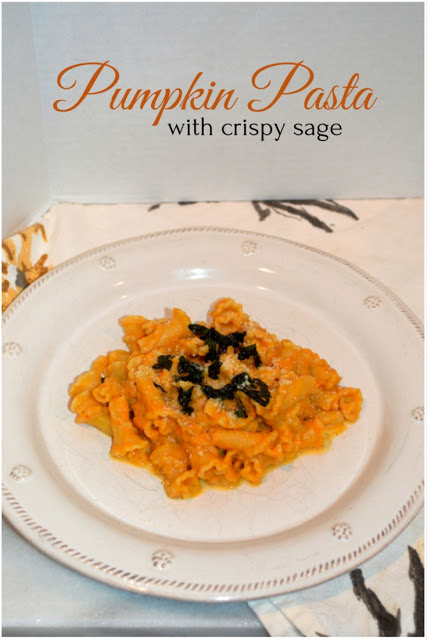
pumpkin-pasta

Happy Tuesday! Now that it is officially November, it’s all pumpkin, all the time for me! I made this quick dinner last night {we just got home yesterday afternoon from Pittsburgh — sorry that I was MIA most of yesterday, we were driving! — so I was looking for something easy to make after a long weekend}. 

Pasta is the perfect quick, weeknight dinner. And as much as I love a good marinara sauce, sometimes it can get a little boring. A pumpkin pasta sauce is a great way to spice up your weeknight pasta dish in the fall, and it’s super flavorful! I added a little nutmeg to keep with the typical pumpkin flavors, but I also added red pepper flakes for some heat. The crispy sage was the most delicious way to garnish pumpkin pasta. And, by sautéing the sage in the olive oil before adding the shallots and garlic, the sage infused the olive oil for added flavor. 

If you are looking for a quick weeknight dinner and have pumpkin on your mind like me, give this yummy fall dish a try! 

Pumpkin Pasta with Crispy Sage


{what you will need}
1 pound pasta {I used campanile}
15 ounce can pure pumpkin puree {not pumpkin pie filling}
3 shallots, chopped
3 garlic cloves, minced
10 sage leaves, roughly chopped
3 tablespoons olive oil
2 cups chicken stock {I used reduced sodium}
1/2 cup heavy cream 
1/2 cup Parmesan cheese plus more for garnish, if desired
1/2 tablespoon red pepper flakes {more or less depending on how much you like heat!}
1 teaspoon nutmeg
Salt & pepper to taste 

{directions}
Begin by cooking pasta according to package directions. In a large skillet, heat 2 tablespoons olive oil over medium heat; add the sage and sauté for 3-4 minutes, or until crispy. Remove sage to plate, leaving the olive oil in the skillet. Add an additional tablespoon olive oil to the skillet, followed by the shallots and garlic. Sauté until soft, about 4 minutes. Stir in the pumpkin, chicken stock and heavy cream. Add the red pepper flakes, nutmeg and salt and pepper. Allow to cook for about 5 minutes until the mixture begins to thicken. Stir in the Parmesan cheese and remove from the heat. Add the cooked pasta. Garnish with the crispy sage, serve and enjoy! 


Thanks for stopping by and have a wonderful Tuesday!

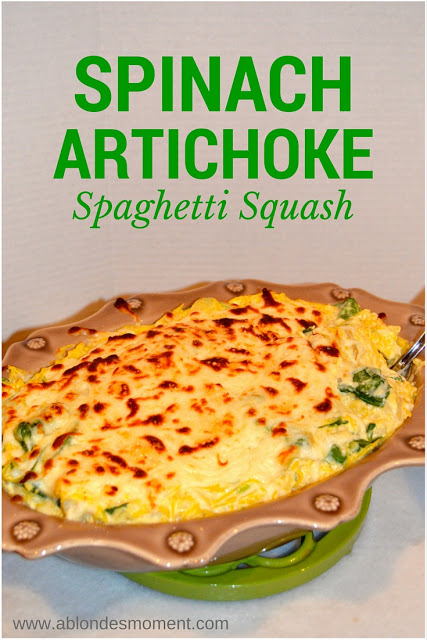
Spinach Artichoke Spaghetti Squash

spinach-artichoke-spaghetti-squash
Today I am sharing a fun twist on a recipe I made a few months ago. It was a Spinach Artichoke Mac and Cheese and it was SO delicious — you can never go wrong with the combination of spinach and artichokes! After skimming through some of my old posts, I started craving that fabulous combination and I wanted to recreate it in a healthier version. And since it’s squash season, I replaced the pasta with spaghetti squash and it was just as good. Actually, it might have been better because I didn’t feel even remotely guilty about eating it! It’s definitely worth a try, and it was a quick weeknight dinner, I just made it last night!

Read More

spooky ghost cupcakes

spooky-ghost-cupcakes-halloween

Wow! Can you believe Halloween is already next week?! Today, I am sharing another treat that is just in time for Halloween week. {Just in case you missed my other Halloween inspired treats from earlier this month: witches’ hat cookies and creepy cocktail: the dark & spooky}

When it comes to baking, cupcakes are probably my sweet of choice. I love testing out different flavors and combinations and coming up with cute ways to decorate them. I wanted to make at least one Halloween themed cupcake this year — I had some cute cupcake wrappers that I was dying to put to use! I ended up using a store bought mix and frosting because this past weekend was a little chaotic with chores — there was no time for “from scratch” cupcakes!

These cupcakes are not only easy to make, but they are so cute! Almost too cute to eat…almost 🙂
Spooky Ghost Cupcakes
{what you will need}
1 box chocolate cake mix {plus required ingredients on the box}
Sprinkles {I used the sprinkles that came with the frosting & this}
Festive cupcake wrappers
Decorating bag & tip

{directions}
Prepare cupcakes according to package directions. Once cupcakes are baked, allow to cool in the pan for 5 minutes before transferring to a cooling rack. Be sure that the cupcakes are completely cool before frosting. Meanwhile, using the black sparkle gel, decorate the marshmallows to look like a ghost; set aside to dry. Begin to frost the cupcakes, add the sprinkles and top with the ghost marshmallow. Makes 24 cupcakes.

halloween-dessert-recipes

halloween-recipes

halloween-cupcakes

marshmallow-ghosts

halloween-treat-ideas

halloween-cupcakes
ghost-halloween-cupcakes
Thanks for stopping by and happy Halloween baking!