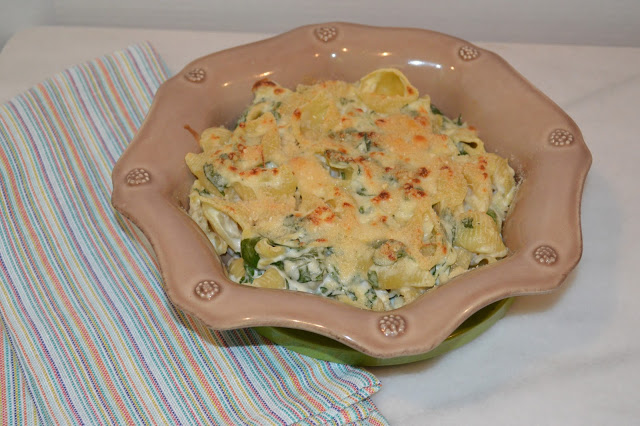
spinach artichoke mac & cheese

spinach-artichoke-mac-and-cheese

I’ve had a serious craving for Spinach Artichoke Dip lately. Truthfully, it’s not even something I would order as an appetizer out at a restaurant, so it was definitely an odd dish to crave. Although, Wegmans has had an amazing selection of fresh artichokes that I have been drawn to over the past few weeks, so maybe we can blame it on that!

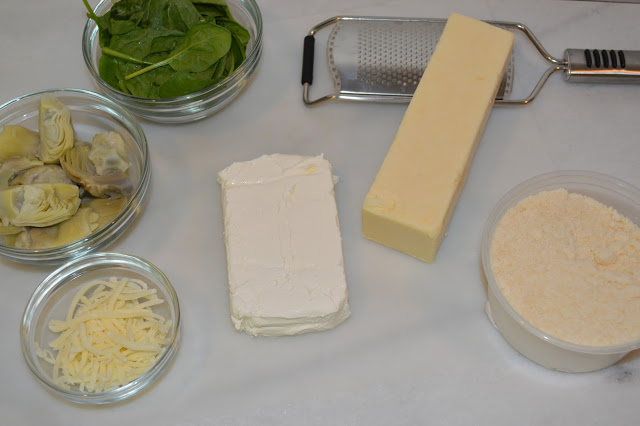
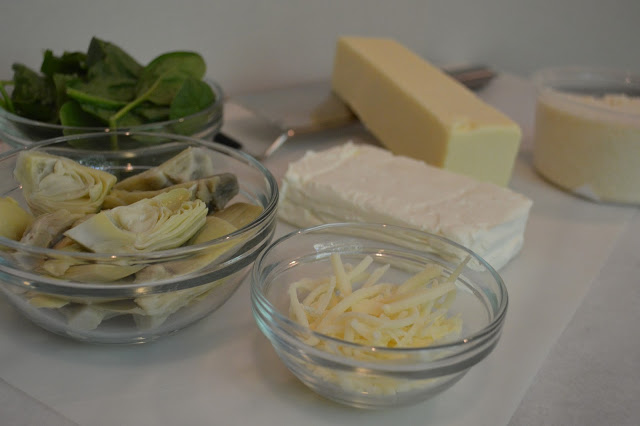
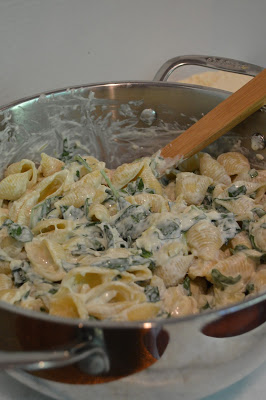
Regardless, I decided to combine my craving for this dip with one of my favorite foods of all time: macaroni and cheese. The possibilities are truly endless with mac and cheese, from using different kinds of cheese to the ingredients you add in to make it unique. I just love experimenting with different add-ins! I decided to go pretty traditional for the cheese aspect of the recipe, mainly to allow the spinach and artichokes to be the stars. I did incorporate cream cheese into the recipe to mimic the creaminess of spinach artichoke dip.

The best part about this macaroni and cheese is that it’s actually not that terrible for you! Arguably, the most questionable ingredients, when it comes to fat, are the cheddar cheese and the pasta shells. I love that mac and cheese can be a comfort food without being high in calories!

Spinach Artichoke Macaroni & Cheese

{what you will need}
1 pound pasta {I used shells}
8 ounces cream cheese, at room temperature {I used reduced fat}
1 cup white cheddar cheese, grated
1 cup mozzarella cheese, grated {I used reduced fat}
3/4 cup fresh spinach
1 1/4 cups frozen artichokes, thawed & chopped
3 tablespoons Parmesan cheese, grated
1 3/4 cup low fat milk
1/2 cup yellow onion, thinly sliced
Dash of nutmeg
1 bay leaf
2 tablespoons butter
1 1/2 tablespoons flour
Salt and pepper to taste

{recipe}
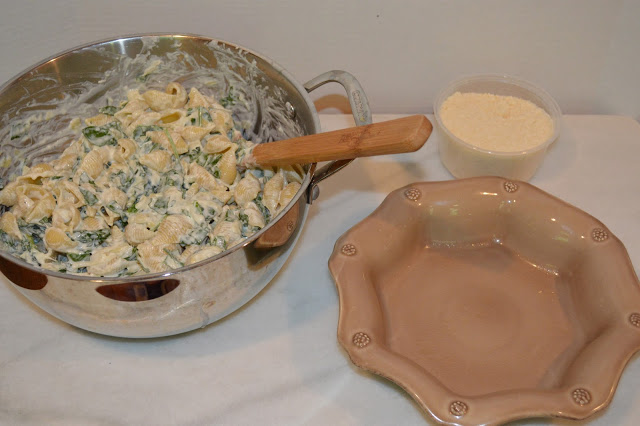
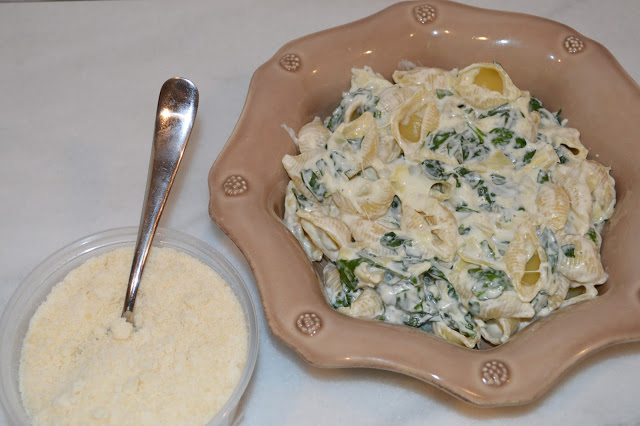
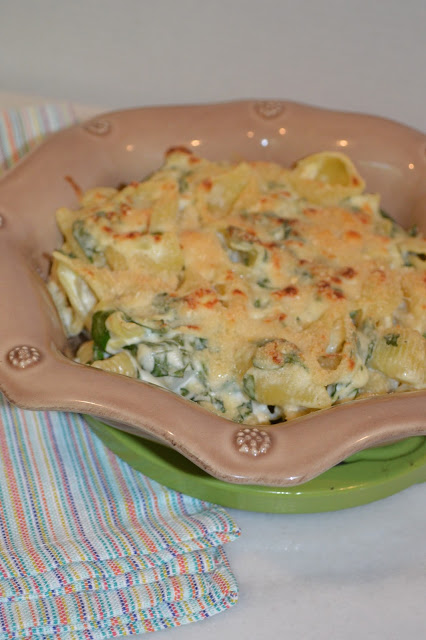
Preheat broiler. Cook pasta according to package instructions reserving 1/2 cup of pasta water. Combine the milk, onion, nutmeg and bay leaf in a large saucepan over medium-high heat. Once it begins to simmer, remove from the heat and set aside for 15 minutes. Strain the milk into a separate bowl, discarding the solids. Wipe the saucepan clean and melt the butter over medium heat. Add the flour and stir constantly for about 1 minute to incorporate. Slowly add the milk and bring to a boil. Cook, stirring constantly, for about 8 minutes until the mixture is thick. Remove from the heat and season with salt and pepper. Stir in the cheddar, mozzarella and cream cheeses until melted. Add the spinach and cook until just wilted, about 1 minute. Stir in the artichokes and pasta and combine completely. Add pasta water to thin out, if necessary. Transfer pasta to baking dish that has been sprayed with cooking spray. Sprinkle Parmesan cheese over the top and broil for 3-4 minutes until a brown crust begins to form. Enjoy! 


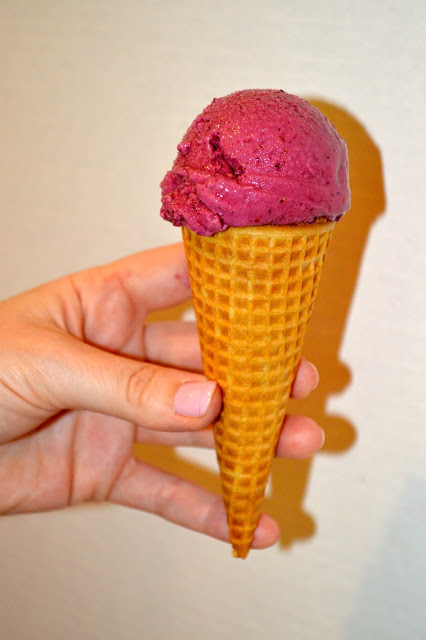
mixed berry frozen yogurt

Summer is in full swing here in DC, and  today I am sharing something that can help beat the heat. Not only is it refreshing, but it’s a super pretty color too!

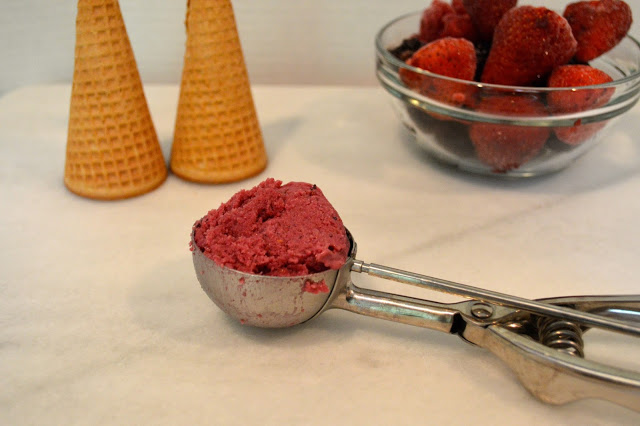
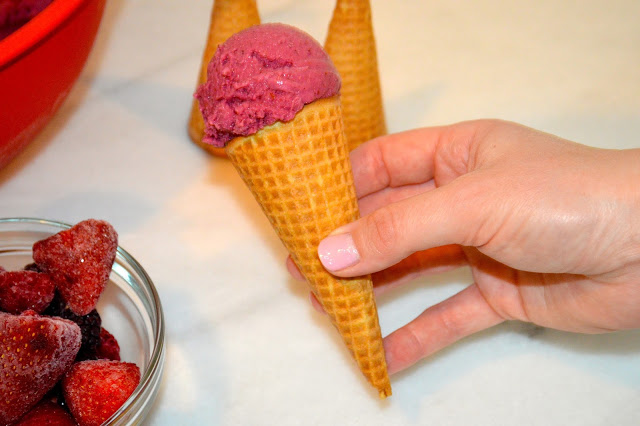
This past weekend, I tried my hand at making homemade frozen yogurt. Originally, I had planned on using fresh fruit, but since I do not have an ice cream maker, I figured starting with frozen fruit would speed up the freezing process! If you do own an ice cream maker, you can follow these directions, but instead of freezing it in a pan or bowl, you can follow your standard ice cream machine instructions 🙂

This was the perfect cold dessert for a summer day, so refreshing and healthy too! 

Mixed Berry Frozen Yogurt 

{what you will need}

3 cups frozen mixed berries {or any other berry you prefer!}
2 cups plain Greek yogurt
1/3 cup sugar
1 1/2 teaspoon vanilla extract
Ice cream cones

{frozen yogurt recipe}
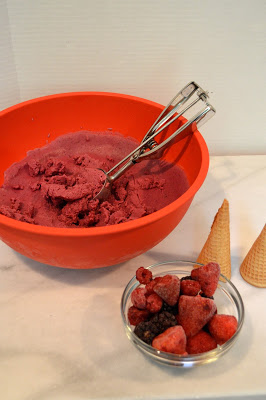
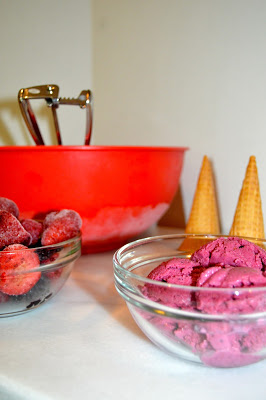
In a food processor, place the frozen berries, Greek yogurt, sugar and vanilla extract. Blend until smooth. This could take a couple of minutes, especially if you are using frozen fruit. Transfer the mixture to a large bowl or pan. Cover and freeze for at least 3 hours. Each hour, remove the bowl or pan from the freezer and whisk the mixture a few times and place it back in the freezer. By the second or third time, you will notice that it is becoming more difficult to stir. Freeze until completely frozen and serve on an ice cream cone of your choice or in a bowl. Enjoy!


tea & scones

your-tea
Happy Tuesday! Today, in honor of Wimbledon, I am sharing the perfect combination of tea and scones. There is nothing more British than this combination and with all the tennis happening across the pond, I thought it would be the perfect opportunity to share Your Tea with you! 

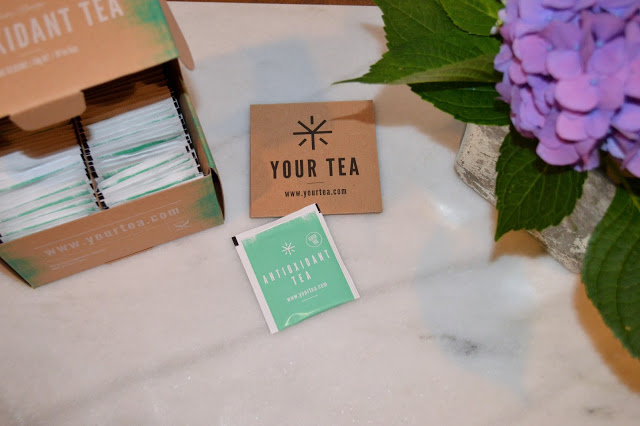
I drink coffee every morning, but sometimes I like to incorporate tea into my day as well, especially when I’m feeling a little under the weather. After feeling sick a few weeks ago, I was eager to give the Antioxidant Tea from Your Tea a try in hopes of staying clear of any additional colds this summer. This tea is designed to not only increase your immunity, but help with your overall health. The antioxidants in this cup of tea also assist with anti-ageing and detoxifying your body. As for the taste, the closest comparison I can make is to green tea. Maybe because that is my typical tea of choice, but the taste was most definitely tolerable…I’ve tasted many teas that were just awful! Overall, I would recommend this antioxidant tea and I’m looking forward to incorporating it into my daily routine in an effort to build up my immune system, especially in preparation for fall and winter! 

your-tea-antioxidant-tea

It is recommended to enjoy this tea 30 minutes before or after meals, which allows for the perfect amount of time for your vanilla icing to dry on these scones 🙂
tea-and-scones
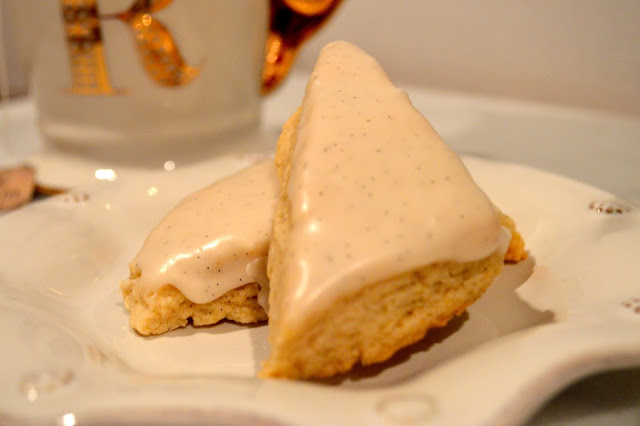
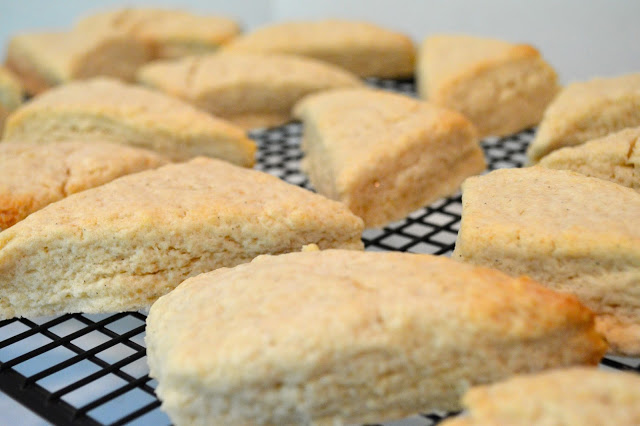
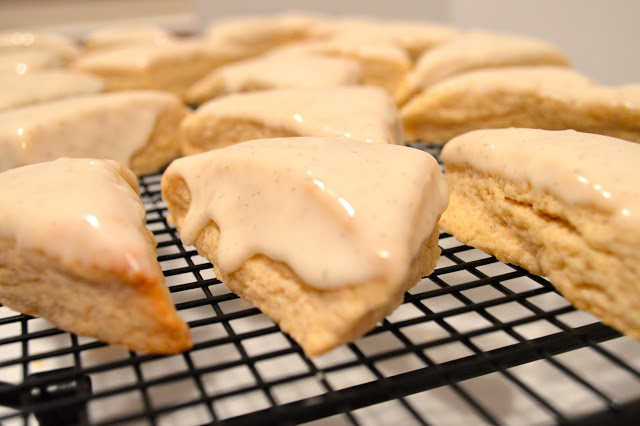
This is the second time I have tried my hand at making scones. The first was for the Royal Wedding back in 2011. Let’s just say they weren’t a huge success. They were hard and abnormally large {I guess I used too much baking powder!} and just didn’t taste that great. This time, I wanted a smaller sized, simply flavored scone that would not overpower the tea. Vanilla bean was the perfect compliment. This scone recipe is from the Pioneer Woman, who is my favorite Food Network star — she just has the best recipes! I followed her recipe pretty closely, but I did cut the glaze recipe in half, still having some left over. I also used vanilla bean paste instead of the whole vanilla beans, as she recommends. Vanilla beans are quite pricey and the paste is what is inside the vanilla bean anyways 🙂 

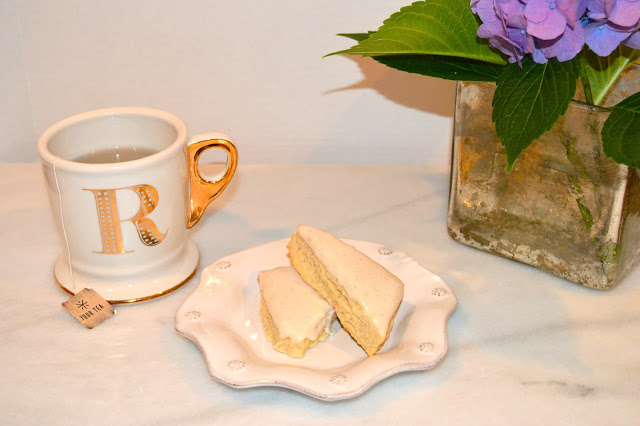
Vanilla bean scones were the perfect treat to enjoy after this antioxidant tea!

Mug 


vanilla-bean-scones

Vanilla Bean Scones

{what you will need: for the scones}

3 cups all-purpose flour
2/3 cups sugar
5 teaspoons baking powder
1/4 teaspoon salt
2 sticks unsalted butter, chilled
1 egg
3/4 cups heavy cream
2 tablespoons vanilla bean paste {I used this}

{what you will need: for the glaze}

2.5 cups powdered sugar
1/4 cup milk
1/2 tablespoon vanilla bean paste 
Dash of salt

{scone recipe}
Preheat the oven to 350 degrees. Stir the vanilla bean paste
into cream and allow mixture to sit for 15 minutes. Sift together the flour, sugar, baking powder and salt. Using
a pastry cutter, cut the butter into the flour until the mixture resembles
crumbs. Mix the vanilla cream with the egg, then combine with the flour
mixture. Stir gently with a fork until the mixture comes together. Turn the
dough out onto a floured surface and press the dough together to form a rectangle.
Using a rolling pin, roll the rectangle into about ½ inch to ¾ inch thickness.
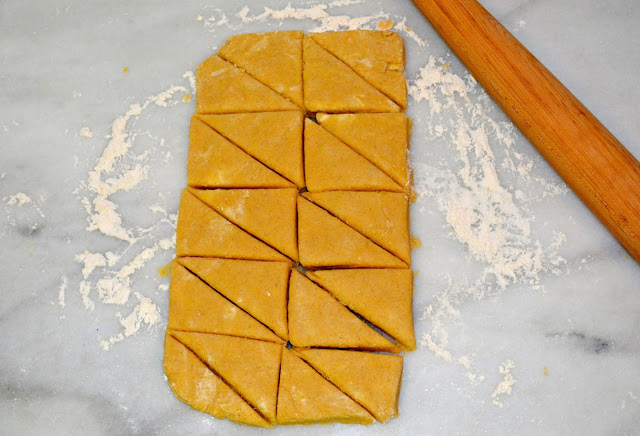
Trim into a symmetrical rectangle using a knife and cut the rectangle into
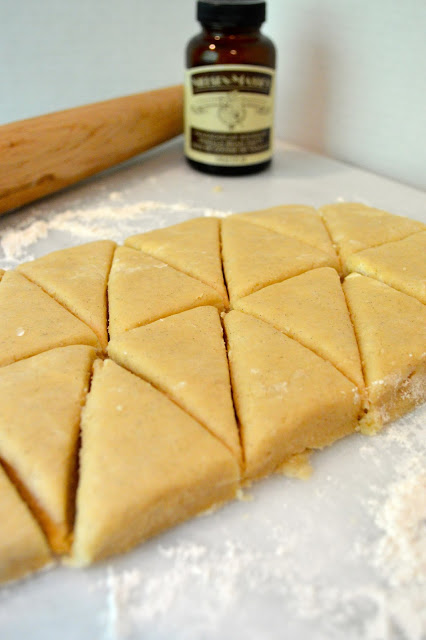
squares. Then, cut each square in half diagonally to form two triangles.
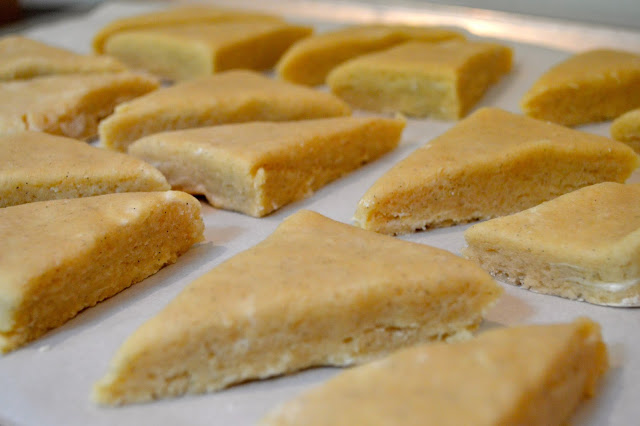
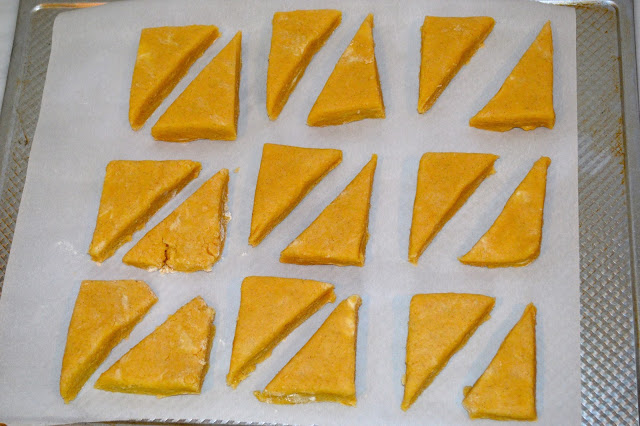
Transfer scones to parchment paper-lined baking sheet and bake for 18 minutes.
Allow the scones to cool for 15 minutes on the baking sheet and then transfer
to a cooling rack to cool completely.  

{glaze recipe}
To make the glaze, stir the vanilla bean paste into the
milk, allow to sit for a few minutes. Mix the powdered sugar with the vanilla
milk, adding more powdered sugar or milk to get the consistency to the right
thickness. Whisk until glaze is completely smooth. Taking one scone at a time,
carefully dunk each cooled scone into the glaze. Transfer to cooling rack {with
parchment paper underneath!}. Allow the glaze to set completely, no less than
30 minutes. 

vanilla-scones

homemade-vanilla-bean-scones

scones

vanilla-scones

vanilla-scones-with-glaze

From “happy tea” to “energy tea” there are several different teas to pick from so be sure to check out Your Tea’s website for the tea that is right for you! 


Thanks for stopping by and have a wonderful Tuesday!


Brought to you by Your Tea. All opinions are my own. 

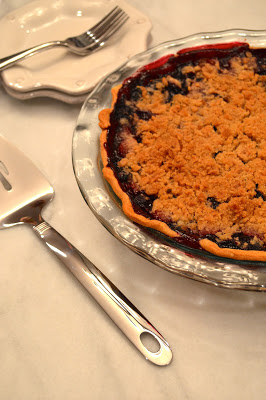
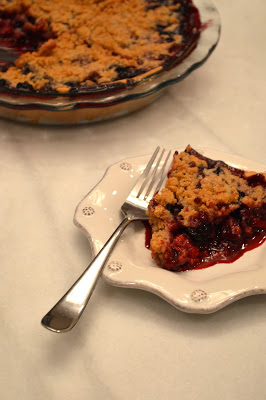
triple berry crumble pie

triple-berry-crumble-pie

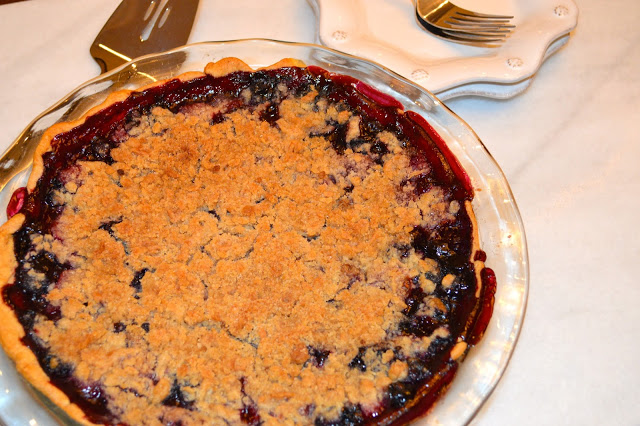
Happy Tuesday! Today I am sharing a berry pie with the most delicious crumble top that is just in time for this weekend’s festivities. Usually, I find myself making a berry trifle, the perfect fresh and light dessert for summer, around the Fourth of July. But, this year, I’ve been craving a pie. Why a pie, I have no idea, but I decided it was the perfect excuse to make one!

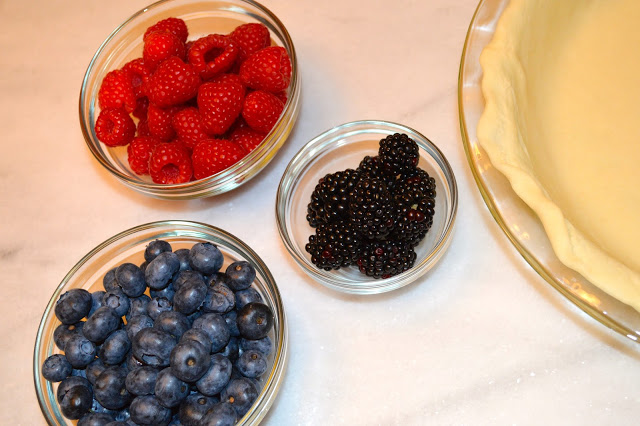
Berries are by far my favorite fruit, especially raspberries. There has been such a wonderful selection of fresh berries at the store the last couple of weeks, I decided it would be perfect to incorporate them into a festive dessert. It’s super patriotic too 🙂 

As I was preparing all the ingredients for this dessert, it came to my attention that I did not have a pie dish! With all the cooking and baking I do, how do I not have a pie dish?? And why wasn’t that added to our wedding registry over four years ago?! Regardless, I found a pie dish at the grocery store and I am now the proud owner 🙂 Stay tuned, more pie recipes to come! 

Since I obviously don’t have much experience in pie making, I decided to go with a Martha Stewart blueberry pie to start as a basis for my recipe. You can’t go wrong with Martha! Although I did not make my own crust, this was one of the most delicious pies I have ever tasted! You could definitely make your own crust, but for me, it was much quicker to buy it. 

The crust comes two in a package and the crumble that is on top of the pie makes enough for two pies, so it looks like I will be making it again for this weekend. No complaints from me! 

homemade-berry-pie

berry-pieberry-crumble-pie

4th-of-july-desserts

triple-berry-pie

fourth-of-july-pie4th-of-july-berry-pie

Triple Berry Crumble Pie 

{what you will need: for the pie filling}
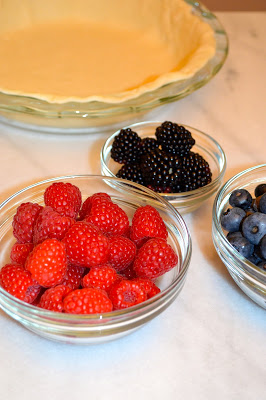
5 cups berries {2 cups raspberries, 2 cups blueberries, 1 cup blackberries}
3/4 cup sugar
3 tablespoons all-purpose flour
1 tablespoon lemon juice
1/8 teaspoon salt
Store bought pie crust 
Pie dish 

{what you will need: for the crumble}
1 1/2 cups all-purpose flour
3/4 cup brown sugar
1/3 cup sugar
1/4 teaspoon salt
1/4 teaspoon cinnamon
1 1/2 sticks cold butter, cut into pieces 

{pie recipe}
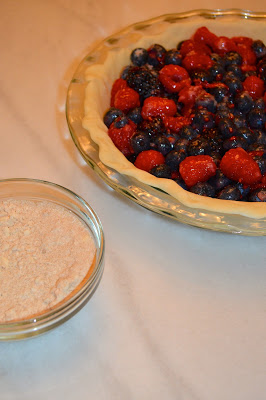
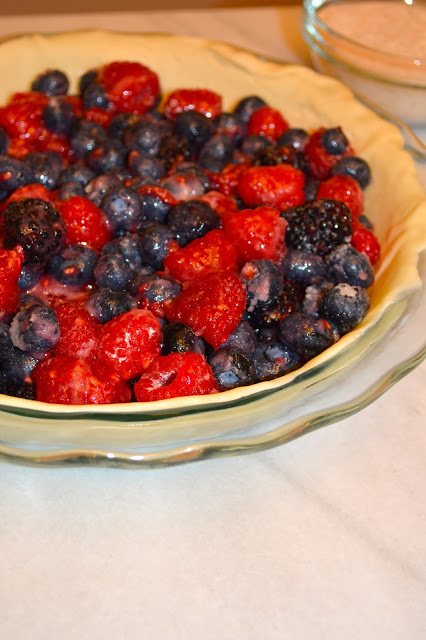
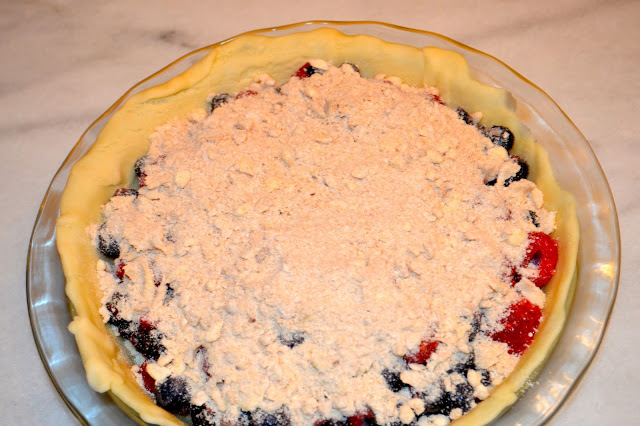
Preheat the oven to 400 degrees. Combine the berries with the sugar, flour, lemon juice and salt in a large bowl. Pour mixture into the pie shell. Top with half of the crumble recipe. Adjust, if necessary, your oven racks so the rack that holds the pie will be in the lower third of the oven. Place the pie dish on a foil-lined baking sheet and place in the oven. Reduce the heat to 350 degrees. Bake for 1 1/2 hours until the fruit is bubbling and the crust is brown. Allow to cool at least 3 hours. 

{crumble recipe}
In a large bowl, mix the flour, brown sugar, sugar, salt and cinnamon with a whisk. Cut the cold butter into the mixture with a pastry blender until clumps begin to form. Divide the mixture in half; freeze in plastic bags. 

Thanks for stopping by and happy baking!! 

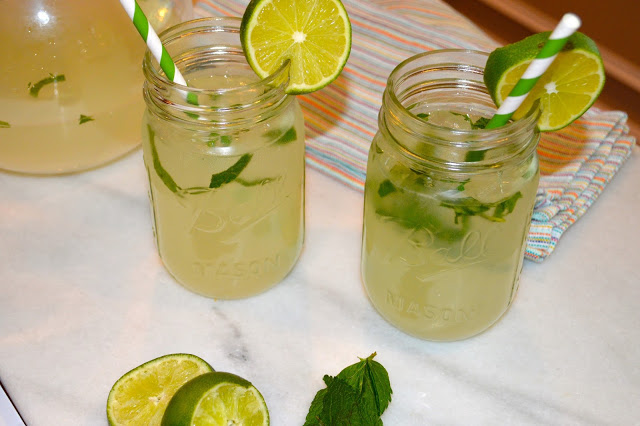
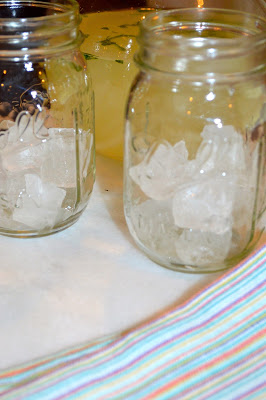
mint limeade

mint-limeade

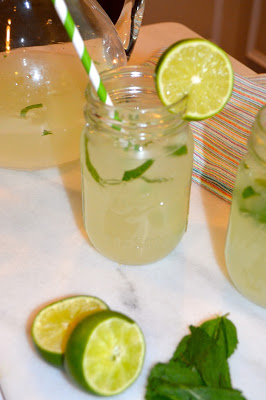
Happy Tuesday! The weather has been so ridiculously hot here, I am already sick of summer. And it’s only the end of June! Needless to say, we have a long way to go before the heat breaks, and what better way to cool down than with a super refreshing mint limeade?!

I made this mint limeade drink on Sunday and it was the perfect way to cool down after taking pictures in the morning! It was super simple and only requires 3 ingredients, not including the glasses and cute straws 🙂 I can definitely see this becoming a summer staple in our house! 
Mint Limeade
1 1/2 cup lime juice {for me, it was 9 limes, plus 1 additional lime for garnish, if desired}
1/4 cup sugar
5 cups water 
2 sprigs fresh mint, chopped
Mix the lime juice, sugar and water in a large pitcher until completely combined. Stir in the fresh mint sprigs and pour into glasses. Garnish with lime on rim of glass and cute straws, if desired. Enjoy!
mint-limeademint-limeade


Thanks for stopping by and have a great day! 

roasted beet risotto

roasted-beet-risotto

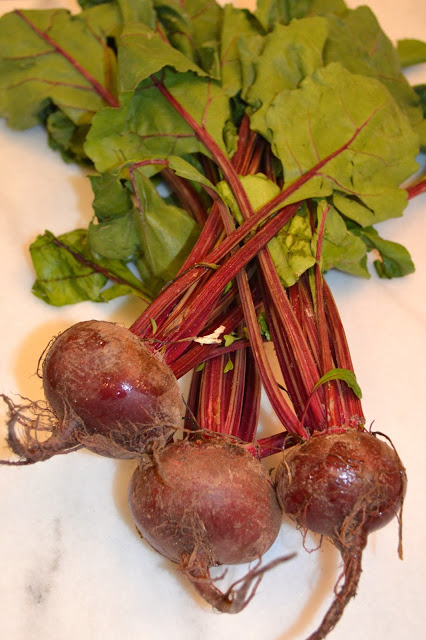
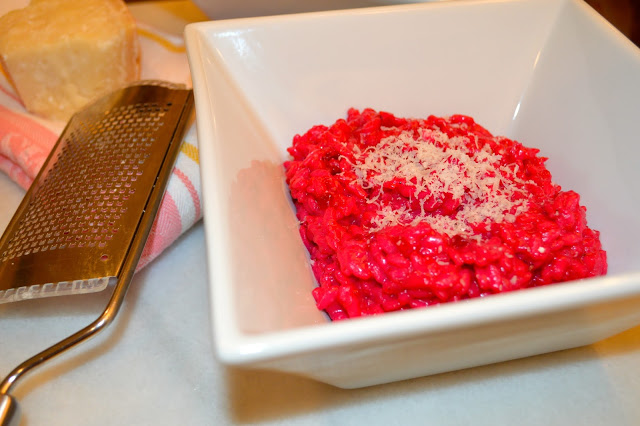
There are just some things that scream summer. For me, one of those things are beets. I know, beets aren’t a super popular vegetable, and admittedly, they are one vegetable I absolutely despised as a child, but, in the last few years, beets have really grown on me. A few weeks ago we were at our grocery store, Wegmans, and I saw the fresh red and golden beets in the produce department. Since then, I have had beets on the brain! 


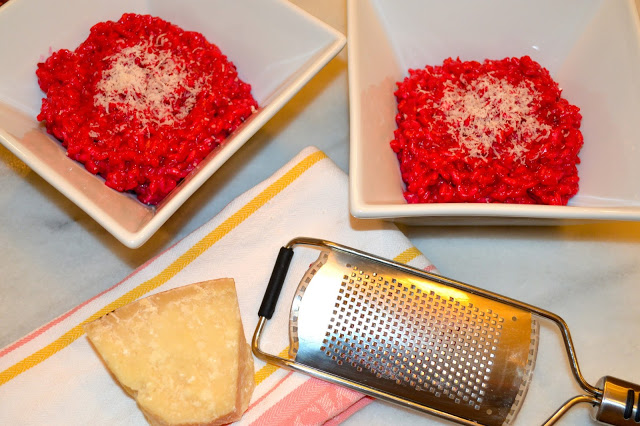
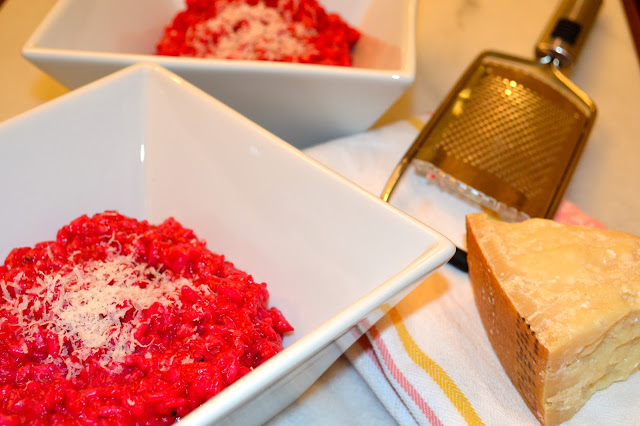
I wanted to come up with a different way to serve the beets. My mom had mentioned to me that she had made shrimp risotto one night for dinner last week and suddenly I thought, beet risotto! Personally, I like my beets roasted but you could definitely boil them as well. By adding the roasted beets to the risotto, it made a delicious dinner that wasn’t overly sweet, as beets can sometimes be. And how about this color?! In my mind, you can never go wrong with something that is this shade of pink/purple 🙂

Truthfully, if I hadn’t added the beets to the risotto myself, I wouldn’t have known they were even in the dish. The mixture of the chicken stock, butter and Parmesan have a way of coming together to really cut this sweet vegetable into a very mild taste — it’s pretty remarkable! So for those that don’t like beets, give this recipe a try — you will forget you are even eating one of the healthiest foods in the world!

Have a great day and thanks for dropping by!

fresh-red-beets

preparing-beet-risotto

red-beet-risotto

beet-risotto

Roasted Beet Risotto
3 red beets
2 tablespoons olive oil
1 small onion, chopped
1 shallot, chopped
2 cups arborio rice
1/2 dry white wine
32 ounces chicken stock 
1 tablespoon butter
1/4 cup Parmesan cheese plus more for garnish
Salt and pepper to taste 
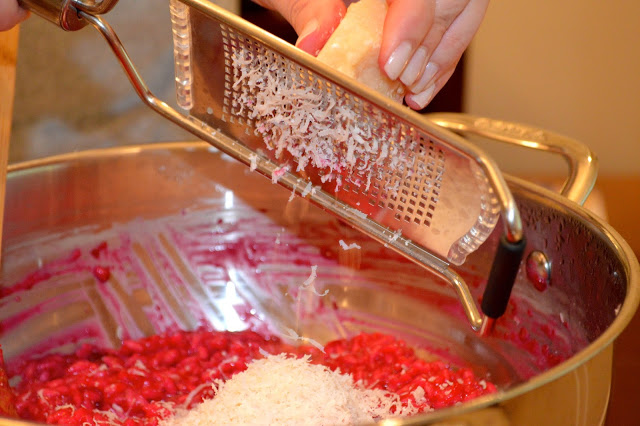
Preheat the oven to 425 degrees. Wrap each beet in a packet of foil. Place on a baking sheet and bake until the beet is slightly soft, about 50-60 minutes. Allows the beets to cool in the packet and rub off the skins. Place beets in food processor and mix until a texture that is similar to a puree forms; set aside. Place chicken stock in pan and keep the heat on low to warm the stock. Meanwhile, heat olive oil in large pan over medium heat and cook onion and shallot until soft and starting to brown, about 10 minutes. Add the rice and stir to coat. Mix in the wine and allow the mixture to reduce, about 3 minutes. Add about 1/2 cup of warm chicken stock at a time until absorbed. Continue to stir and add the stock 1/2 cup at a time until the liquid is absorbed; repeat until the rice is fully cooked, about 20 minutes. {I used just about all my stock and tasted the rice at this point to check it’s “doneness”} Remove from the heat and stir in the butter. Add the pureed red beets and stir to combine completely. Add the Parmesan cheese and season with salt and pepper. Garnish with additional Parmesan, if desired. 

a taste of napa: ricotta gnocchi

Last Tuesday, I shared one of my favorite appetizers from one of our favorite Napa restaurants. I mentioned that I was recreating two of our favorite meals from our week in wine country, and today I am sharing a main dish I had while dining at Michael Chiarello’s Bottega Ristorante

It’s no secret that I love the Food Network. Not only do I love seeing all the food and recipes, but it definitely has a calming effect after a long day, don’t you think?! Anyways, four years ago when we traveled to Napa for our honeymoon, I knew that we had to try Michael Chiarello’s restaurant. He was always one of my favorite Food Network stars growing up and Italian food is be absolute favorite. Having been in Napa for our third time a couple weeks ago, we knew we had to continue the tradition and return to Bottega. It may be boring, but I have ordered the same meal each time! I should branch out and try something new, but the ricotta gnocchi is so good and so unique, I never want to miss a chance to enjoy it! Since we were missing Napa and all the delicious food last weekend, I made the Burrata as an appetizer and the ricotta gnocchi for dinner. Needless to say that was a lot of food {and cheese!} and we were SO full by the end of the day. It was totally worth it though 😉 

I’ve made gnocchi before {see here} but I have always used potatoes as the main ingredient. I was definitely intrigued by the concept of having ricotta cheese as the “meat” of the pasta. Potato gnocchi can be especially heavy, but I’ve noticed with the ricotta, it’s much lighter, meaning you can eat a lot more! 

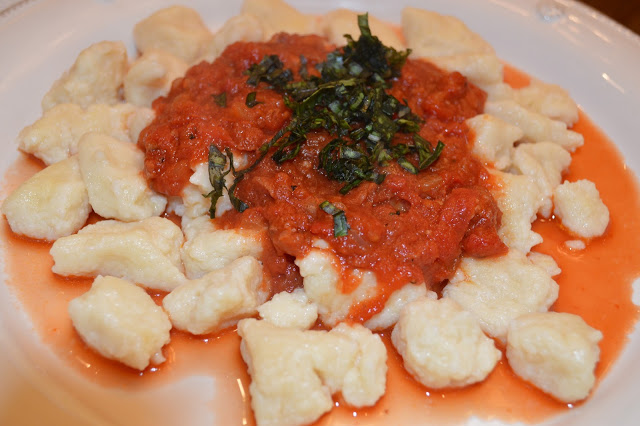
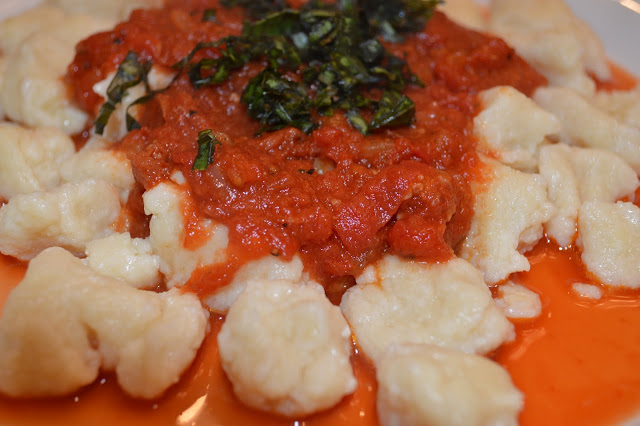
I found this recipe from Geoffrey Zakarian that is pretty much a carbon copy of the meal I enjoyed at Bottega. Although Zakarian lists the recipe as “easy”, it should be noted that making fresh pasta is never easy {at least in my opinion!} and the forming of the dough is time consuming and does require patience {which I have none of!}. I was getting super frustrated as I was rolling the dough into a ball and forming the gnocchi. I was tempted to add more flour to help with the stickiness, because it is SUPER sticky. But, I’m so glad I followed the recipe exactly because if I would have added more flour, I think it would have made the gnocchi too heavy, defeating the purpose of a ricotta base. And, all in all, the frustration and patience was worth it because this pasta was so delicious! I’m so happy that I found an almost identical match for Bottega’s ricotta gnocchi and I cannot wait to experiment with different sauces! 

ricotta-gnocchi

Ricotta Gnocchi with Prosciutto Tomato Sauce 

2 cups ricotta cheese {I used part-skim}
1/2 cup grated Parmesan cheese, additional for serving if desired
1 1/2 tablespoons olive oil
2 large eggs
1 1/4 cups all-purpose flour, plus more for dusting
Semolina flour, for dusting
6 ounces prosciutto, diced
1/2 cup yellow onion, diced
Salt and pepper to taste
2 garlic cloves, minced
1 28-ounce can crushed tomatoes
5 fresh basil leaves, chopped
Combine the ricotta cheese, Parmesan, olive oil, eggs and a pinch of salt with a whisk in a large mixing bowl. Add the all-purpose flour in three parts, stirring with a rubber spatula, and making sure to fully combine the flour each time. Bring the dough together into a ball and cut off one-quarter of it. Dust your work surface with all purpose flour and roll the cut-off piece of dough into a long rope, about 5/8 inch in diameter. Cut the rope into bite-sized pieces. Repeat with the rest of the dough, one quarter at a time. Dust the semolina flour on parchment paper and place the gnocchi on the parchment paper to prevent sticking. Bring a large pot of salted water to a boil and cook the gnocchi in the boiling water for about 2 minutes, just until the gnocchi begins to float to the top of the water. Drain and serve gnocchi with the prosciutto tomato sauce {see below}. 
Prosciutto Tomato Sauce
Heat a large saute pan over medium-high heat. Add the prosciutto and cook until crispy, about 5 minutes. Remove the prosciutto from the skillet and transfer to clean plate. Leaving the fat in the pan, add the onions and season with salt and pepper. Cook until the onions are soft, about 5 minutes. Add the garlic and cook for an additional minute. Add the crushed tomatoes and bring to a simmer. Reduce the heat to low and cook for 15-20 minutes until the sauce begins to thicken. Add the prosciutto back to the sauce and cook for another 5 minutes. Season with additional salt and pepper, if needed. Serve with the ricotta gnocchi and top with basil and additional Parmesan cheese, if desired. 
ricotta-gnocchi-prosciutto-sauce
Thanks so much for stopping by and have a great Tuesday!

a napa appetizer: burrata

Happy Tuesday! Two weeks ago, we were in Napa celebrating our fourth anniversary and enjoying the most amazing food. Napa may be known for the wine, but the food isn’t too far behind, at least in my book 🙂 We ate at so many excellent restaurants, each meal was better than the last. Now that we are back to reality, a diet is definitely an order! But before we get back on our healthy food track, I wanted to remake two of our favorite dishes from Napa, to relive the delicious flavors one more time! I will be sharing a main dish next week, but today is all about one of the most decadent and delicious appetizers ever: Burrata. 

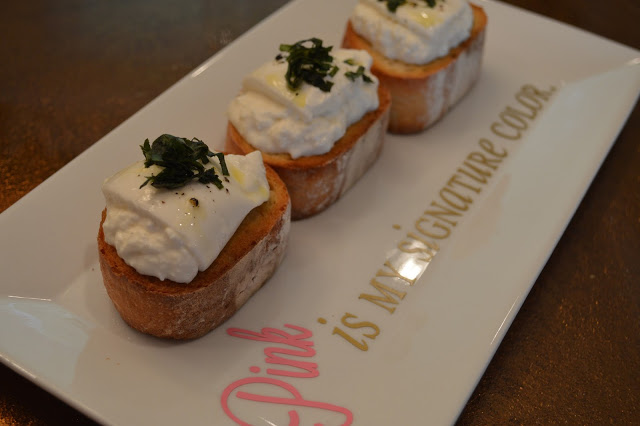
If we had to choose, I think my husband and I would both pick Tra Vigne as our favorite restaurant. And for me, it’s probably my favorite restaurant ever, not just in Napa! The entire menu is unbelievable, to the point of not knowing what to order because you like several dishes! But, the mozzarella cheese “al minuto” is a must. The mozzarella cheese is hand made the moment you order, and it is served with grilled bruschetta and Napa olive oil. This is truly one of the most amazing things I have ever ate, and probably one of the most high in calories. I try not to think about that, though!

When I decided to recreate this dish, I wanted to use Burrata instead of mozzarella cheese. Burrata is a fresh Italian cheese that is made from mozzarella and cream. The outer “shell” of the Burrata is solid mozzarella while the inside is a creamy mixture of mozzarella and cream. Just say cream and you know it’s good, right?! 

Although it wasn’t exactly like Tra Vigne’s “al minuto” mozzarella, it’s a good replacement until we can get back out to California again! 
toasted-baguette-burrata-basil

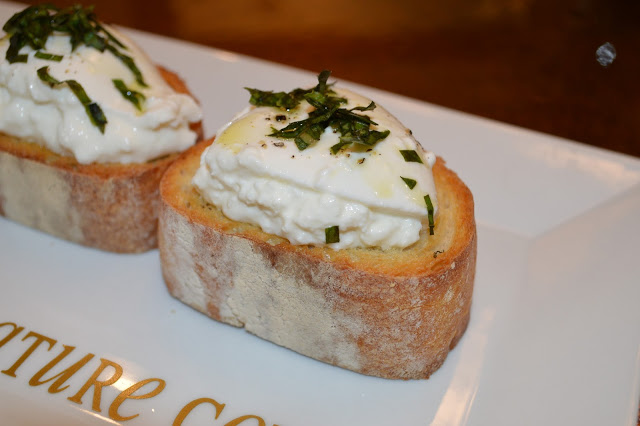
Toasted Baguette with Burrata and Fresh Basil 
makes 8
1 baguette, sliced in 1 inch slices
8 ounces fresh Burrata {I used this}
5-7 basil leaves, thinly sliced
Extra virgin olive oil
Salt and pepper
Preheat oven to 450 degrees. Place baguette slices on to baking sheet. Brush the top side with olive oil. Bake for about 5 minutes. Remove from the oven and flip the slices over, brushing the other side with olive oil. Bake for an additional 5 minutes until both sides are golden brown. Divide two of the Burrata balls into fourths. Place one slice of the Burrata on top of each toasted baguette slice. Drizzle a little olive oil on top, followed by a pinch of salt and pepper. Top with basil and serve! 
burrata-appetizer

Thanks so much for stopping by and happy cooking! 

addicted to tofu

It’s true. I’m addicted to tofu. I never thought this would happen, but after being out in California last week and not having what seems to be our weekly tofu dish, it really hit me! I know it probably sounds like a strange addiction, but with so many different ways to serve this healthy food, the possibilities are endless and never leads to food boredom. For the record, I blame Chipotle’s sofritas for getting me hooked on tofu. Thanks, Chipotle! 

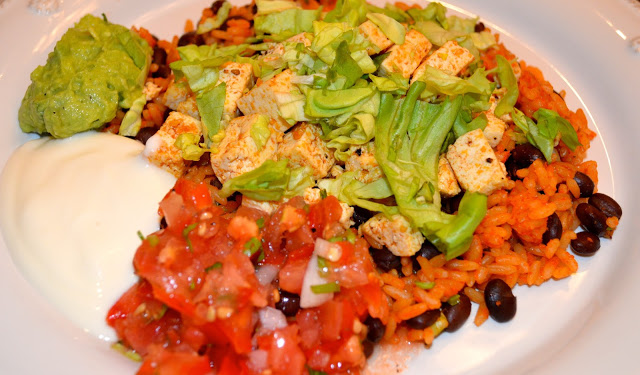
This has to be one of my favorite ways I’ve made tofu in the past few months. It’s a really quick dinner that can be served in a burrito or the tortilla-less version, a “burrito bowl.” I love that you can customize the toppings to fit your tastebuds, but I have to recommend the hot sauce. It’s that good. 

For those who haven’t tried tofu or are afraid to try tofu {I use to be one!}, this is probably the easiest and most flavorful tofu recipe I’ve made, so it would definitely be a good place to start!

Have a great Friday and a wonderful weekend, everyone! Thanks for dropping by!


Tofu & Black Bean Burrito Bowls
14 ounces extra-firm tofu, drained & pressed
1 15.5 ounce can black beans, drained & rinsed {I used organic for lower sodium}
16 ounces prepared rice {I used Spanish rice}
3-4 green onions, chopped
2 tablespoons olive oil
1/2 tablespoon ground coriander
1/2 tablespoon ground cumin
1/2 tablespoon ground paprika
1/2 tablespoon garlic powder
1 teaspoon salt
Salt and pepper, to taste
For the garnish: shredded lettuce, guacamole, pico de gallo, sour cream, hot sauce {amazing!}
*Alternatively, you could replace the spices with a taco seasoning package. The spices I chose are pretty close to the traditional taco seasoning, but the package version can be high in sodium so I typically like to stay clear of them!
Begin by preparing the tofu: drain and press the tofu dry; cut into bite-sized cubes. Depending on the kind of rice you make, you can also start preparing that. I used “microwave in the bag” rice, so it only takes 90 seconds! Place the rice and black beans in large bowl and set aside. Heat olive oil over medium heat in a large skillet. Add the tofu and season with a little salt and pepper. Don’t worry about seasoning it too much, the kick of seasoning will come later. Cook and stir constantly until the tofu begins to brown, about 5 minutes. Keep an eye on the tofu to be sure that it doesn’t stick to the pan, stirring is very important! Add the coriander, cumin, paprika, garlic powder and a little more salt to the tofu, mixing to make sure the tofu is completely covered in the spices; cook for about 2 minutes. Add about 1 tablespoon of water to allow the tofu to steam; cook until all the water is absorbed, no more than 1 minute. Transfer tofu to a separate bowl. To assemble burrito bowls: Layer the rice and bean mixture on the bottom, followed by the tofu and the shredded lettuce, if desired. Garnish with your favorite toppings. My favorite is the hot sauce — it’s amazing! 

anniversary cupcakes

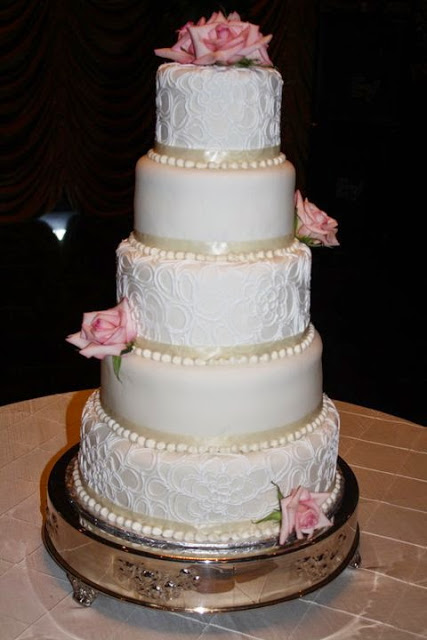
wedding-cake-with-roses
Photo by Lisa McCraw 

Happy Friday! Since yesterday was our 4th anniversary, I wanted to recreate our wedding cake, in the cupcake version! Our wedding cake was the most beautiful and delicious cake ever. And even though I only had about three bites of it, it was the best three bites ever! Although I will never be able to recreate the wonder that was this cake, I can at least try 🙂 

Hope you all have a wonderful long weekend welcoming summer! 

vanilla-cupcake-raspberry-filling

Vanilla Cupcakes with Raspberry Filling

1 package white cake mix, I used Duncan Hines
1 {3.4 ounce} box vanilla instant pudding 
1 cup almond milk {you can use regular milk, as well}
1/3 cup vegetable oil
3 eggs
1 teaspoon vanilla extract 
1/2 cup raspberry jam
2 {16 ounce} jars vanilla frosting, I used Duncan Hines {this is for about 2 dozen cupcakes}
Edible flowers for decoration, if desired 
Preheat the oven to 350 degrees. Line cupcake pan with cupcake liners. Place the cake mix, milk, oil, eggs and vanilla extra in a large bowl; blend with an electric mixer on low speed to combine. Add the instant pudding and blend again on low speed until all the ingredients are combined. Spoon batter into the cupcake pan until about 2/3 full. Bake for about 16 minutes {depending on your oven} or until the tops are just golden brown. You can also stick a toothpick in the center of the cupcake, and if it comes out clean, it’s done 🙂 Let the cupcakes to rest for about 5 minutes in the pan and then transfer to cooling rack; allow cupcakes to cool completely before adding the filling or frosting. Place the raspberry frosting in a decorating bag with a round decorating tip attached {I used this}. Insert the tip into the top center of the unfrosted cupcake and squeeze a small amount of filling until there is raspberry dot on top of the cupcake {don’t worry, the frosting will cover the dot!}. To frost, place the frosting in the decorating bag with you favorite decorating tip attached {I used this} and pipe the frosting onto the cupcake. Decorate with edible flowers, if desired.