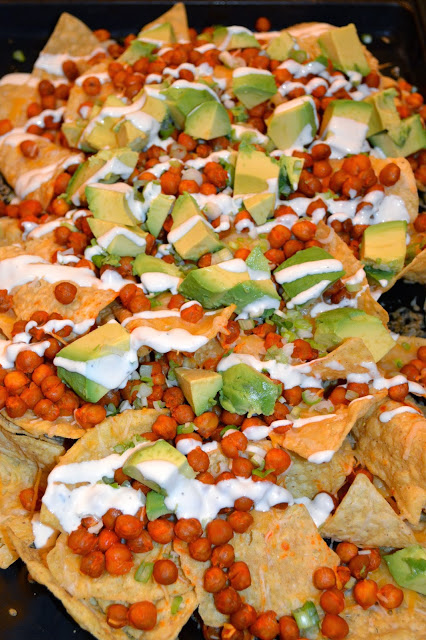
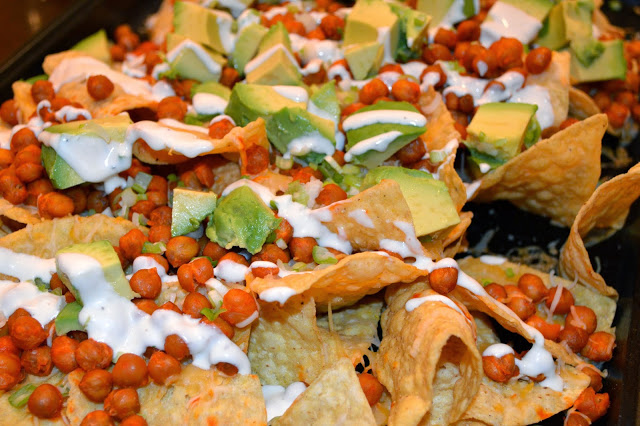
buffalo chickpea nachos

I have to confess, I am completely obsessed with buffalo sauce. It all started in college when I would get a buffalo chicken sandwich at one of our campus eateries and since then, I’m addicted. I don’t even like chicken but if it’s covered in buffalo sauce, I’ll eat it. Although I could probably eat anything soaked in buffalo sauce everyday of the week. I know it’s not the most healthy addiction! 

When cooking, I love to come up with ways to make a traditionally unhealthy meal a little more healthy, even it it is just a little 🙂 One of my go-to ingredients are chickpeas or garbanzo beans. I use them a ton in my cooking because they are high in protein and fiber. And, I’ve found that the organic canned beans are much lower in sodium, so I always opt for them. Chickpeas are great on salads to add a little crunch, or even to replace meat — they are the perfect vegetarian option!

Up until this past weekend when I made these nachos, my favorite chickpea and buffalo chickpea recipe was the Buffalo Chickpea Pizza. I made this pizza two Fridays ago and since then, I’ve been craving that buffalo crunch of the chickpea! For me, these buffalo chickpea nachos take the cake. Paired with avocado {another favorite food!} and ranch dressing, you have a healthy take on a delicious appetizer that is sure to be crowd-pleaser! Bonus: it’s super easy to put together! 

Hope you all have a wonderful Tuesday and thanks for stopping by! 

buffalo-chickpea-nachos
Buffalo Chickpea Nachos

2 cans chickpeas/garbanzo beans, drained & rinsed {I used organic}
3-4 tablespoons extra virgin olive oil
3-4 tablespoons cayenne pepper sauce {I used Frank’s RedHot} 
2 cups Mexican shredded cheese 
1 avocado, sliced into bite-sized pieces
Green onions, thinly sliced or diced {I used about 7 small onions}
1/2 cup ranch dressing {I used low-fat}
Tortilla chips 
Preheat oven to 400 degrees. Toss chickpeas with olive oil on rimmed baking sheet; roast for 30 minutes. Transfer roasted chickpeas to medium-sized bowl and pour cayenne pepper sauce over chickpeas to completely coat. On a clean baking sheet, spread the tortilla chips out as desired. Sprinkle Mexican cheese over all the chips, followed by the buffalo-coated chickpeas. Place back in the oven for 5 minutes, just until the cheese has started to melt. Garnish with green onions, avocado pieces and ranch dressing. Serve and enjoy! 

buffalo-chickpea-nachos

ode to pgh & mint juleps

Do you ever crave a particular dish from your favorite restaurant? For me, there are definitely certain meals that I love so much, I try to recreate them in my own kitchen. This is the case for my favorite restaurant in Pittsburgh, Lidia’s. Living in the Steel City for four years while in college allowed me to enjoy some amazing food, most of which came from this Italian restaurant in the city’s Strip District. {To see my entire post about Pittsburgh and Lidia’s, click here}

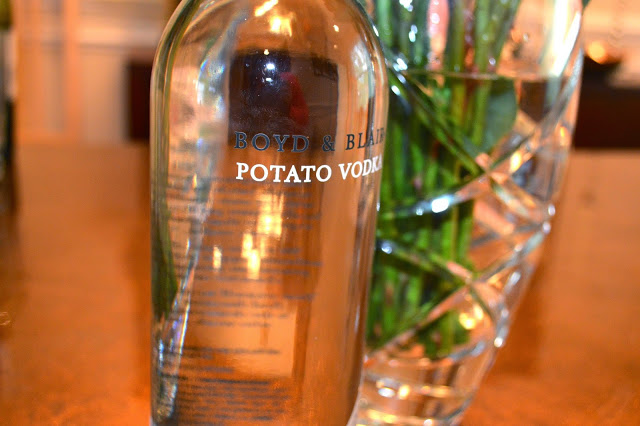
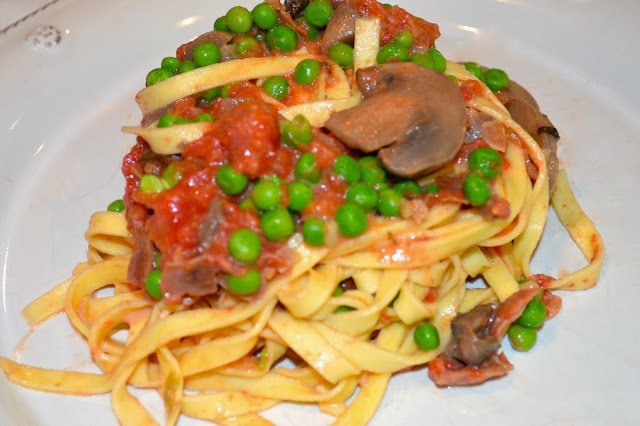
Whenever we travel back to Pittsburgh, Lidia’s is always a must. Our favorite menu item is the “Pasta Trio” where you are able to sample the day’s three special pastas. Typically, our favorite pasta is of the vodka sauce variety {how can you not love that pink, creamy sauce?!} I’ve made vodka sauce before and shared it here on A Blonde’s Moment, but today’s version has a few special ingredients. A few months ago, my husband discovered Boyd & Blair Potato Vodka, which is made right in Pittsburgh. We thought using a Pittsburgh vodka to make our favorite Pittsburgh dish was perfect way to recreate our favorite pasta. 

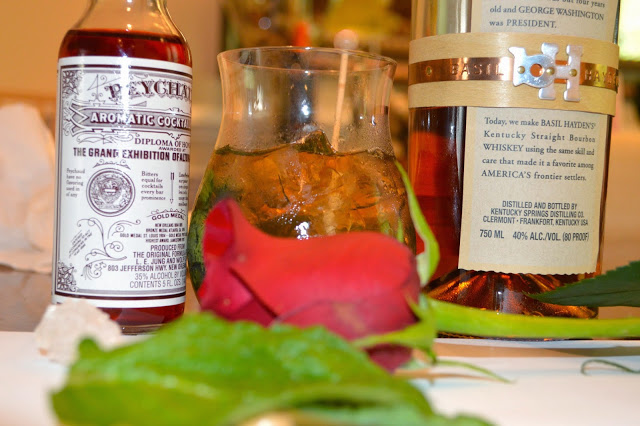
I made this for dinner on Saturday and after a long day of yard work, it definitely hit the spot! Although the recommended cocktail for this dish probably isn’t a Mint Julep, in honor of the Kentucky Derby, my husband made up one of his favorite drinks. He is sharing his Mint Julep recipe below, so be sure to check it out! The Kentucky Derby might be over, but there are still horse races to enjoy and Mint Juleps to be had! 

Thanks so much for stopping by and have a great Tuesday!


boyd-and-blair-potato-vodka
Pittsburgh-made Boyd & Blair Potato Vodka
fettuccine-vodka-sauce

Fettuccine with Mushrooms, Pea, Prosciutto & Vodka Sauce

1 pound pasta {I used fresh fettuccine}
4 tablespoons extra virgin olive oil
16 ounces fresh mushrooms, sliced
2 shallots, diced
2 cloves garlic
1 tablespoon red pepper flakes
3 ounces prosciutto, chopped into bite-sized pieces
3/4 bag frozen peas, room temperature
1 28 ounce can whole, peeled tomatoes, crushed with hands
½ cup good vodka {I used Pittsburgh’s own Boyd & Blair}
2/3 cup heavy cream
Grated Parmesan cheese and/or basil to garnish
Salt to taste


Start by cooking the pasta according to package directions. {I used fresh pasta so it only took about 3 minutes to cook.} Reserve about ½ cup of the pasta water. Heat extra virgin olive oil over medium heat.  Add the chopped prosciutto. Cook until crispy, about 3 minutes. Remove prosciutto from skillet and place on paper towel to drain. Add another tablespoon of olive oil to the same skillet and saute the mushrooms until the mushrooms begin to brown and all the liquid has evaporated, about 10 minutes. Transfer the mushrooms to a clean plate and add another tablespoon of olive oil to the same skillet. Add the shallot and cook for about 2 minutes. Add the garlic and red pepper flakes and cook for another minute. Remove the skillet from the heat and add the crushed tomatoes, vodka and salt, to taste. Stir to combine and place back on the heat. Cook for about 8-9 minutes to allow the vodka to burn off. Add the heavy cream and stir to fully combine. Cook for another 3-4 minutes until the sauce becomes thick. Turn the heat down to low and add the peas. Cook for about 2 minutes and turn off the heat. Add the crispy prosciutto and mushrooms and stir in pasta. If the sauce is too thick, you can add some of the reserve pasta water to thin it out. Serve with grated Parmesan cheese and basil, if desired. 


kentucky-derby-mint-julip

mint-julep


Mint Juleps


10 mint leaves
1 ounce simple syrup 
2 ounces bourbon {we used Basil Hayden’s}
1 sugar swizzle stick
2 dashes Angostura bitters
Ice


Muddle leaves with simple syrup in cocktail glass {use a mint julep silver glass if you have one!} to release the oils in the mint; be sure to not bruise. Add enough ice to fill the glass. Add bourbon. Add bitters. Swirl bitters with sugar stick. Makes one drink. 

greek flatbread pizza

One of my very favorite things about Fridays is that it’s pizza night in our house. I have experimented with, what seems like, hundreds of different toppings to make some pretty delicious combinations. Last Friday I decided to try something completely different: instead of using the traditional pizza crust for the base, I used the packaged Naan that can be found at your grocery store!

Sometimes, I get really into my pizza making on Fridays. I come up with the most complicated, and time consuming, ideas that have me cooking in the kitchen all night! I thought by using the Naan as the “crust” that would cut down on a significant amount of time. The best part about this pizza is definitely the time aspect, but it was so tasty too! Greek salad is one of my favorite salads to make, and since we are finally at the point in the spring when the produce is looking perfect, I thought tomatoes and cucumbers would be an amazing pizza topping for this quick Friday night dinner! 

And, as for the pesto, I always seem to have a container of it in my fridge. I think it’s a great staple that can be added to/on top of so many different things, it’s a great thing to keep on hand 🙂 
greek-flatbread-pizza

Greek Flatbread Pizza
Makes two personal-sized pizzas

1 package original Naan {2 flatbreads in package}
1/4 cup homemade or store-bought pesto
1 cucumber, peeled & diced
1 pint cherry tomatoes, halved
2 cups shredded mozzarella cheese
1 small red onion, chopped
1/4 cup feta cheese, crumbled
2-3 tablespoons tzatziki sauce {I used store-bought}
1 tablespoon olive oil
1 tablespoon balsamic vinegar
Salt and pepper, to taste
Preheat the oven to 400 degrees. Place flatbreads on a baking sheet. In a small bowl, combine the tomatoes, cucumber and red onion; season with salt and pepper, if desired. Mix with the olive oil and balsamic vinegar; stir to combine and allow to sit for at least 5 minutes. Spread pesto onto the flatbread, followed by the shredded mozzarella cheese. Bake for 5-10 minutes, just until the cheese begins to melt. Remove the flatbreads from the oven and top with the tomato mixture followed by the feta cheese. Drizzle tzatziki sauce over the pizza, if desired. Serve and enjoy! 
Thanks for stopping by!

sweet strawberry cupcakes

Happy Thursday! I’ve been on a real cupcake kick as of late. I use to make cupcakes all the time, but it can be time consuming to make a homemade cupcake with homemade frosting. I love the idea of “enhancing” a cake mix from a box. My favorite brand of cake mix is Duncan Hines; I find their mixes to be most like a homemade cake. By adding just a few ingredients, you can make a cake box mix taste like you’ve spent hours in the kitchen! 

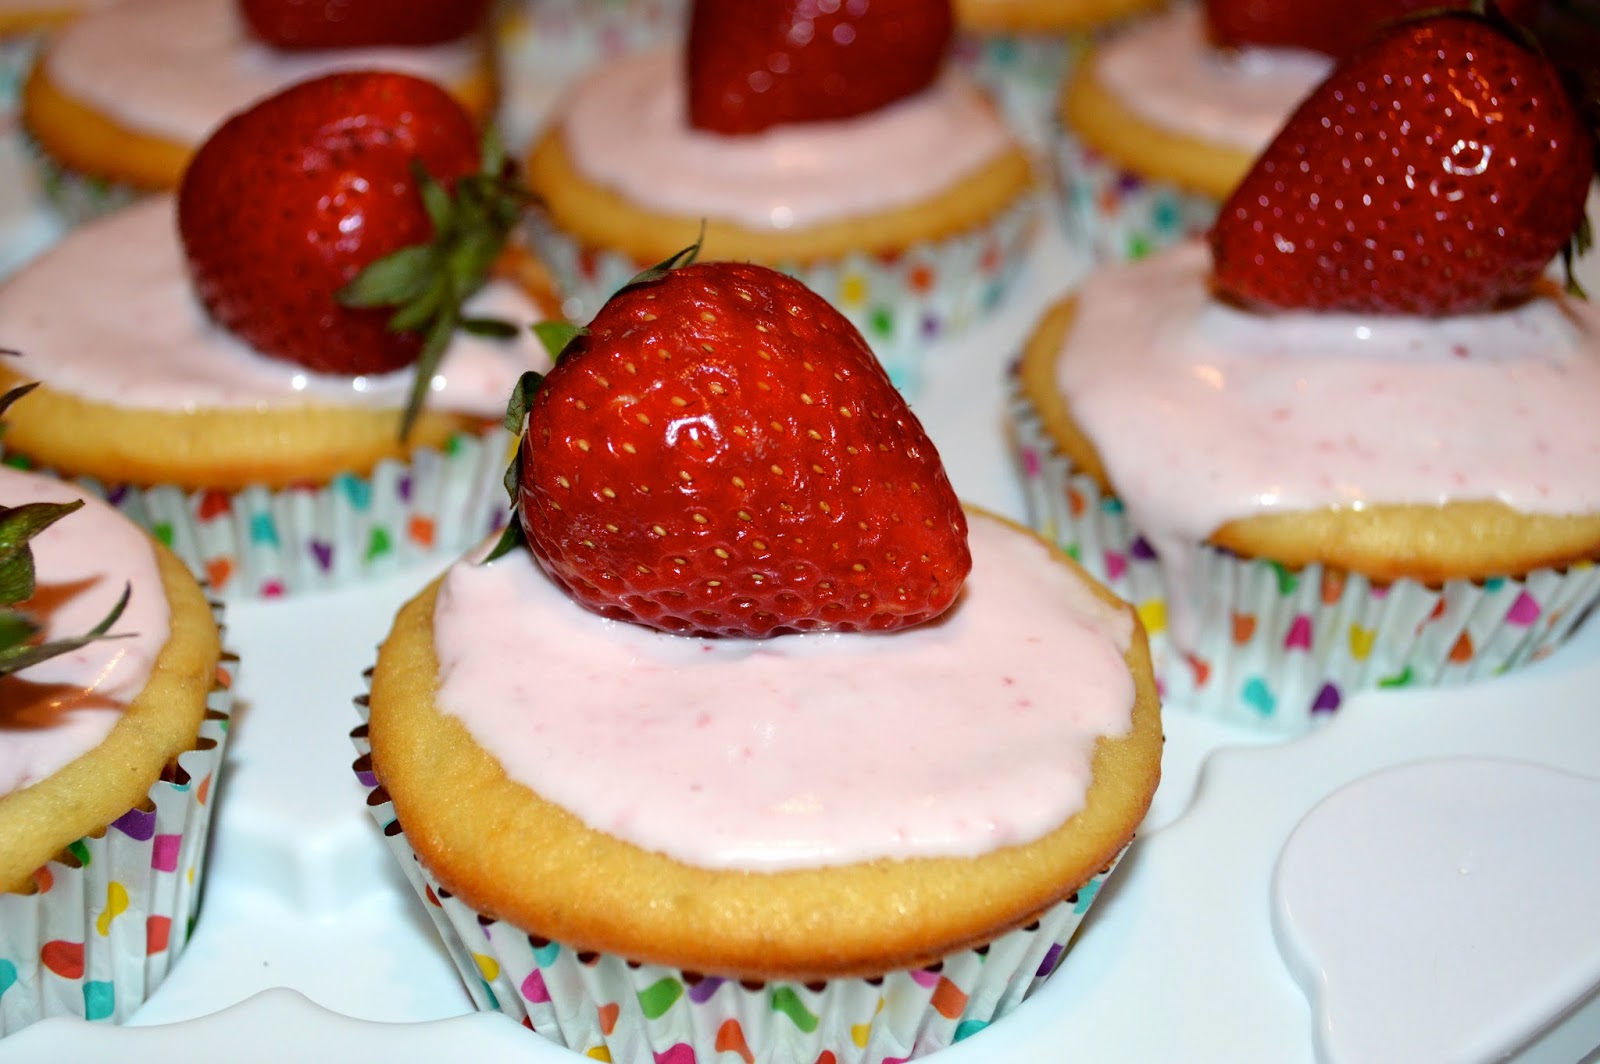
I was experimenting with the frosting on this one. I had a huge container of strawberries that I wanted to use up, so I pureed the strawberries and added them to the store-bought vanilla frosting. You could definitely just keep a plain vanilla frosting and garnish with a fresh strawberry, but if you are looking for more of that sweet strawberry flavor, I would add the pureed strawberries to the frosting. I got a little too carried away with the strawberry puree, so the frosting was pretty thin {hence why there isn’t a pretty swirl on these cupcakes!}. If you want a stiffer frosting that will make the perfect swirl, I would decrease the number of strawberries you puree or add more frosting to the amount I used 🙂 
sweet-strawberry-cupcakes

Sweet Strawberry Cupcakes 
*slightly adapted from My Baking Addiction 

For the Cupcakes:
1 box vanilla cake mix {I used this}
1/2 of 3.4 ounce package of instant vanilla pudding mix
1 {individual size} Greek strawberry yogurt {I used this}
3/4 cup vegetable oil
1/2 cup water
4 eggs, lightly beaten
2 teaspoons vanilla extract
10 fresh strawberries, diced
For the Frosting:
1 container store-store bought vanilla frosting {I used this}
6-8 fresh strawberries, quartered 
24 fresh, whole strawberries for garnish, if desired
24 cupcake wrappers {I used these}
Preheat the oven to 350 degrees. Line the muffin tin with cupcake liners. In a large bowl, mix the cake mix, instant pudding, Greek yogurt, vegetable oil, water, eggs and vanilla extract with a hand mixer for about 2 minutes, or until the batter is smooth. Fold in the fresh, diced strawberries. Fill the cupcake tins about 3/4 full. Bake for 18-20 minutes or until the tops of the cupcakes spring back when lightly touched {mine we perfect at about 19 minutes}. Allow the cupcakes to cool for 3-5 minutes in the muffin tin before transferring to a cooling rack. Cool completely before frosting. In a medium size bowl, place the store-bought vanilla frosting. Blend 6-8 quartered strawberries in a food processor until a puree forms; add strawberry puree to the frosting. Mix together to combine. Frost each cupcake and top with whole strawberry. 
Thanks so much for stopping by and have a wonderful weekend!

cauliflower pizza crust

Today’s post takes it to a whole new level of crazy. I made this cauliflower pizza crust last Friday for our weekly “Pizza Friday” and I think my husband was confused {correct me if I’m wrong, Richard! 😉 } I kept talking about the cauliflower pizza crust all week and how I was so excited to make it, but I think he thought we were have the cauliflower as a topping and not a crust. And I sensed that he was skeptical when he found out the cauliflower was actually part of the crust. And frankly, I was too. I couldn’t image the texture of cauliflower as a pizza crust, even if it was ground in a food processor!


I have seen several recipes for healthier ways to make pizza — especially gluten free options that seem to be great alternatives to the traditional pizza dough. As you may know, I love to incorporate healthy and “hip” foods into our weekly meals, so I’ve been thinking about this cauliflower crust for sometime! 

The result? It was DELICIOUS! Even my skeptical husband said it was in the top 5 pizzas I’ve made 🙂 I decided to keep it relatively simple with the toppings, since the crust was the star. And, I didn’t want anything too heavy because I wasn’t sure how much the crust could hold {this is definitely an eat with a fork kind of pizza — although that’s all pizza for me, but I think it’s probably a necessity with this crust!}. I used my regular caprese pizza recipe for the toppings of the pizza and it was the perfect compliment to this flatbread-like crust! 


cauliflower-pizza-crust


cauliflower-pizza-crust


Cauliflower Pizza Crust
slightly adapted from Food Network’s Katie Lee
1 medium-sized head of cauliflower, stalk removed 
1/2 cup shredded mozzarella cheese
1/2 cup grated Parmesan cheese
1/2 teaspoon oregano
1/2 teaspoon garlic powder
1/4 teaspoon salt
1/4 teaspoon ground pepper
2 eggs, lightly beaten 
Preheat the oven to 400 degrees. Line a baking sheet with parchment paper. Cut the cauliflower into florets and blend in a food processor until fine, almost the consistency of couscous. Place the cauliflower in a clean kitchen towel to allow all the water to drain from the cauliflower; transfer to large bowl. Add the mozzarella, Parmesan, oregano, garlic powder, salt and pepper and lightly beaten eggs to the cauliflower; stir to combine. Spread evenly onto a baking sheet. Bake for 20 minutes. Add the toppings {see below} to the crust and make for another 10-15 minutes, or until the cheese is bubbly. 
Caprese Pizza

1 pint cherry or grape tomatoes, halved
2 garlic cloves, diced
1 tablespoon olive oil
3-4 tablespoons store-bought pesto
1 1/2 – 2 cups shredded mozzarella
Fresh basil for garnish, if desired 
Preheat oven to 400 degrees. Place halved cherry or grape tomatoes in a small bowl with the garlic. Add the olive oil and stir to coat the tomatoes; set aside for about 10 minutes. On a baking sheet, spread the tomato and garlic mixture into a single layer, roast for about 5 minutes {keep your eye on them, they go quickly!}. To assemble pizza: spread a thin layer of the pesto on the cooked pizza crust, followed by the shredded mozzarella. Top with the roast tomato and garlic mixture and garnish with a few basil leaves, if desired. Cook the pizza for another 10-15 minutes, or until the cheese is bubbly. 
Let me know if you end up trying this cauliflower crust and what you think! Thanks so much for stopping by! 

blueberry french toast

blueberry-french-toast


As I mentioned in yesterday’s post, I was quiet the busy bee in the kitchen this weekend and I wanted to share a delicious recipe I made for Easter brunch! One of my favorite breakfast meals is french toast. I would probably consider eating it everyday if it wasn’t so rich and terrible for you! With all the eggs, milk/heavy cream and butter, french toast is usually a once in a blue moon kind of food. 


I thought Blueberry French Toast would be ideal for Easter Brunch, and by swapping a few ingredients for healthier ones, I think this french toast recipe can be more of a once per month food, instead of a once per year food 🙂 You do, obviously, still have to incorporate bread into the recipe, so if you are looking for a healthier option, you could use wheat or whole grain bread. I couldn’t pass up the Challah bread when I saw it at the store on Saturday — it is SO perfect for french toast. 

I made my french toast the night before, which allowed the liquid to soak into the bread really well. Also, it was easy to just take it out of the refrigerator after church and toss in the blueberries and stick it in the oven! You have to love an easy, oven-ready meal 🙂


blueberry-french-toast


Blueberry French Toast
1 loaf bread {I used Challah, but use whatever you like!}
8 egg whites
1 1/2 cup almond milk
1/4 cup honey {you could also use maple syrup}
1 teaspoon vanilla extract
2 teaspoons almond extract
2 teaspoons ground cinnamon
6 ounces fresh blueberries
Begin by cubing the loaf of bread into bite-sized pieces. In a large mixing bowl, combine the egg whites, almond milk, honey, vanilla and almond extracts and ground cinnamon; whisk well. Spray a large baking dish with cooking spray and place the cubed bread in the dish. Pour the liquid mixture over the bread; stir to make sure the bread is coated. Leave in the refrigerator overnight. The next morning, preheat the oven to 350 degrees. Remove baking dish from refrigerator and stir in the blueberries. Allow the casserole to get to room temperature before baking. Bake french toast for 45 minutes. Enjoy!

What were some of the items on your Easter menu? I’ll be sharing one more recipe later this week, so stay tuned! Thanks for stopping by!

easter cupcakes

easter-cupcakes


Just in time for Easter this weekend, I am sharing a quick and cute dessert that is sure to be festive for the occasion! To cut down on time, I used a vanilla cake mix and added the coconut extract and finely chopped coconut to enhance the flavor instead of making a coconut cupcake from scratch. As a side note, I am a firm believer in the Duncan Hines cakes mixes. From my experience, they are the most moist and delicious cakes I have ever had from a box, and are the closest to baking a cake from scratch! 


So I typically like to make my own frosting. I’m super particular about the way my buttercream tastes, but that was not in the cards for last night! After a long day at work, taking Ella on a walk, cooking dinner and making these cupcakes, homemade frosting was not going to happen {especially since I had to be done for Southern Charm by 10pm. If you haven’t checked out Southern Charm you must. I’m totally obsessed!} Anyways, back to the frosting. Since I wasn’t using much for these cupcakes {basically just enough for the toasted coconut to stick} I decided it was ok to use store-bought frosting. And, much to my surprise, it was pretty tasty! Yes, I tried some with a spoon once they were all frosted 😉 I used the Duncan Hines‘s vanilla and it was super smooth and silky! 
*If you want to try the frosting I usually make, I’ve included it below 🙂 


For the cupcake:
1 box vanilla cake mix {I used this}
1 1/3 cup water
1/3 cup vegetable oil
3 eggs
2 teaspoons coconut extract
About 1 cup shredded coconut {I probably used 1 1/4 cup}
For the frosting:
3 cups powdered sugar
1 cup unsalted butter
1 teaspoon vanilla extract
Splash of milk, if desired
For the decorations:
1 cup shredded coconut, toasted
Heat oven to 350 degrees. Begin by preparing the decorations: spread shredded coconut evenly onto cookie sheet. Bake 7-8 minutes until golden brown, stirring occasionally so the coconut doesn’t burn. Meanwhile, mix the cake mix, water, oil, eggs and coconut extract with an electric mixer in a large bowl. Stir in the non-toasted coconut. Line cupcake pans with cupcake wrappers and divide the batter, filling each muffin cup about three-quarters full. Bake 15-18 minutes {mine took exactly 16 minutes, but each oven is different}, until a toothpick inserted into the center of the cupcake comes out clean. Allow the cupcakes to cool for about 5 minutes before transferring to a cooling rack. *For the frosting: in the bowl of stand mixer, mix the powdered sugar, unsalted butter and vanilla extract until smooth. To assemble the cupcakes: allow the cupcakes to cool completely before frosting. With a pastry knife or table knife, spread just enough of the frosting on the cupcake to cover the top. Sprinkle each cupcake with desired amount of toasted coconut. Dip one side of a Cadbury mini egg into the frosting to act as “glue” and place on top of the shredded coconut. Enjoy! 

cilantro lime shrimp tacos

Well, I’m hooked on shrimp now. You might remember the shrimp scampi dish I made a few weeks ago, and how I am really not a seafood person, with the exception of crab that is 😉 The weather was gorgeous this past weekend and the grill was literally calling our names. Since making the shrimp scampi, I was very much looking forward to getting the shrimp on the grill — everything is better on the grill, right?! So the first nice weekend we had, I was ready to fire up the grill!

I always love Mexican food and have always been intrigued by the concept of fish/shrimp tacos. I decided shrimp tacos was the perfect way to go to break in the grill for the first time this spring. As for the marinade, there is this DELICIOUS cilantro lime marinade I get at our local grocery store, Wegmans. For those that don’t have a Wegmans, Kraft makes a delicious Zesty Lime dressing that would be delicious on the shrimp as well! Garnish the shrimp tacos with avocado, lime crema and cilantro {as you can see, I forgot that!} and you have a delicious and healthy meal that is perfect for the warming temperatures! 


cilantro-lime-shrimp


cilantro-lime-shrimp


cilantro-lime-shrimp-tacos

Cilantro Lime Shrimp Tacos

25 jumbo shrimp {peeled & deveined}
1/2 cup lime dressing {Kraft Zesty Lime is delicious!}
1 avocado {halved & pitted, cut into bite-sized pieces}
Flour tortillas {I used whole wheat, but you could also use corn}
Cilantro, for garnish {which I forgot!}

For the lime crema:
1/2 cup plain Greek yogurt
Juice of 1 lime
1 teaspoon ground cumin
Salt and pepper to taste

Place the peeled and deveined shrimp in a gallon-sized Ziploc bag. Pour the lime dressing over the shrimp and seal the bag tightly. Make sure the dressing is covering all the shrimp and allow the shrimp to marinade for about 20 minutes. Meanwhile, heat your grill to high heat. Weave shrimp onto skewer. Place on grill and cook until the shrimp begins to brown, about 3-5 minted on each side {depending on how high your heat is}. To make the lime crema: mix all the ingredients together in a small bowl with a whisk. To assemble tacos: place 3-4 shrimp on tortilla, garnish with avocado pieces, lime crema and cilantro.

Happy cooking and thanks for stopping by!

half marathon recap // pb energy bites

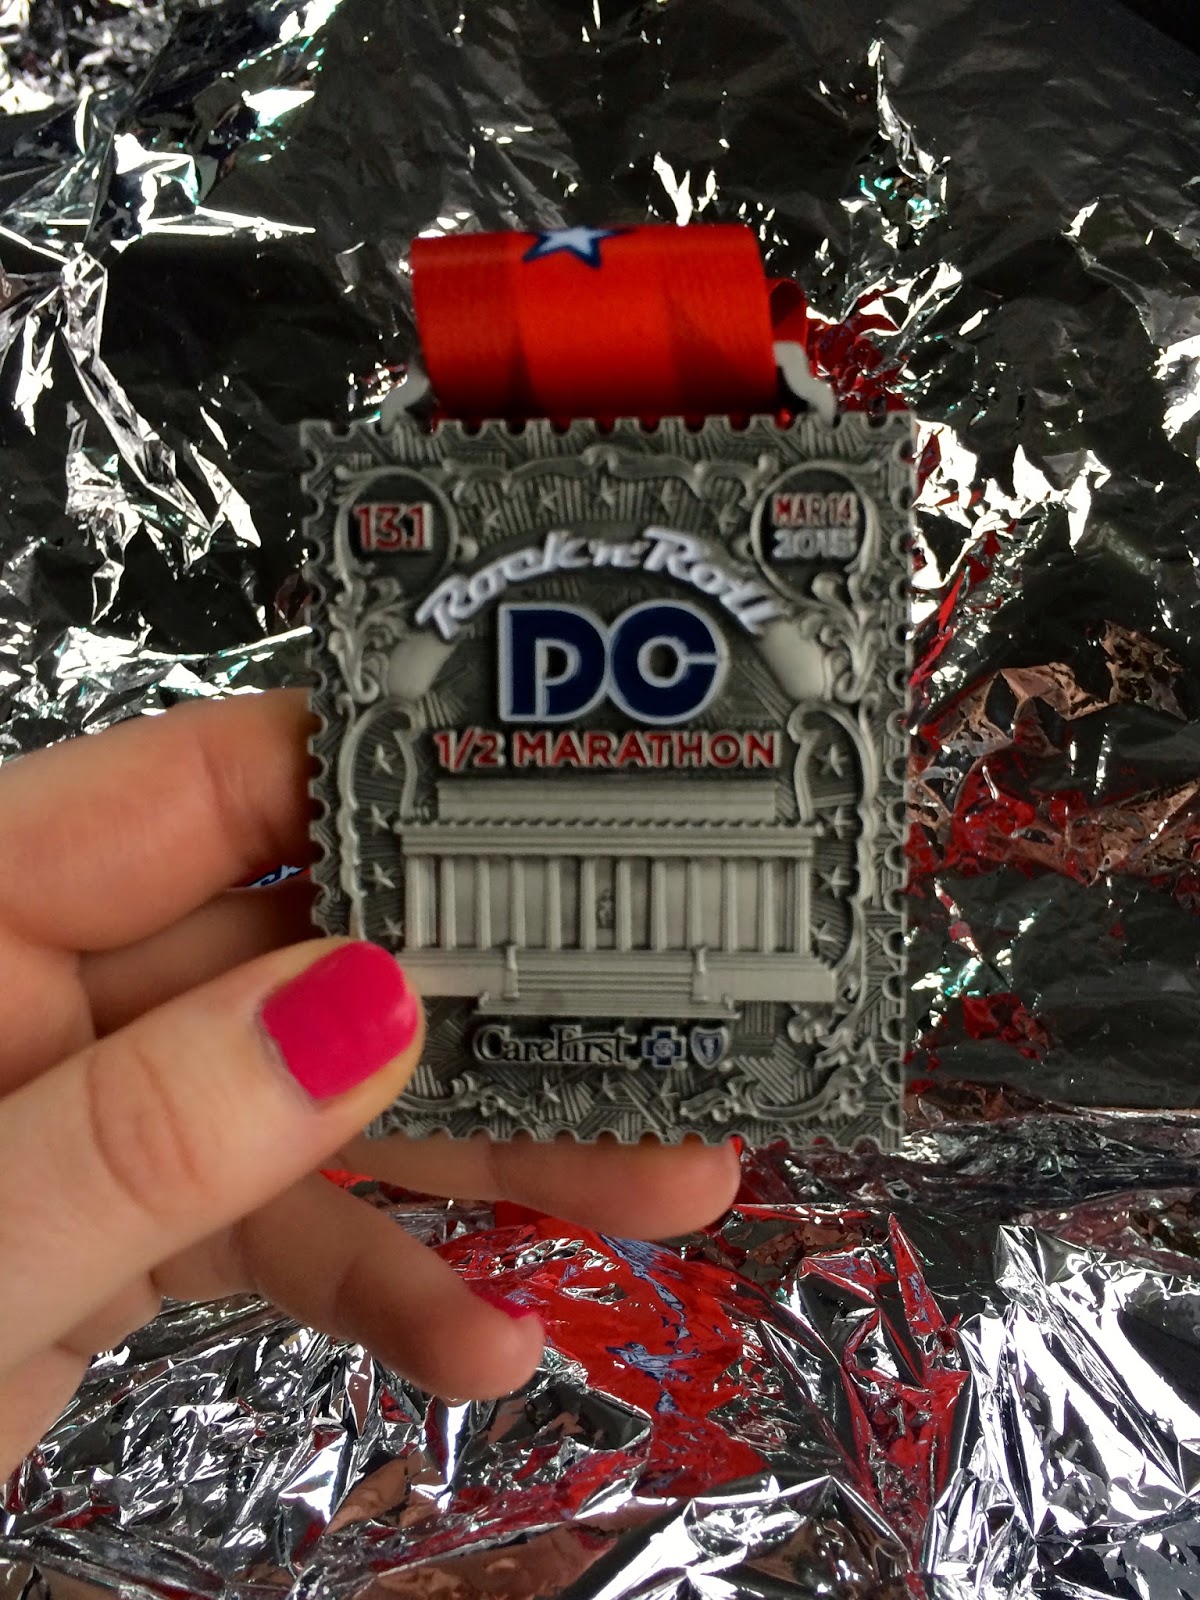
Happy Friday! Today I am recapping the half marathon from last weekend and also sharing the perfect, healthy snack — whether you are running a race or not! Unfortunately, we don’t have many pictures from this year’s race. Actually, we only have 2! With the terrible rain, the opportunity for pictures was just not happening. But, overall, it was a great race and I really feel accomplished for running that distance in a torrential downpour! It was a fitting end to the weeks of training that consisted of only a few outdoor runs due to the snow and freezing temperatures and a 10 mile run on the treadmill. Yes, it was awful. 


A rainy start line!
Now that the training and race have come to a conclusion, I am looking forward to a little more free time and more energy during the week; those 5 miles on the weekdays were a killer! Whether I am training for a race or not, I am always starving in the middle of the day. And having a healthy and nutritious snack while away at work all day is difficult to achieve. The answer: pb (peanut butter) energy bites. I love ANYTHING with peanut butter so that’s typically the first ingredient I look for in a healthy snack. Although oats and peanut butter are the base to this recipe, the rest is up to you! I opted for pretty basic ingredients, but you could also add chia seeds, wheat germ, sunflower seeds or even flax seeds. Another option would be to substitute the chocolate chips for raisins or cranberries {I probably would have done that but didn’t feel like going to the store! Plus, the chocolate chips can help those of us with an uncontrollable sweet tooth 😉 } 

I’m very much looking forward to experimenting with different ingredients to enhance these energy bites — I will keep you posted on future ingredients 🙂 What are your favorite snacks that help to get you through the day? I would love to hear your ideas; I’m always looking for new foods to incorporate into my weekly snack schedule 😉 


peanut-butter-energy-bites-ingredients

peanut-butter-energy-bites-ingredients

peanut-butter-energy-bites

peanut-butter-energy-bites


PB Energy Bites

1 cup oats {I used old fashioned oats}
1/2 cup peanut butter
2/3 cup coconut flakes
1/3 cup honey
1/2 cup chocolate chips {I used mini}
1 teaspoon vanilla extract

Combine all ingredients in a large bowl; chill for 20-30 minutes. Roll into balls {mine are about a tablespoon} and place in a storage container in the refrigerator. Enjoy!
Thanks for stopping by and having a fabulous weekend!  

St. Patrick’s Day Muddy Buddies

Happy St. Patrick’s Day! Although I was planning to take today off from the blogosphere {it was a crazy race weekend!} I wanted to share with you a super simple St. Patrick’s Day dessert that you can throw together quickly — and it’s delicious! 

I guess I first need to ask if “muddy buddies” are a regional obsession?! Growing up, I could not get enough of this sweet treat, but after speaking with a co-worker who had never heard of the term “muddy buddies”, I began to wonder if this was something half of the country was missing out on? For those that haven’t heard about this addicting snack, it’s Chex mix, peanut butter, chocolate and powdered sugar all combined to make a snack that you literally can’t stop eating. How can you honestly go wrong with any of these ingredients?! 

It always seems that as the post-race recovery period begins, all I want are sweets {so please excuse this unhealthy recipe 😉 }. I thought to make these muddy buddies more festive, I would add a few St. Patrick’s Day ingredients: green M&M’s and Lucky Charms cereal {I also have a confession about that: I have never tasted or bought Lucky Charms cereal before this recipe! I’m not a big sweets person, except post-race days, but I thought this cereal was too perfect to pass up!}. The result is a delicious and addictive sweet snack that you will not be able to stop eating! Hopefully this cures my post-race sweet tooth 🙂

Have you heard of muddy buddies? Or do you call them something else? Or are these a totally new snack to you? Let me know in the comments below! 

st-patricks-day-muddy-buddies

1 box Chex cereal {about 9 cups}
1/4 cup green M&M’s
1/4 cup Lucky Charms cereal
1 cup semi-sweet chocolate chips
1/2 cup peanut butter
1/4 cup unsalted butter
1 teaspoon vanilla extract
1 1/2 cup powdered sugar
Place Chex cereal in a large bowl. In a separate microwave-safe bowl, melt the chocolate chips, peanut butter and butter. Cook on high for 30 seconds, stir with a rubber spatula, and cook for another 30 minutes until the mixture is smooth. Stir in the vanilla extract. Pour the chocolate mixture over the Chex cereal and toss to coat, using a rubber spatula. Pour the mixture into a 2 gallon resealable plastic bag. Add the powdered sugar to the bag, seal the bag tightly and shake vigorously to allow the powdered sugar to coat the cereal. Spread mixture onto waxed paper to dry and mix with the green M&M’s and Lucky Charms. Store in an airtight container in the refrigerator. 
*Click here for the standard Muddy Buddy Recipe 

Have a wonderful day and thanks for stopping by!