thanksgiving for two

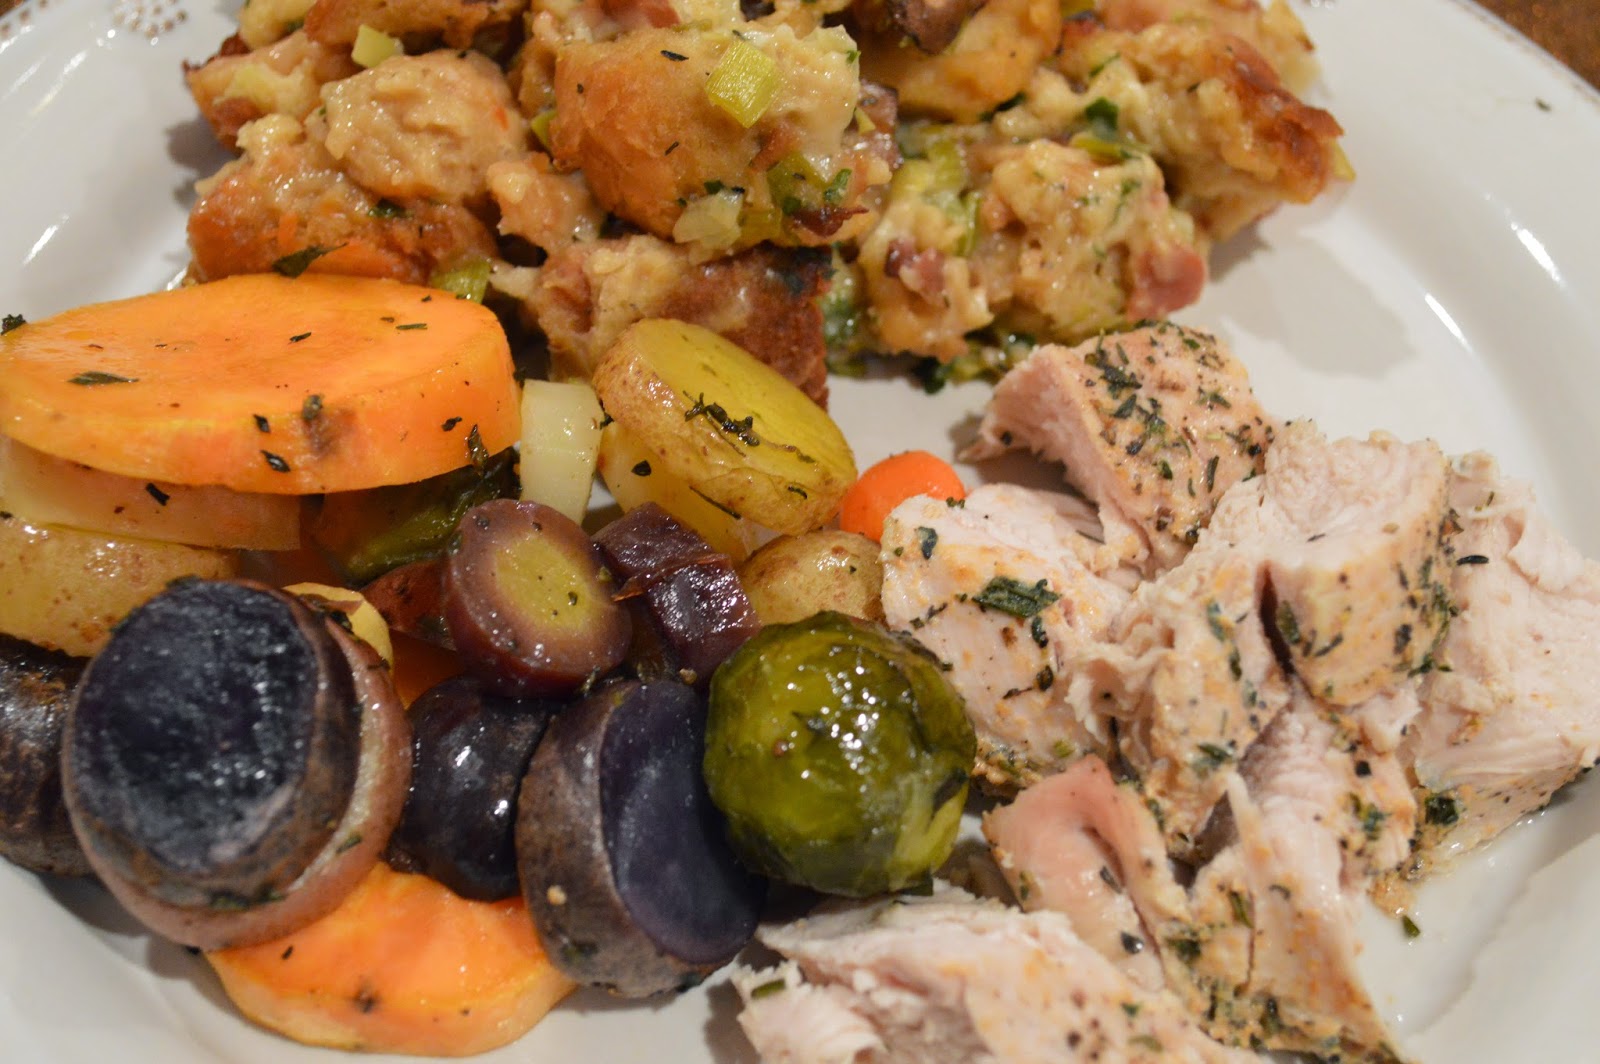
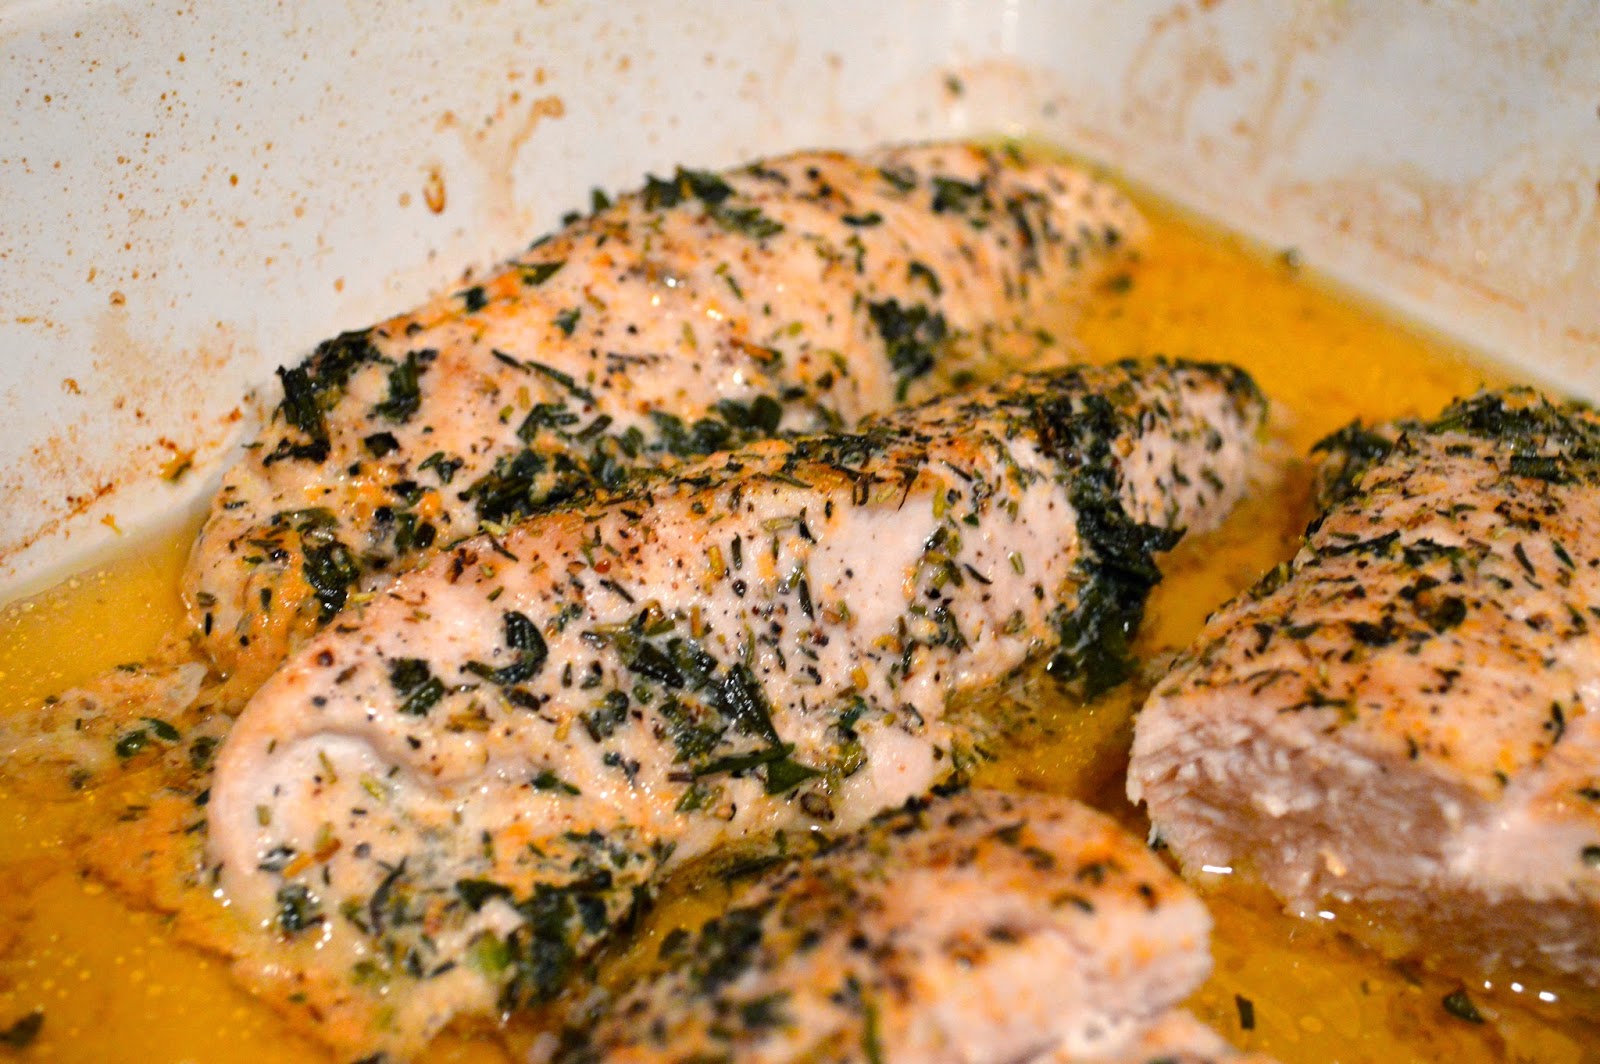
This past weekend, I made a mini version of Thanksgiving for my husband and I. We are headed back to Ohio for Thanksgiving where we will have a huge meal, but I wanted to share a few recipes that can be used for just two {or double/triple them to feed more}! There was no reason to cook a huge turkey for only two people, so I went the turkey tenderloin route and they turned out fantastic! They typically come three tenderloins per package and they are super easy to work with. I also made two sides that were semi-traditional, but with a little spin: instead of mashed potatoes, I roasted fall vegetables together to create the most delicious mixture of the season’s best flavors; and a dressing with leeks, mushrooms and prosciutto. It was literally to die for! No matter how many people you are serving this Thanksgiving, take a look at these recipes below, and try incorporating them into your menu on Thursday! 

Happy cooking!
Turkey Tenderloin for Two

1.25 pounds turkey tenderloin

1/4 cup chicken stock {you could also use white wine}

1 tablespoon butter, melted

2 tablespoons fresh rosemary

2 tablespoons fresh thyme

1 garlic clove, minced

Salt and pepper to taste

Preheat oven to 375 degrees. Spray a casserole dish with cooking spray and evenly distribute the turkey tenderloins in the dish. In a small bowl, combine the melted butter, chicken stock, rosemary, thyme, garlic and salt and pepper. Spoon mixture over the turkey. Bake, basting occasionally, for 30-35 minutes until the thickest part of the turkey reaches between 165 degrees and 170 degrees. Allow turkey to stand 5 minutes before slicing.

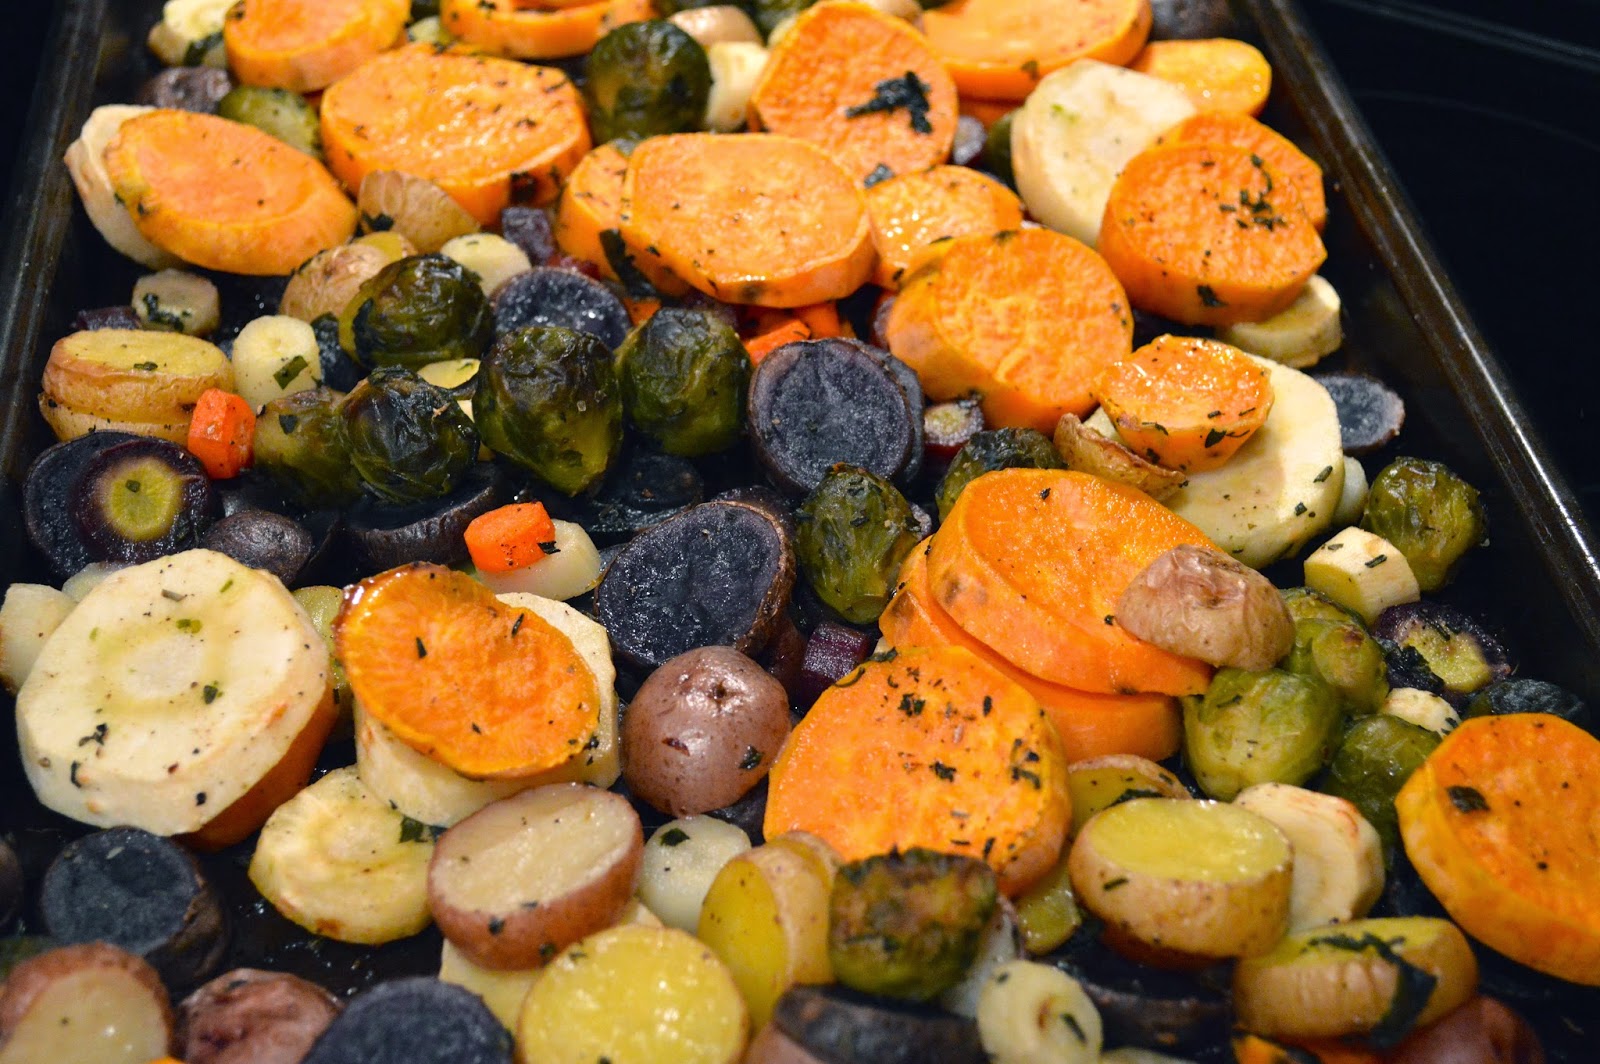
Fall Roasted Vegetables

I cut all my vegetables into circles with about a 1/2 inch thickness so they didn’t shrink too small once baked. 

2 sweet potatoes, peeled and sliced

2 parsnips, peeled and sliced

24 ounces baby potatoes, sliced

4 medium-sized carrots, peeled and sliced

12 ounces frozen brussels sprouts, cooked according to package instructions

1/2 tablespoon dried oregano

1 tablespoon fresh rosemary

1 tablespoon fresh thyme

6 (about) basil leaves, chopped

Salt and pepper to taste

Olive oil

Preheat oven to 400 degrees. Toss the vegetables with a few tablespoons of olive oil, oregano, rosemary, thyme, basil, salt and pepper. Spread vegetables out onto a baking sheet in a single layer. Bake for 35-40 minutes.

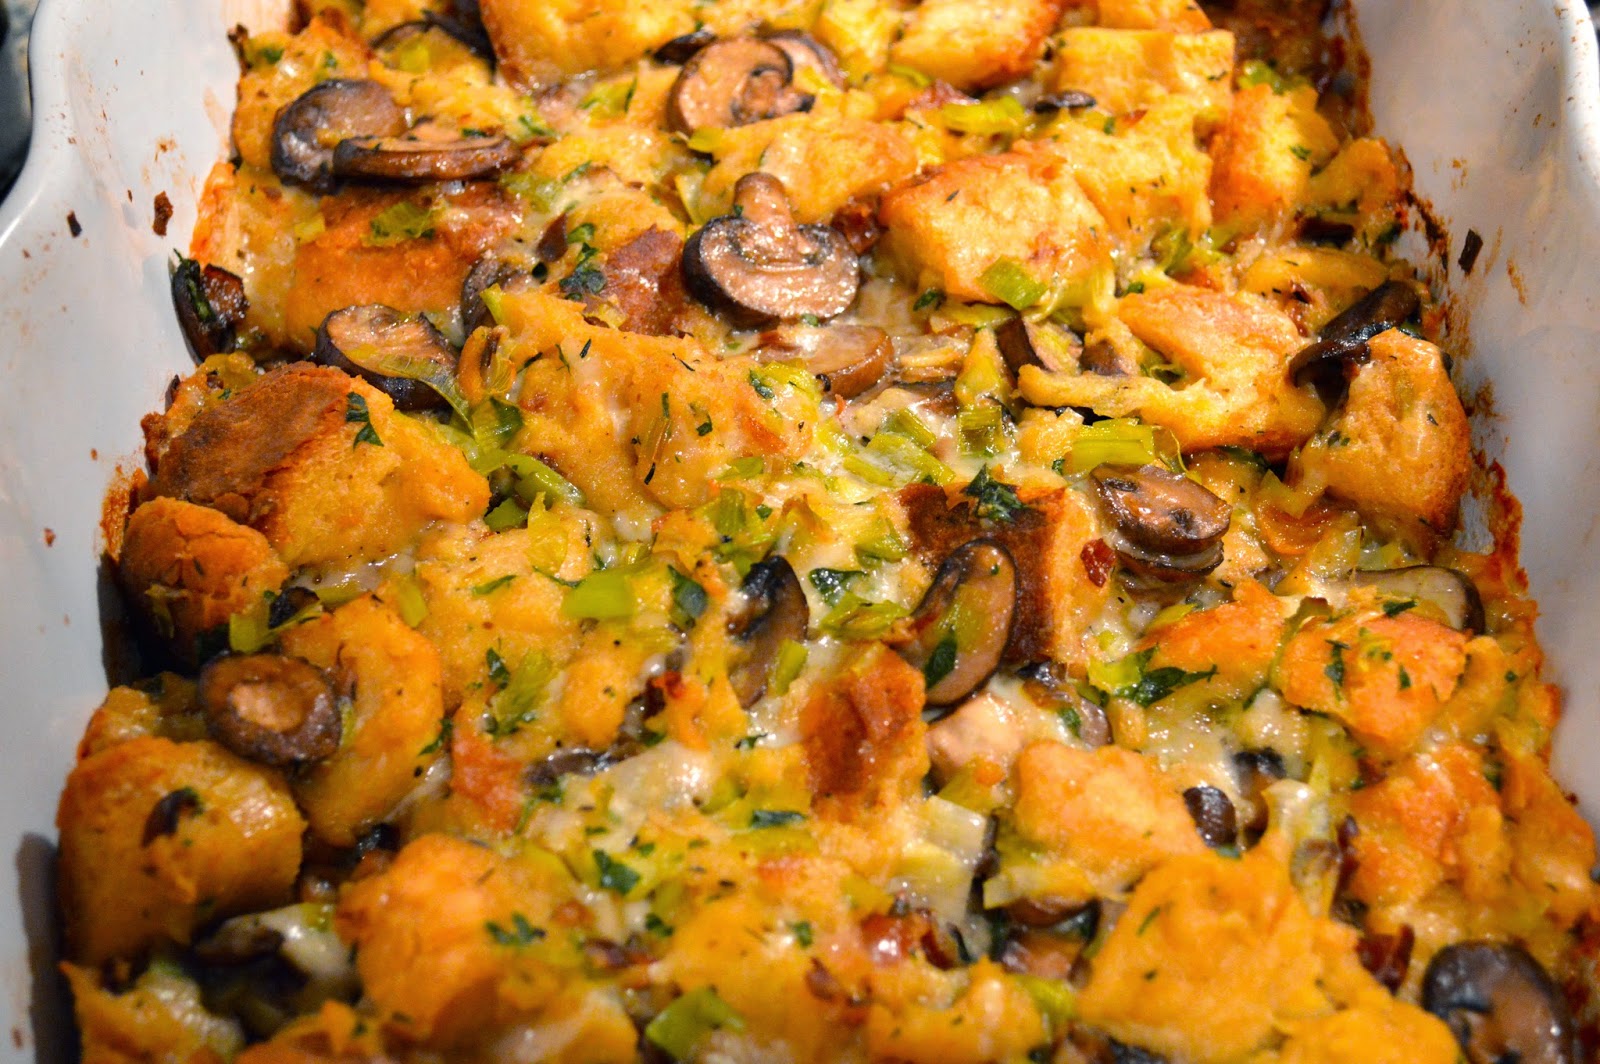
Leek, Mushroom and Prosciutto Dressing  

1 loaf of day-old Italian bread

1/2 stick + 3 tablespoons unsalted butter

2-3 leeks, cleaned and chopped

1 teaspoon thyme

16 ounces sliced baby bella mushrooms

2 ounces prosciutto, chopped

1/4 cup fresh parsley, chopped

2 eggs, beaten

3 cups chicken broth

1 cup gruyere cheese, shredded

Preheat oven to 375 degrees. Cut bread into 1/2 inch cubes {If the bread is still fresh, place bread cubes on dry baking sheet and cook at 300 degrees for 15-20 minutes to dry them out}. Transfer bread cubes to a large bowl. Heat 1/2 stick of butter in a large skillet. Add the leeks, thyme and salt and pepper. Cook for 5 minutes. Add chicken stock and bring to a simmer. Remove from the heat. Meanwhile, in a separate skillet, heat a few tablespoons of olive oil over medium heat and cook the mushrooms, stirring occasionally, until all the liquid is absorbed, about 10 minutes. Transfer mushrooms to small bowl and set aside. In the same skillet, heat a few tablespoons olive oil over medium heat and cook the prosciutto until crispy, about 5 minutes. Transfer crispy prosciutto to a separate small bowl and set aside. In a medium-sized bowl, beat 2 eggs and add the parsley, stir to combine. Add the egg and parsley mixture to the bread cubes, stir to coat. Add the leek and chicken broth mixture and the mushrooms to the bread mixture and stir to fully incorporate. Add the prosciutto and the gruyere cheese. Transfer to baking dish that has been sprayed with cooking spray and scatter 3 tablespoons of butter on top of dressing. Cover with foil and bake for 30 minutes. Remove foil and bake for another 20 minutes until golden brown.
greek tacos {and the giveaway winner!}

2-3 boneless, skinless chicken breasts

1 pint cherry tomatoes, halved

1 red onion, chopped

8 ounce block feta {I used fat free}

8 ounces cream cheese {low fat}, softened

1/2 cup plain Greek yogurt

3 tablespoons oregano

4 tablespoons lemon juice

Salt and pepper

Olive oil

Flour tortillas

Basil, for garnish if desired

Preheat oven to 350 degrees. Heat 3-4 tablespoons olive oil in medium skillet over medium-high heat. Season each side of the chicken with lemon juice, oregano, salt and pepper {I used about 1 tablespoon of both oregano and lemon juice on each chicken breast – but it’s up to you how much oregano you like…it’s strong!}. Cook chicken for about 5-6 minutes on each side until golden brown {my chicken was pretty thin, so just make sure each side is brown if your chicken is thicker!}. Meanwhile, in a food processor, combine 3/4 of the block of feta, cream cheese, Greek yogurt and salt and pepper to taste. Blend until incorporated. While the food processor is running, add about 1 tablespoon lemon juice; blend until smooth. Once chicken is cooked, cut into bite sized pieces. Wrap desired number of tortillas in foil and place on baking sheet in oven for about 5 minutes, or until warm. To assemble tacos, place about 1 tablespoon feta cream mixture on the bottom, followed by chicken, tomatoes and red onion. Garnish with basil and serve.

Happy Friday! Sharing this quick and fun take on tacos today. I don’t cook meat that often in our house {I like to say I’m a vegetarian except for steak and turkey sandwiches 😉 } but my husband loves chicken, so every once in a while, I try to incorporate chicken into our weekly menu. And this was a great and simple chicken recipe for any weeknight dinner! You could also add a cucumber or spinach to this {I just didn’t have either in the refrigerator!} for some added color.

Last week, A Blonde’s Moment celebrated it’s first birthday {you can see the post on that here}. To celebrate a year of blogging fun, I am giving away a fabulous J.Crew statement necklace. The giveaway closed last night at midnight and I’m excited to announce the winner…

Congratulations, Jackie! Email me at rachel@ablondesmoment.com 🙂

Thank you so much to all who entered!! Have a wonderful weekend! 

spaghetti squash with pesto & roasted tomatoes

1 medium-sized spaghetti squash

1/2 cup prepared pesto

2 pints cherry tomatoes {I used a mixture of red & yellow}

2 garlic cloves, minced

Olive oil

Salt and pepper

Parmesan cheese, for garnish

Preheat oven to 450 degrees. Split the squash in half and scrape out the seeds. Line a baking sheet with foil. Season the flesh side of the squash with olive oil, salt and pepper. Place the squash flesh side down and roast for 30-35 minutes. Remove from the oven and rest until cool enough to handle. Decrease the oven temperature to 350 degrees. Toss the cherry tomatoes with garlic and olive oil. Spread out in one layer on a separate baking sheet and sprinkle with salt and pepper. Roast 15 minutes until soft.

Once the squash is cooled, using a fork, scrape the strands of squash from the inside into a large bowl. Toss the spaghetti squash with the pesto and the roasted tomatoes. Sprinkle with Parmesan cheese, if desired, and serve.

There are several reasons why I love fall, one being the food. Squash is one of my favorite seasonal foods and spaghetti squash is probably my favorite kind of squash! This is an easy weeknight meal, that is not only nutritious, but it’s hard to tell this isn’t pasta. I typically serve this with a marinara as if it were pasta, but I wanted something a little more fresh with more flavors for last night’s dinner. {Also, we are having regular pasta with my homemade sauce tomorrow, so I didn’t want two similar dinners in the same week 😉 } Coming from someone who can never have too much pasta, it’s hard to tell the difference between regular spaghetti and spaghetti squash 🙂

Have a wonderful day!

P.S. Today is the last day to enter the J.Crew necklace giveaway! Giveaway closes tonight at midnight EST. For all the details and to enter click here 🙂

french bread pizza {remix}

4 Italian hoagie rolls, split in half

1 Roma tomato, thinly sliced

4-6 Piquillo peppers {or roasted red peppers} from 12 ounce jar, thinly sliced

1 Mozzarella cheese ball {about 1/2 pound}, sliced

2-3 ounces crumbled goat cheese

1/2 cup prepared pesto

2-3 tablespoons grated Parmesan cheese

Salt & pepper to taste

Preheat oven to 375 degrees. Split the hoagie rolls in half and arrange on baking sheet. Caprese Pizzas: spread 1 tablespoon pesto on the roll, followed by 2 slices of mozzarella cheese and 2 tomatoes. Sprinkle with Parmesan cheese {about 1/2 tablespoon} and salt and pepper. Roasted Pepper Pizzas: spread 1 tablespoon pesto on the roll, followed by 2 slices of mozzarella cheese and the sliced peppers. Sprinkle with crumbled goat cheese and season with salt and pepper. Place baking sheet in oven for 10 minutes. After 10 minutes, turn the broiler on for about a minute {watch it closely so it doesn’t burn!}. Serve immediately and enjoy!

Happy Friday, everyone! I don’t know about you, but this past week just flew by! I was in need of a quick dinner the other night, so I thought I would make these little french bread pizzas. I have made meatball french bread pizzas before but I thought I would take the vegetarian route this time. I have to say, these turned out so much better than the meatball ones. I had used french bread {the fresh kind you can buy in the bakery section at the grocery store} with the meatball pizzas and, at the time, they seemed fine. But after trying these, I now know the bread secret…store-bought Italian hoagies! They were more crispy then the fresh-baked bread and made for the most delicious “crust”. The great thing about these french bread pizzas is that you can literally use any toppings you would like. It’s so fun to experiment with different pizza toppings and making new, yummy combinations. 

Have a fabulous weekend!

first birthday + a giveaway {closed}

It may be cliche, but time sure does fly when you’re having fun. It’s hard to believe that today marks A Blonde’s Moment’s first birthday. It seems like just yesterday I was sitting down to write my first blog post {you can see it here}. Blogging was something I always wanted to do, but never set aside the time to do it. I was first introduced to blogging my senior year at Duquesne University where I took a Web 2.0 class that was an elective for my English minor. Little did I know how valuable that class would end up being.

Although A Blonde’s Moment has transformed a lot in a year, from sharing a few recipes and fashion pieces and the general goings-on of our life in the DC area, I couldn’t be more happy with where A Blonde’s Moment is today. It started out as something fun to do in my “spare time” and now it has become all-consuming…and I wouldn’t have it any other way.

As we mark A Blonde’s Moment’s first birthday, there are a few exciting things ahead. A new website is coming soon and I cannot wait to share it with all of you. But first, in celebration of A Blonde’s Moment’s first birthday, I have a special surprise for all my readers. I am giving away this J.Crew statement necklace to one lucky follower! I have one myself and I just love it. I actually find myself wanting to buy more tops so I can wear it more often…it’s that beautiful. This is definitely a birthday giveaway you don’t want to miss!
Entry Rules:
1. Instagram: Share this giveaway on Instagram & tag @rach.mccarthy.
Use #ablondesmoment so I can see it!
2. Comment below: Let me know how you would style this fabulous statement necklace! {Click on the callout box below to comment}
Additional Entries:
1. Facebook: “Like” A Blonde’s Moment
2. Twitter: Follow rachmccarthy7
*Please comment for each additional entry 🙂
Giveaway closes November 20, 2014 at midnight EST. A randomly selected winner will be announced November 21, 2014. Good luck!!
Thank you so much to everyone who has supported and followed A Blonde’s Moment over the past year. I’m so grateful for all your love and cannot wait to continue this journey with you for many years to come 🙂
You can see who won this giveaway here!

healthy minestrone

1 yellow onion, diced

2 carrots, diced

2 celery, diced

1 large zucchini, chopped

2 garlic cloves. minced

10 ounces frozen green beans, slightly thawed

32 ounces vegetable stock {I used no-salt added}

28 ounce can crushed or diced tomatoes

2 1/2 cups water

3/4 cup quinoa

1/2 teaspoon dried rosemary

1/2 teaspoon dried thyme

2 tablespoons fresh parsley, chopped

1 teaspoon sugar

2 cups kale, ribs removed

30 ounces of canned beans, drained & rinsed {I used a mixture of chickpeas & cannelloni beans}

Splash of lemon juice

Parmesan cheese for garnish

Salt & pepper to taste

Olive oil

In a large pot, heat 2-3 tablespoons olive oil over medium heat; add the onion, carrot and celery. Cook until vegetables are tender, about 5 minutes. Add the zucchini, green beans and garlic; cook for another 2 minutes. Pour in the vegetable stock, crushed tomatoes, water, rosemary, thyme, parsley, sugar and salt and pepper; bring to a boil and decrease heat to medium low and allow to cook about 15 minutes. Stir in the uncooked quinoa, cover and cook for 15 minutes. Add the beans, kale and splash of lemon juice and cook until the kale begins to wilt, about 3-5 minutes. Garnish with Parmesan cheese and crusty bread!

A fun and healthy take on traditional minestrone, the kale and quinoa combine for a delicious and vitatmin-packed soup. You can add a number of different vegetables to this soup, but I love the way the kale combines with the traditional soup ingredients of onions, carrots and celery, along with the tender zucchini. If you would prefer keeping with the traditional pasta in your soup, you can definitely switch the quinoa out, you would just have to cook the pasta separately and add it to the soup at the end 🙂 I served this delicious soup with the most wonderful, crusty bread from Wegmans. {If you have a Wegmans even remotely close to you, it’s a place you must check out!} This is the perfect soup for a fall or winter evening, and the best part is it’s healthy too! 

Happy cooking and thanks for stopping by!
*Slightly adapted from Cooking Classy

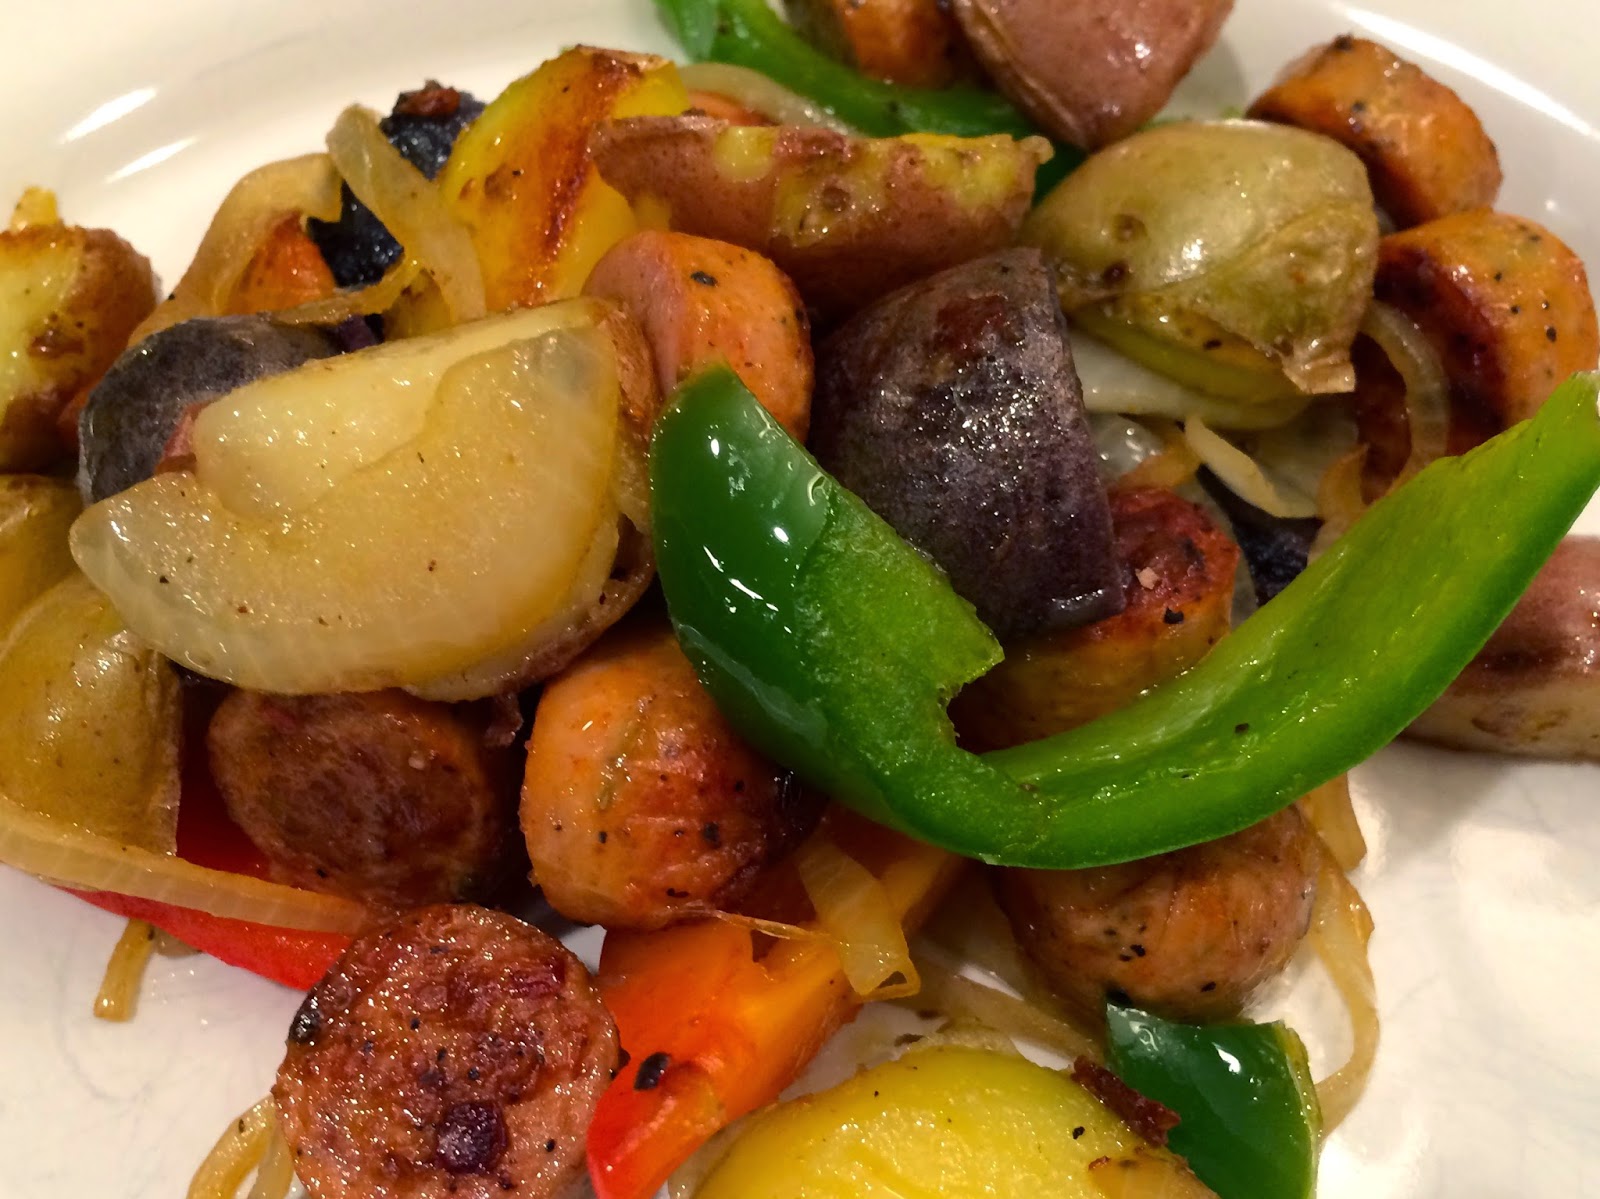
chicken sausage + pepper hash

12 ounces chicken sausage, cut into bite-sized pieces {I used al fresco, Sweet Italian Style}

1 green pepper, sliced

1 red pepper, sliced

1 yellow onion, sliced

24 ounces baby potatoes, quartered {I used the baby medley}

Olive oil

Salt & pepper, to taste

In a large, heavy skillet, heat a few tablespoons of olive oil over medium heat; add the potatoes, season with salt and pepper and cook until they begin to brown, about 10 minutes. Meanwhile, in a separate medium skillet, heat 1-2 tablespoons olive oil over medium heat to brown the sliced chicken sausage {about 5-6 minutes}. Remove from skillet and set aside. Add the peppers and onion to that same skillet; season with salt and pepper. Sauté until the vegetables begin to softened, about 5-7 minutes. Transfer the sausage and vegetables to the large skillet with the potatoes and mix to combine. Serve and enjoy!

Happy Friday! One of my go-to items when looking for a quick dinner is the al fresco chicken sausage. There are several different flavors to pick from and there are so many different ways to incorporate them into your meals! Sometimes I will just serve them grilled and on a bun {like a hot dog!} with peppers and onions, but since it gets dark so early now, the grill really isn’t an option by the time I get home from work. I love these chicken sausages because they are relatively healthy and they can be made into an easy weeknight meal. Also, I’m obsessed with baby potatoes {the purple ones in particular!} so it was fun to add these in as well. I love that this dinner has a meat, a starch and vegetables all in one dish! 

Have a wonderful weekend everyone!

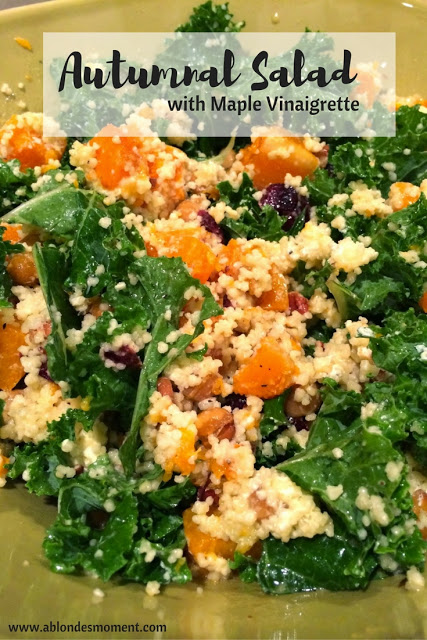
autumnal salad with maple vinaigrette

healthy-fall-salad-recipe
Today I am sharing the most perfect fall salad. I’m not a huge fan of sweet salads, and although by looking at the ingredients you would think this was super sweet, it’s not! The kale and goat cheese really balance out the sweeter ingredients of maple syrup, cranberries and even the butternut squash. This salad gives you the perfect taste of all things fall in one bite — the maple vinaigrette dressing gives the salad such a warm and inviting taste while the cranberries and pecans give the salad an added crunch. This is a quick dinner that is a must make before fall comes to a close! 

Autumnal Salad with Maple Vinaigrette

{what you will need}

1 small butternut squash, peeled & chopped
1 15.5 ounce can chickpeas, drained & rinsed
3 cups kale, destemmed
1/2 cup dried cranberries
1/4 – 1/2 cup pecans, chopped
4-5 ounces cooked couscous {I used about half of this box}
3 ounces goat cheese, crumbled
Olive oil
Salt & pepper

For the Maple Vinaigrette Dressing:
2 tablespoons extra virgin olive oil
1 tablespoon apple cider vinegar
2 teaspoons pure maple syrup {plus a dash more!}
1 1/2 tablespoons Dijon mustard
Salt & pepper to taste


{directions}

Preheat oven to 450 degrees. Toss chopped butternut squash and chickpeas in about 3-4 tablespoons olive oil, salt and pepper and place on baking sheet in single layer; cook for 30 minutes. Meanwhile, cook couscous according to package instructions {I only used about half of the box}. Allow the butternut squash and chickpea mixture to cool about 10 minutes before assembling the salad. To make the dressing: whisk olive oil, cider vinegar, maple syrup and Dijon together; season with salt and pepper. To assemble the salad: place kale in large bowl, followed by the cranberries and pecans; top with the crumbled goat cheese. Place the couscous and roasted butternut squash and chickpea mixture on top {I like to put the cheese on before the couscous and squash mixture because it is still warm and it starts to melt the cheese!}. Toss with the maple vinaigrette dressing and serve immediately!

southwest sweet potato tacos

3 sweet potatoes, peeled & diced

1 15.5 ounce can black beans, drained & rinsed

2 Roma tomatoes, chopped

1/2 red onion, diced

6 tablespoons cilantro, chopped

1 avocado

1/2 cup plain Greek yogurt

1/2 tablespoon cumin

1 tablespoon chili powder

1 lime

Salt and pepper

Olive oil

Flour tortillas

Cheese to garnish {I used a white cheddar}

Preheat the oven to 350 degrees. Head 2-3 tablespoons olive oil over medium heat in a large skillet; add the sweet potatoes and season with chili powder. Sauté sweet potatoes until they begin to brown, about 10-12 minutes. Meanwhile, prepare the pico de gallo: in a large bowl, combine the chopped tomatoes and red onion, black beans, 3 tablespoons cilantro and the juice from half of the lime; season with salt and pepper. To make the avocado-lime crema: in a food processor, place the avocado, Greek yogurt, the juice from the other half of the lime and cumin; season with salt and pepper and mix until combined. To warm the tortillas, wrap the tortillas in foil and place in oven for 3-5 minutes. To assemble tacos: Place the sweet potatoes on the tortilla, followed by the pico de gallo and avocado-lime crema. Top with your favorite cheese.

Happy Friday! I love this fall spin on tacos. It’s a great way to incorporate flavors of the season into everyday meals. The sweet potatoes get super crispy when sautéed in olive oil and add a great crunch to this fall taco. By bringing in the traditional flavors of the pico de gallo and the avocado-lime crema {last seen here}, the most perfect, fall taco is formed!  

Hope everyone has a fabulous weekend!

vegetarian mexican lasagna

2 8.8 ounce Spanish style rice {I used this}

1 pint grape tomatoes, halved

1 yellow onion, diced

2 garlic cloves, minced

1/2 tablespoon cumin

1/2 tablespoon chili powder

1 teaspoon paprika

1 15.5 ounce can black beans, drained & rinsed

2 8 ounce cans enchilada sauce

1 15.5 ounce jar salsa {I used medium}

1/2 of the 1 ounce package taco seasoning {I used reduced sodium}

16 ounces shredded Mexican cheese

Flour tortillas {I used 9}

Salt and pepper, to taste

Olive oil

Sour cream, for garnish

Preheat the oven to 375 degrees. Heat a few tablespoons olive oil over medium heat in a large skillet; add the onion and garlic and season with cumin, chili powder and paprika. Sauté until soft, about 5 minutes. Stir in halved grape tomatoes and cook for an additional 2-3 minutes; season with salt and pepper. Add the black beans. Meanwhile, prepare the Spanish rice according to package directions. After the black beans have cook for about 2 minutes, reduce the heat to low and add the cooked rice; stir to combine. To assemble the lasagna: in a large casserole dish, spray with cooking spray and pour one of the 8 ounce cans of enchilada sauce to cover the bottom of the dish. Place a layer of tortillas on top of the enchilada sauce {it’s ok if they overlap a little}. Pour half of the vegetable and rice mixture on top of the tortillas followed by 1/3 of the cheese. Next, pour the entire can of salsa over the cheese, followed by the tortilla step again. Top with the remaining vegetable and rice mixture and top with another 1/3 of cheese. Place one more layer of tortillas on top of the cheese, followed by the remaining 8 ounce can of enchilada sauce and then the remaining 1/3 of cheese. Sprinkle the taco seasoning on top of the final layer of cheese. Bake for 25-30 minutes or until the cheese begins to brown. Garnish with sour cream or any other favorite toppings.

I love experimenting with different recipe ideas. I’ve been making Mexican lasagna for some time now, but most of the time I use ground beef {see my other Mexican Lasagna recipe here}. Since I didn’t have meat on hand, I thought I would make a vegetarian version and use black beans. I’ve always used enchilada sauce, but I really liked the way the chunky salsa added another layer of flavor in this dish. And topping the entire casserole with the taco seasoning gave the cheese a delicious, crusty taste. I will warn you, by adding the cumin, chili powder and paprika in the beginning, it can get pretty spicy! I would recommend garnishing the lasagna with sour cream to cool it down! Happy cooking!