With Halloween quickly approaching {I’m just as shocked that it’s almost the end of October!}, it’s that time of the year to share a Halloween-inspired food post. I wanted to share something that would not only work for Halloween, but could also be made for the rest of fall by just changing the decorations. There was one fall treat that came to mind: caramel apples.
I love caramel and I love apples. But, to be honest, I have a serious fear of caramel apples. I don’t know about you, but when I think about caramel apples, the thought of losing a tooth comes to mind. Sorry to go there, but that happens to be why I went with slices instead of the full apple! Caramel and apples are a great combination, but for me, not worth losing a tooth over.
A little background on this recipe: Originally, I had planned to cut the apples into slices and dip just part of the apple in the caramel sauce — stay tuned for how I made the caramel sauce…it’s the best invention ever! — but, as my mom reminded me, the apple needed to be completely covered because it would start to brown once it was exposed to the air. The idea of caramel apple “lollipops” came to mind and I thought that these would not only be a fun dessert for kids, but adults too!
I went through quite a few apple slices to get the recipe right. I started by covering the entire apple slice {front and back} with the caramel, but as the caramel dried, the water from the apple caused the caramel to melt off the back of the apple while it was drying on a wax paper-lined cookie sheet. I quickly realized that only the front of the apple could be covered with caramel and it was going to have to be a “quick turn around” treat.
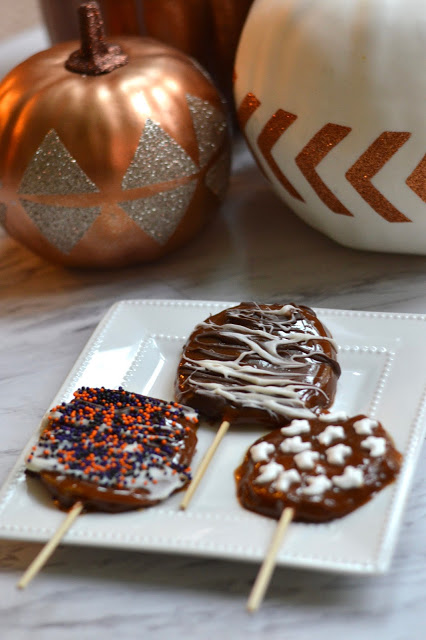
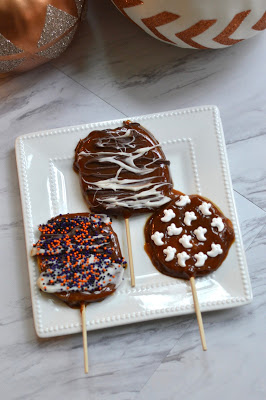
If I were to make these again, I would probably dip the entire apple slice in the milk or white chocolate and then drizzle the apple with the caramel. I think the chocolate would harden and keep the apple better enclosed. Regardless, they came out cute and were fun to decorate with Halloween sprinkles {I used THESE}.
**Now for the caramel! When I was younger, I remember baking with my mom and having to unwrap all the Werther’s caramels and then melting them. But, THESE caramel bites are easy to melt and they are wrapper-free. Best. Invention. Ever.**
Halloween Caramel Apple Pops
Ingredients
- 2 Granny Smith apples, sliced
- 11 ounce package Caramel bits
- 1/4 cup White chocolate, melted
- 1/4 cup Milk chocolate, melted
- Sprinkles for decorating, if desired
- Wooded sticks
- Non-stick cooking spray
Instructions
Wash and dry the apples well. Place a piece of wax paper on a baking dish and spray it with non-stick cooking spray Cut into about 1/2 inch slices and place the wooded sticks in the apple. Melt the caramel bits according to package instructions. Once the caramel has melted, dip the apples into the caramel, only covering one side. Place apples on wax paper to dry and, if using sprinkles, put them on now before the caramel hardens. If using chocolate: once the caramel is dry, melt the chocolate and drizzle on the apple with a fork. Use a toothpick to spread the chocolate around or to create a design. Serve caramel apples immediately.
For more Halloween recipes, see last year’s spooky ghost cupcakes post HERE and a creepy dark and stormy cocktail HERE.
Thanks for dropping by! Have a great Tuesday, friends!
….
This post is linked up with: Tasty Tuesdays | Tickle My Tastebuds Tuesday | Two Cup Tuesday | Weekend Potluck | SITS Girls | Diary of a Real Housewife
Thanks for dropping by! Have a great Tuesday, friends!
….
This post is linked up with: Tasty Tuesdays | Tickle My Tastebuds Tuesday | Two Cup Tuesday | Weekend Potluck | SITS Girls | Diary of a Real Housewife




These look divine…I love caramel!
I like these way more than the full caramel apples!! I love that you can change out the design like you said to make it through the rest of the season! xo, Biana –BlovedBoston
Mmmmm, looks delicious!!! Those Kraft caramel bits are the best, I just got three bags as they were on sale for 97 cents each. Caramel and apples have my heart big time, lol!!!
Oh YUM! And I love your sparkly pumpkins!
x0x0 Caroline http://thecarolove.com/
Oh yummy! This looks / sounds so good!
moorizZLA xx
Wow… dese all look so delicious…great post n lovely photography…xoxo, Neha
http://www.theinstylejournal.com/
Sooo yummy- and definitely easier to melt sans wrapper! 🙂
-Ashley
Le Stylo Rouge
Such a creative idea to save costs! Thanks for sharing 🙂
https://anaturellecraving.blogspot.my
Yum! How fun are these! What a great weekend project. I can't wait to try these.
xo, Whitney and Blaire
Peaches In A Pod
Yummy! These really are the perfect treats for Halloween because they're pops, but I would seriously eat these all the time! They look and sound so good!
It looks delicious! I love sweets! 🙂
http://hairandvibes.blogspot.com
My gosh…these look SO darn good! I am not a fan of the BIG caramel apples, because they are SO hard to bite into. So I guess in a way, I'm scared of them tool. Haha! These would be so much easier to eat!
xo, Lily
Beauty With Lily
Omg, how delicious is this!? You seriously always share the most delicious and creative recipes, I'll have to try this! Thanks so much for sharing, gorgeous, and I hope you're having the most amazing start to your week so far!
XO,
Jalisa
http://www.thestylecontour.com
Omg this is the cutest idea and it looks amazing! I never thought to slice an apple for caramel apples! Such a good idea and so much easier to eat!
<3 Shannon
Upbeat Soles
What a great idea to do slices! I love whole caramel apples but they are difficult to eat and they're too big!
Tina
http://www.justatinabit.com
Wow ! This looks so delicious and i really love caramel.
Many kisses
Marie
http://www.whatiwearinlondon.com
These look DELISH and lol at fear of losing a tooth – I'm right there with you! Such a great idea, still all the fun and yumminess without ruining our teeth!
Green Fashionista