Easy Frozen Dessert for Summer

three-ingredient-chocolate-almond-pie
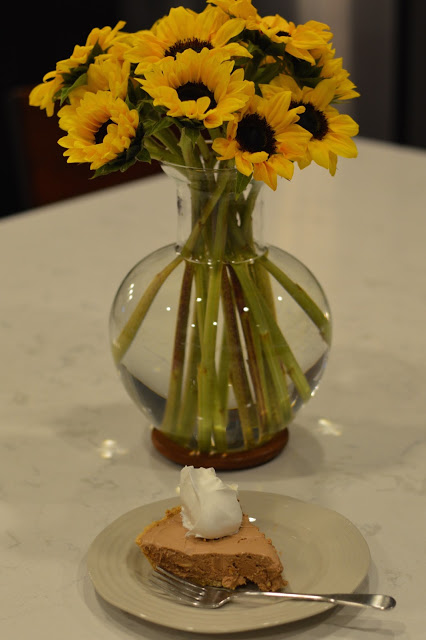
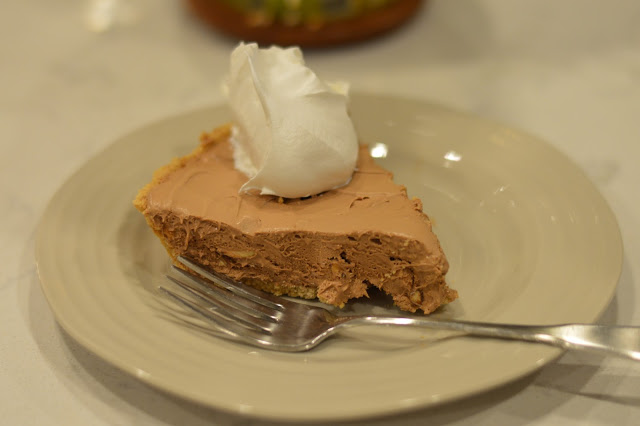
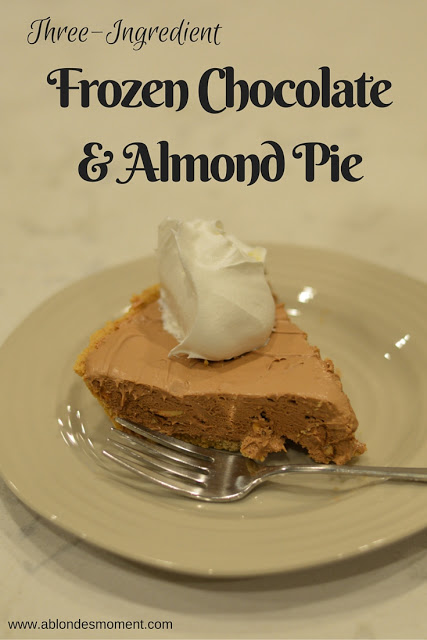
It’s not often that I crave desserts. Don’t get me wrong, I don’t mind them every so often, but generally, I don’t have a major “sweet tooth”. But, when it comes to this Chocolate Almond Pie, I’m pretty sure I could eat the entire pie in one sitting, by myself…it’s that good.

I’ve always been a fan of the Hershey’s almond bar, the combination of chocolate and nuts is just so good! My mom has been making this pie for years and it is probably one of my favorite desserts ever. And it’s ridiculously easy to make with only three ingredients!

The best part is that upon taking the first bite of this deliciously creamy pie, you will have no idea it has only three ingredients. It seems way more fancy than that! If you aren’t a fan of the almonds, you can also easily use the regular Hershey’s chocolate bars instead. Check out the recipe below. These are the measurements we use, but you can adjust the chocolate to less or more depending on how much you like chocolate 😉

easy-summer-dessert

hersheys-chocolate-pie-recipe

easy-summer-dessert-recipe

cool-whip-pie-recipe

cool-whip-chocolate-pie-recipe

chocolate-cool-whip-pie

frozen-pie-recipe

easy-dessert-recipe

easy-summer-dessert-recipe

print recipe

Three-Ingredient Frozen Chocolate & Almond Pie
A no-bake, three-ingredient pie that is the perfect dessert for summer!
Ingredients
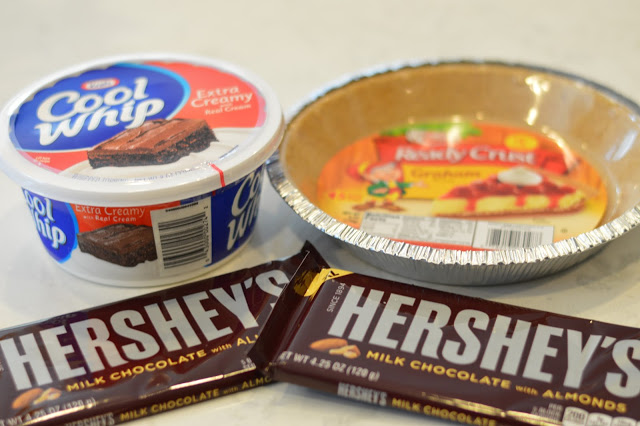
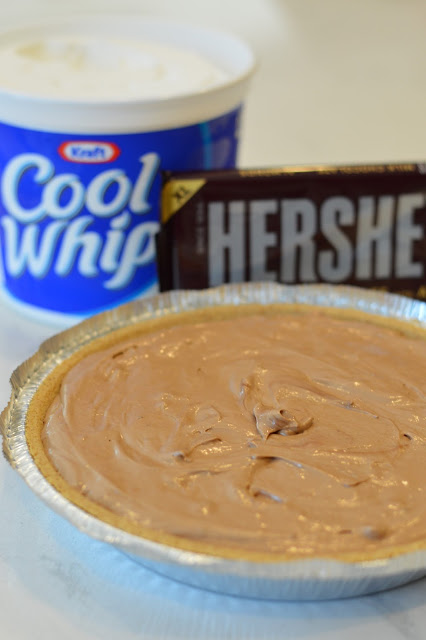
  • 12 ounces Cool Whip, additional for serving if desired
  • 7 ounces Hershey’s Milk Chocolate with Almonds
  • 1 Keebler Ready Crust 10 inch Graham Pie Crust
Instructions
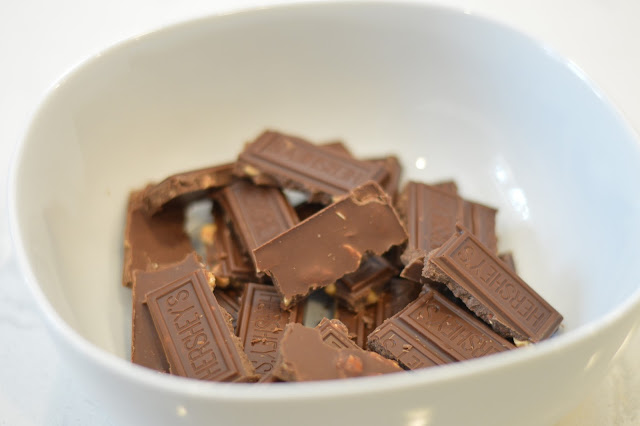
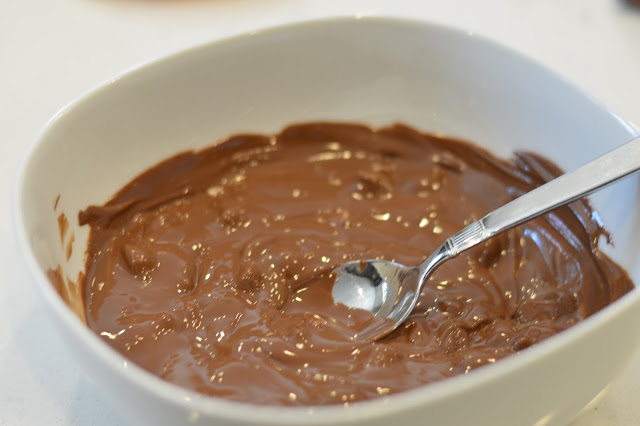
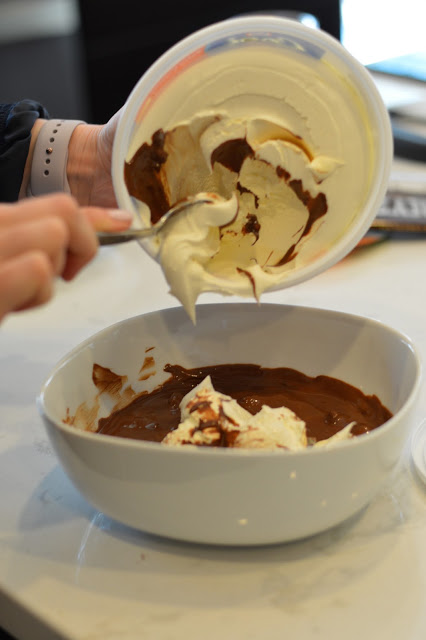
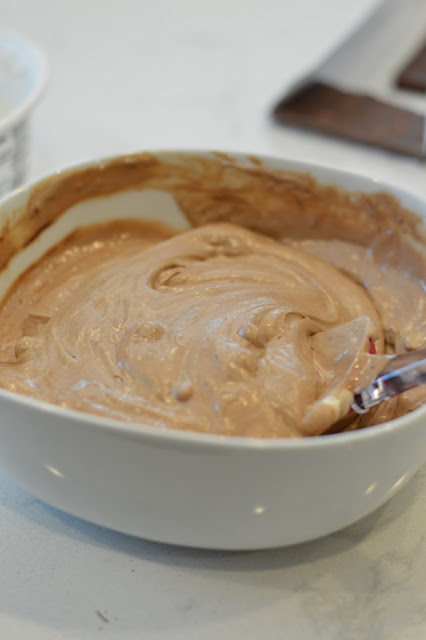
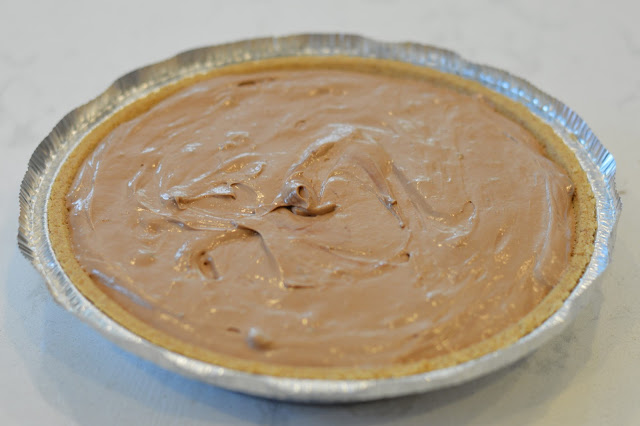
Place the chocolate that has been broken into smaller pieces in a microwave safe bowl. Microwave on high for 45 seconds, stir the chocolate and microwave in additional 15 second intervals until completely melted and smooth. In a large bowl, combine the Cool Whip and melted chocolate, mixing until combined. Pour the Cool Whip mixture into the graham cracker crust, making sure the top of the pie is smooth. Place the lid on the pie and freeze overnight or until set. Serve with an additional dollop of Cool Whip, if desired.
Yield: 1 10″ pie

Ragu Traditions: Chicken Parmesan Meatballs
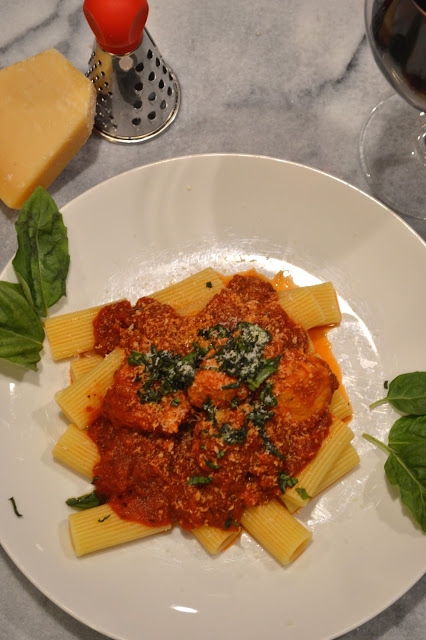
chicken-parmesan-meatballs-recipe
Every family has traditions when it comes to food. For me, it was very rare that we did not sit down as a family for dinner each night growing up. Now, with busy lifestyles, family dinner time seems to be a thing of the past. And although we do not have kids yet, my husband and I make it a point to sit together nearly every night for dinner, no matter what our schedules entail. Full disclosure: I am typically not making a “from scratch” meal each night. With both of our hectic calendars, I am constantly trying to come up with quick recipes and shortcuts to cut down on my time in the kitchen.
If you have not noticed by now, my love for pasta goes pretty deep — I usually try to incorporate a pasta dish at least once into our weekly menu. Since making a batch of homemade sauce on a weeknight is not an option, you can usually find me in the pasta sauce aisle searching for a sauce that has that homestyle flavor in a jar.

Read More

Freezable Egg White Sandwiches

freezable-egg-sandwich
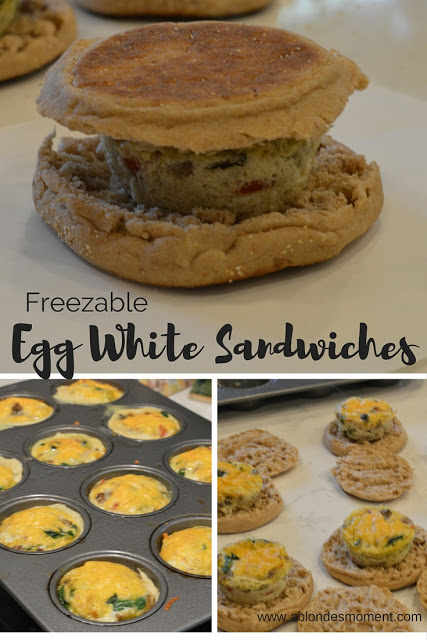
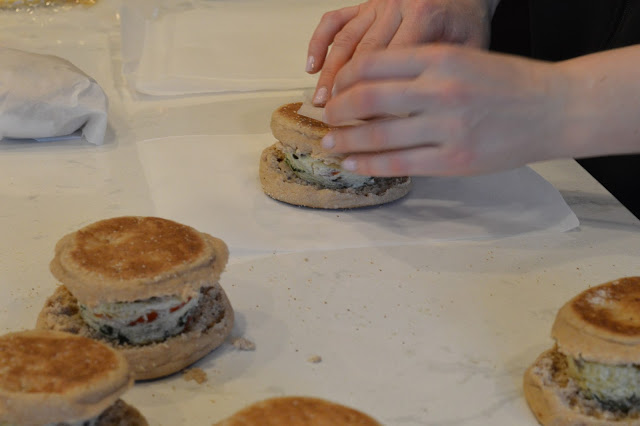
Happy Tuesday! As promised, I’m back with another freezable, make ahead breakfast that’s perfect for a hectic schedule! {see more make ahead breakfast ideas HERE & HERE} Egg white breakfast sandwiches are one of my favorite weekend breakfast choices. But, taking the time to sauté the vegetables, scramble the eggs and assemble the sandwiches — there just isn’t enough time on a weekday! 

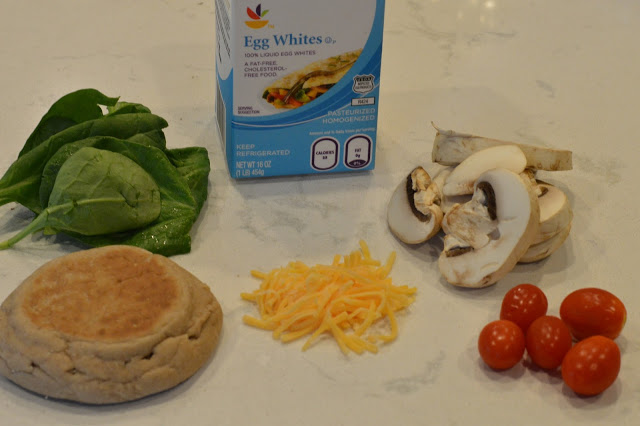
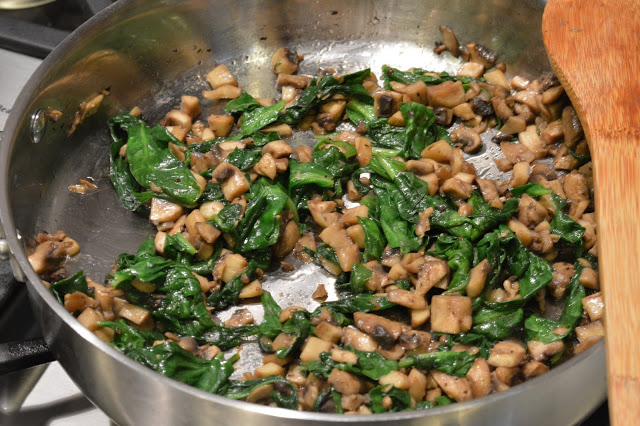
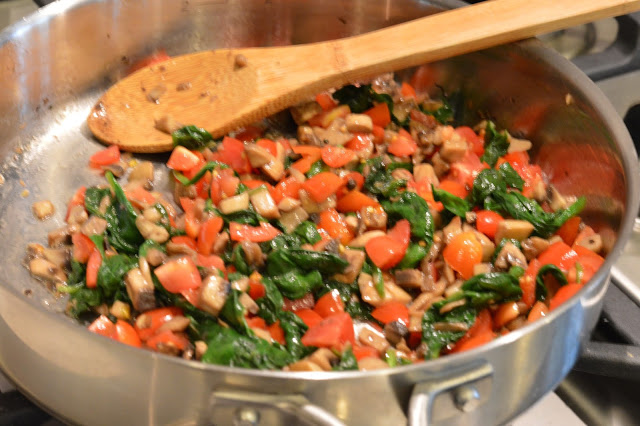
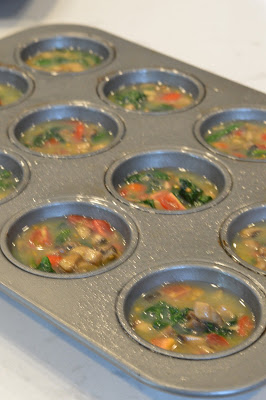
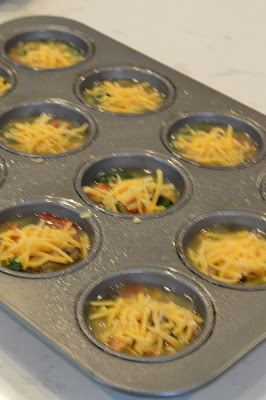
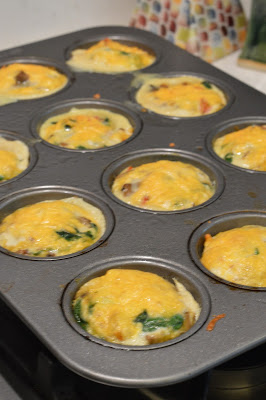
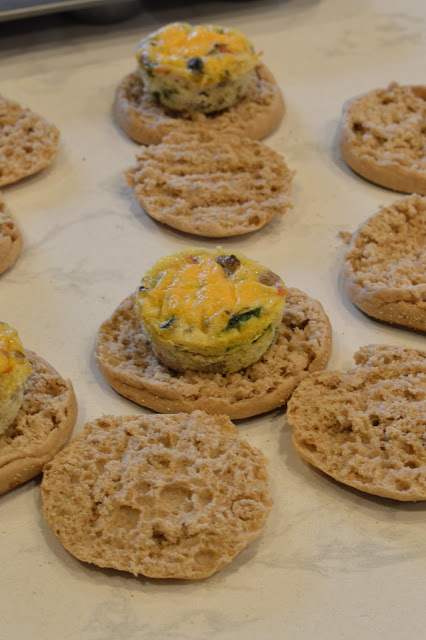
I made these egg white cups with a cupcake pan the other week and they are a great size for English muffins. Although, if you prefer toast, bagel, or without bread, that works too! I used tomatoes, spinach and mushrooms in my egg white cups, but you can add any ingredients you like! Pop these breakfast sandwiches in the microwave and hit the road. Such an easy and healthy breakfast on the go! Check out the recipe below!
make-ahead-breakfast-ideas

egg-white-muffin-cups

breakfast-sandwich-recipe

egg-white-breakfast-sandwich-recipehow-to-make-egg-in-muffin-pan

egg-white-in-muffin-tin-recipehow-to-make-egg-white-muffin-pan

freezable-breakfast-recipes

how-to-freeze-egg-sandwiches

make-ahead-breakfast-sandwich-recipe

freezable-breakfast-ideas
Freezable Egg White Sandwiches

{what you will need}
16 ounces liquid egg whites {or egg beaters}
8 ounces fresh mushrooms
4-6 ounces fresh spinach {about 3/4 of the bag}
1/2 pint grape tomatoes, quartered
Shredded cheddar cheese
English muffins
Olive oil
Salt and pepper, to taste 
Cooking spray

{directions}
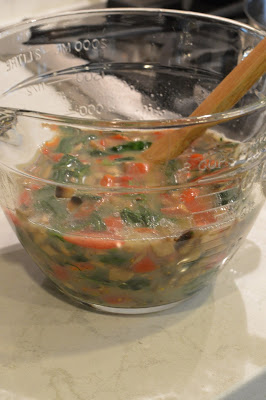
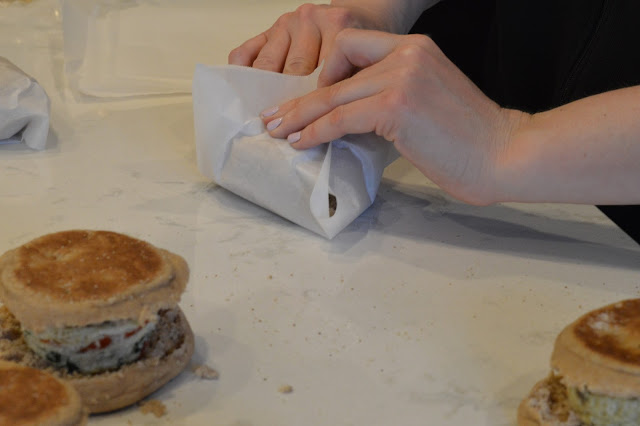
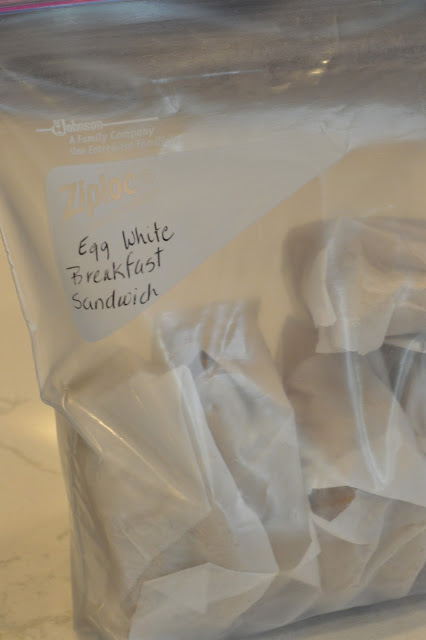
Preheat oven to 350 degrees. In a medium skillet, heat about 2 tablespoons olive oil over medium heat. Sauté the mushrooms and tomatoes until soft and the liquid has evaporated, about 6-8 minutes; transfer to clean bowl. In the same skillet, add 1-2 tablespoons olive oil and sauté the spinach until just wilted, about 2 minutes. Allow the vegetables to cool completely. Pour the egg whites {or egg beaters} into a large bowl and add the cooled vegetables and season with salt and pepper; mix to combine. Spray a muffin tin with cooking spray. Fill each muffin cup about 3/4 full of the egg white mixture. Top with about 1/2 tablespoon of cheddar cheese on each muffin. Bake for 15 to 20 minutes, or until just set. Allow to cool before assembling sandwiches. Place each egg white cup on an English muffin and wrap the sandwich in wax paper and place in a freezer bag and in the freezer. To reheat: remove the egg sandwich from the wax paper and place on a microwave-safe plate with a clean paper towel. Microwave for about 1 to 1 1/2 minutes, or until the egg is warm and heated through. Enjoy!

Print Recipe HERE

….

Thanks for stopping by and see you tomorrow!

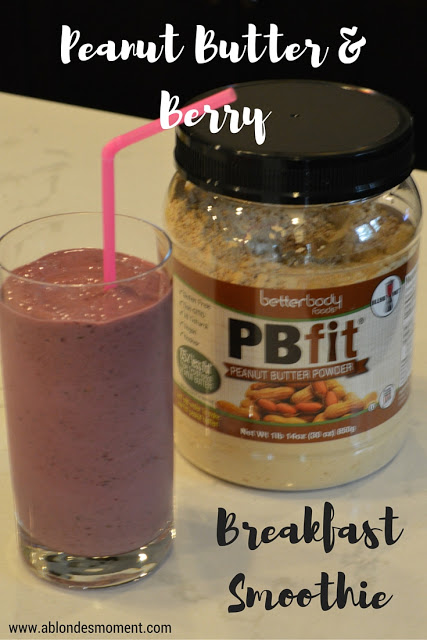
Peanut Butter & Berry Breakfast Smoothie

peanut-butter-berry-smoothie
Happy Tuesday! I’m back with another healthy breakfast or snack idea {see my oatmeal bites from a few weeks ago HERE} and stay tuned, I have another make ahead breakfast idea coming up that you won’t want to miss!

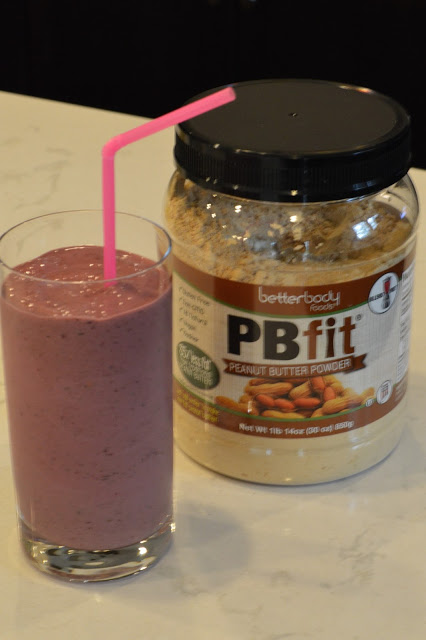
You may remember several weeks ago, we took Ella to Rehoboth Beach for her birthday {you can read that post HERE} and I found the most delicious “Healthy Elvis” smoothie. You also may recall my description of the smoothie: a peanut butter milkshake that’s actually healthy! Well, for the past few weeks, I’ve been craving that smoothie, so I decided to {attempt!} to recreate it. And although this smoothie was delicious and super healthy, it didn’t quite taste like the “Healthy Elvis.” I will keep tweaking the recipe to get something closer to the “healthy peanut butter milkshake” but in the meantime, I wanted to share this “mistake smoothie” that turned out not only to be yummy, but filling — making it the perfect breakfast in the car or afternoon snack. 

easy-smoothie-recipe

healthy-smoothie-recipe

berry-smoothie-recipe

smoothie-with-powdered-peanut-butter-recipe
Peanut Butter & Berry Breakfast Smoothie

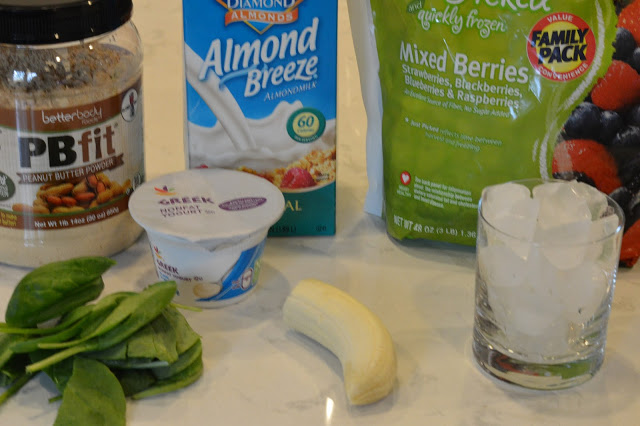
{what you will need}
1 small container non-fat plain Greek yogurt {about 5-6 ounces}
1 cup frozen berries {I used mixed berries}
1/2 fresh banana
2 tablespoons powdered peanut butter {I used PB fit}
1/2 cup milk {I used almond milk}
Handful of spinach
Handful of ice cubes

{directions}
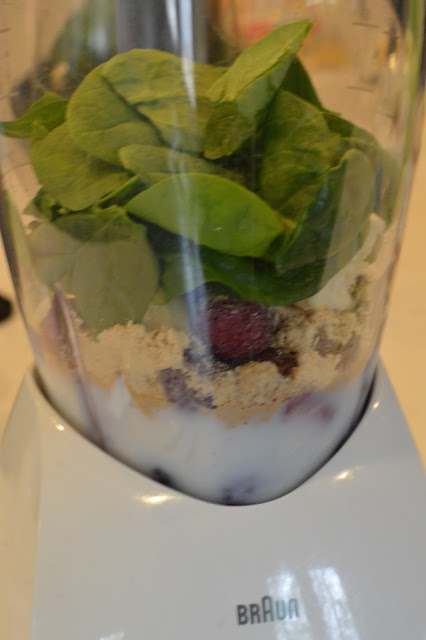
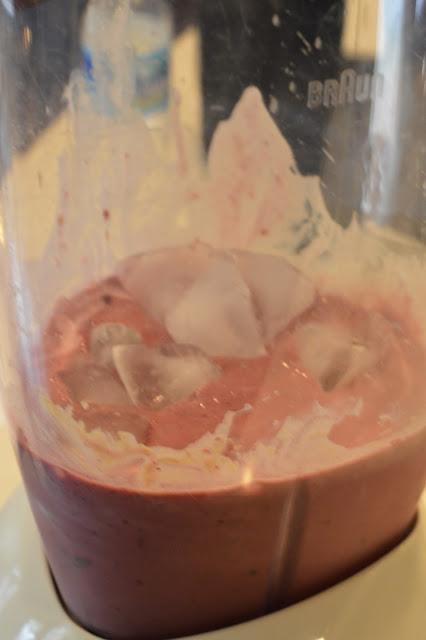
In a blender, place the ingredients in the following order {starting at the bottom}: milk, powdered peanut butter, frozen berries, Greek yogurt, banana, ice cubes and spinach. Blend until completely mixed and serve immediately. 


Print Recipe HERE

….

There is definitely a strong peanut butter taste, but not enough to give the smoothie that taste of a creamy peanut butter milkshake. I’m going to keep working with the ratios and I will report back if I can find a way to recreate that delicious smoothie from Rehoboth Beach. In the meantime, this smoothie will definitely satisfy and keep you full all morning — I’m always looking for breakfasts like that! 

Thanks for dropping by and see you tomorrow for an all new Wednesday Wishes!

Summer Salad: Roasted Beets with Feta & Lemon Juice

roasted-beet-salad-recipe
Beets. Growing up, I could not even stand the sight of this vegetable. I would always get so upset when my mom made these for dinner and refused to eat them! Looking back, you think I would have tolerated them because of that pretty pink/purple color, right?!

Needless to say, my palette has changed quite a bit since I was 8 and now I actually look forward to coming up with new ways to enjoy this healthy vegetable. If you have been following along for awhile, you may have seen THIS recipe from last summer when I combined beets with risotto for a healthy, delicious and quite colorful dish. 

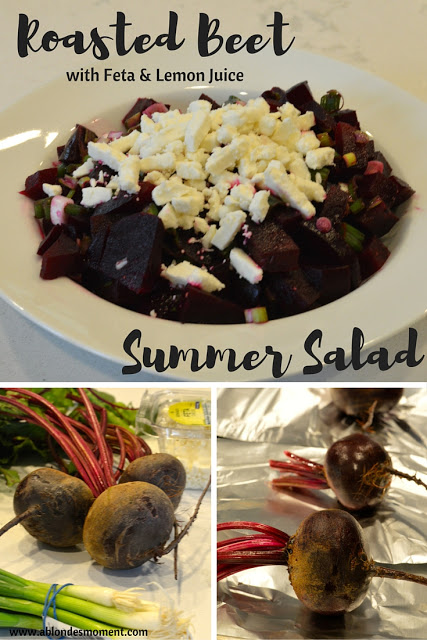
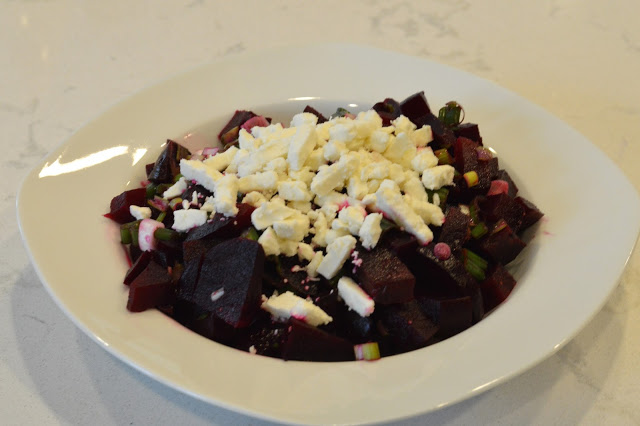
If you haven’t been able to tell from my last few posts, I’m ready for the warm weather to arrive here in Virginia. I love that with the warm weather also comes more seasonally-available vegetables, new recipes and new ways to cook the food, ie. the grill! This roasted beet with feta and lemon juice is the perfect salad or side dish for the summer months. And it’s SO simple! With only a few ingredients, this side dish can come together quickly making it ideal for summer cookouts.
roasted-beet-feta-recipe
roasted-beet-recipeshow-to-roast-beets

roasted-beet-summer-salad-recipe

Roasted Beets with Feta & Lemon Juice


{what you will need}

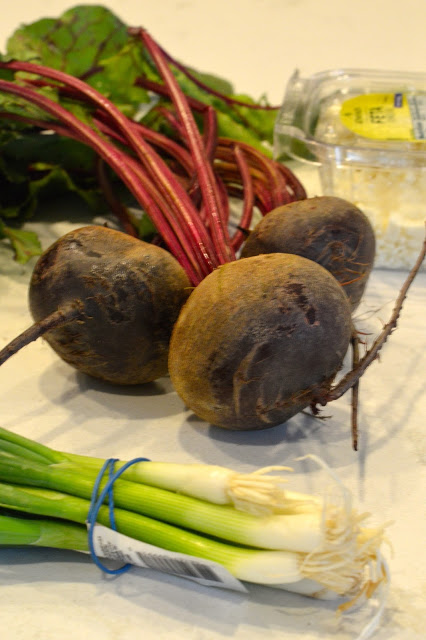
3 red beets {you could also use golden beets}
4 green onions, chopped
Juice from 1/2 lemon
Feta cheese for topping {I used low fat}

{directions}
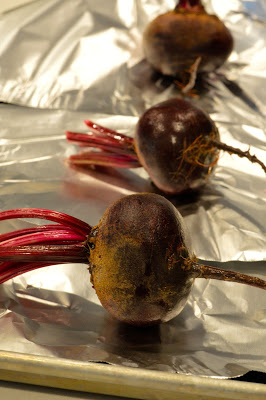
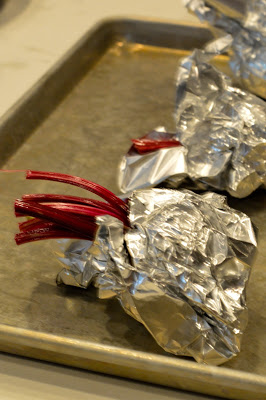
Preheat the oven to 400 degrees. Wash the beets and trim the stem leaving only enough stem for you to hold on to. Wrap each beet individually in foil and place on a baking sheet. Roast for 1 hour. Remove from the oven and allow the beets to cool. Once cool, peel the beets with your fingers {the skin should practically fall off after roasting for this long} and cut into 1/2 inch pieces. Transfer to medium-sized bowl. Add the green onions and lemon juice and stir to incorporate. Season with salt and pepper, if desired. Top with feta cheese and serve cold or at room temperature. Serves 2.

**Note: 3 beets really don’t make a lot! If you are making this as a side dish for more than 2 people, I would suggest doubling or even tripling the recipe!

PRINT RECIPE HERE

….

Thanks for dropping by and happy cooking!

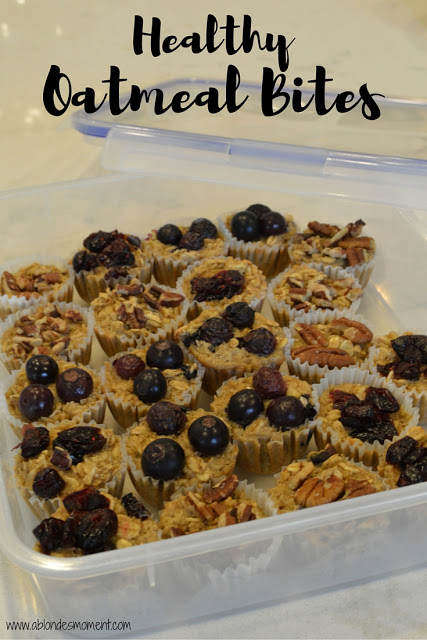
Healthy Oatmeal Bites

healthy-oatmeal-bites
Happy Tuesday! I’m back with another healthy food post that’s perfect for breakfast or a snack. Oatmeal is one of my favorite breakfasts — it’s delicious, easy to customize and keeps you full almost all day! And these oatmeal bites are even more delicious than your regular microwave version. I used a mini muffin to make these into “bite sized” — they can double as a breakfast or even a mid-day snack to take to work! You could easily use a regular sized muffin pan if you want them strictly for breakfast, or just a bigger snack!
oatmeal-bites-recipe

healthy-oatmeal-recipe

oatmeal-breakfast-cupcake-tin
Healthy Oatmeal Bites

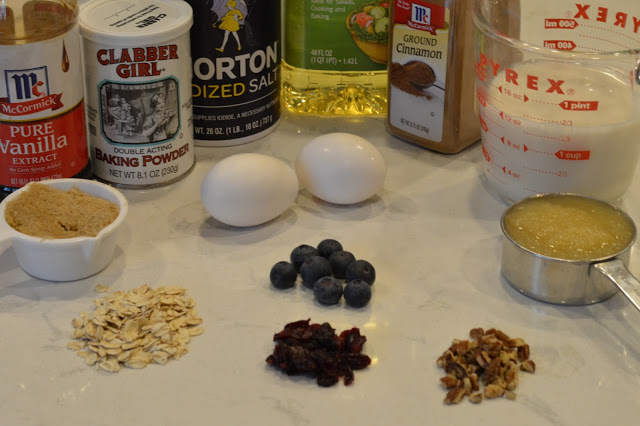
{what you will need}
3 cups old fashioned oats
1 1/2 cups almond milk
1/2 cup applesauce
1/3 cup brown sugar
2 eggs
1 teaspoon cinnamon
2 teaspoons baking powder
2 teaspoons vanilla extract
1/2 teaspoon salt
1/4 cup canola oil
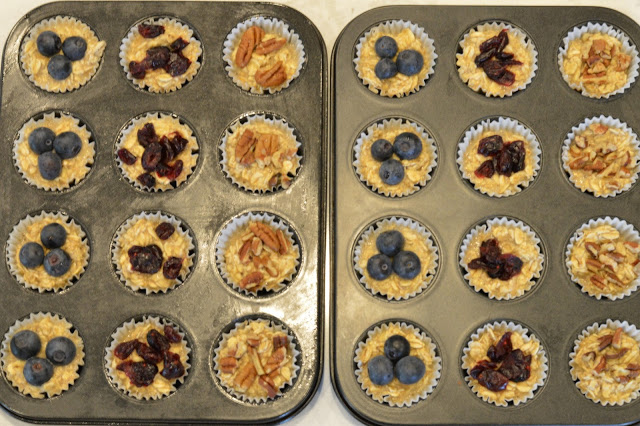
Toppings of choice {I used fresh blueberries, dried cranberries and pecans}

{directions}
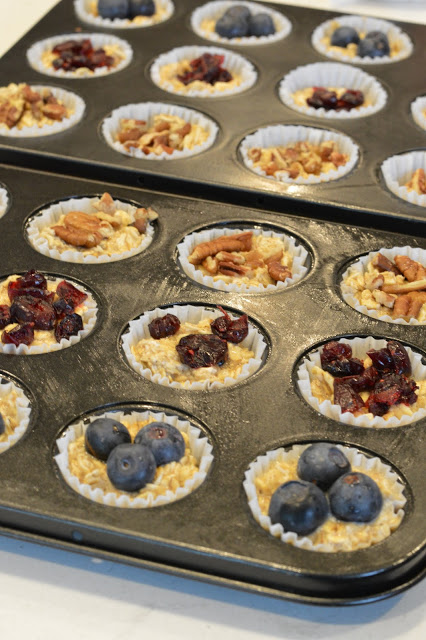
Preheat the oven to 350 degrees. Line muffin tin with cupcake wrappers. In a large bowl, whisk the eggs, oil and brown sugar until dissolved. Add the applesauce, milk, vanilla, salt and cinnamon; whisk until combined. Stir in the oats and baking powder. Fill the muffin tins with 1/4 cup of the mixture. Add toppings of your choice, pushing down the toppings into the mixture with the back of a spoon. Bake for 30 minutes. Cool for about 10 minutes before serving. Oatmeal bites can be frozen for up to 6 months; thaw to enjoy. Makes 24 mini bites, 12 regular sized muffins.


….

Thanks for dropping by! Check back tomorrow for an all new Wednesday Wishes!

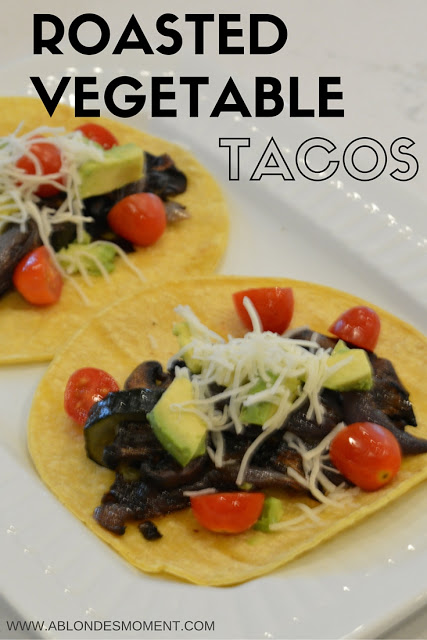
Roasted Vegetable Tacos

roasted-vegetable-taco
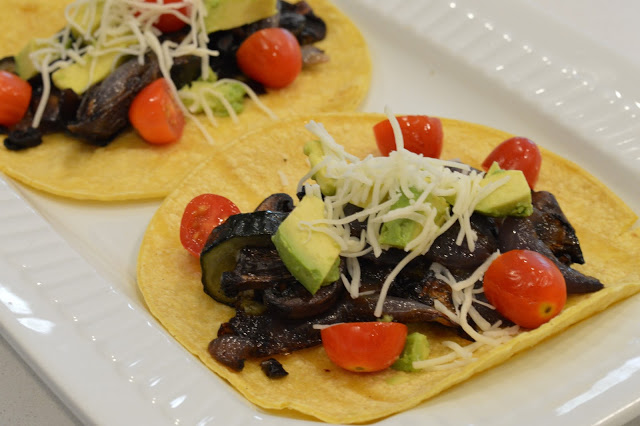
With Cinco de Mayo coming up on Thursday, I wanted to share with you a delicious, healthy and easy taco recipe that will even satisfy the meat-lovers in your life! 

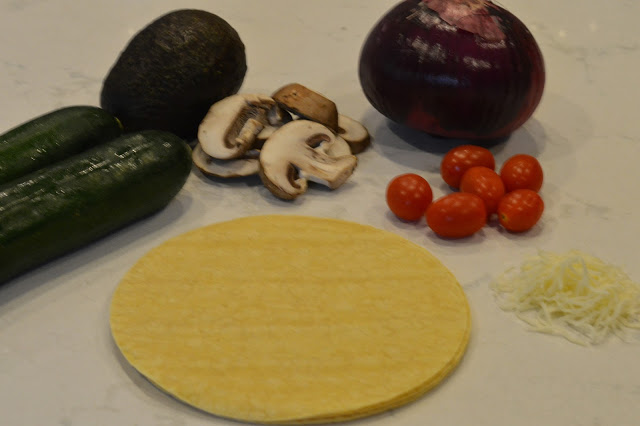
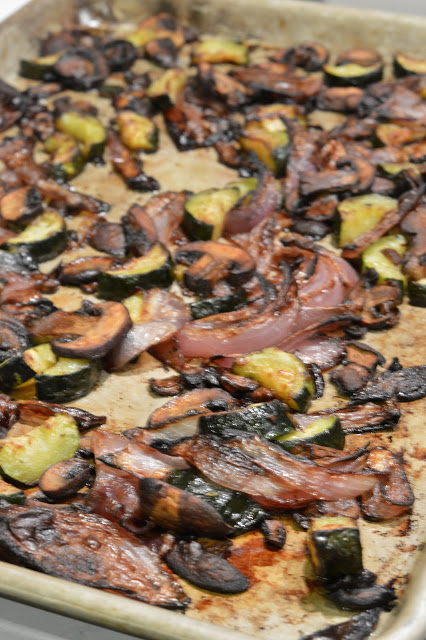
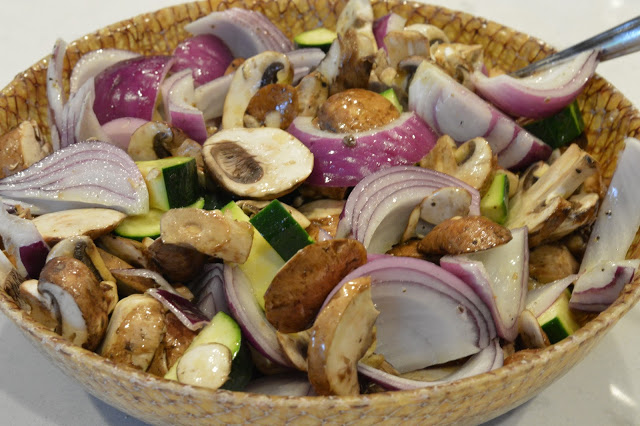
Admittedly, I’m not a huge fan of meat. But, I know that my husband is so I’ve been trying to come up with hearty vegetarian dishes that don’t make him miss the meat. Portabella mushrooms can be a great substitute for meat because they are thick and meaty, just like a steak. Well, maybe not just like a steak, but you get the idea 😉 And when you roasted vegetables like these {I used the portabella mushrooms, red onion and zucchini} and season them with your favorite seasoning {cumin, chili powder or just salt and pepper} it really takes on the flavors of a piece of meat, but much healthier!
taco-recipe-cinco-de-mayo

roasted-vegetable-recipe

how-to-roast-vegetables

avocado-recipe-ideas

vegetarian-taco-recipe

Roasted Vegetable Tacos


{what you will need} 

16 ounces portabella mushrooms {I bought the ones that are already sliced}
2 zucchini, chopped
1 red onion, sliced
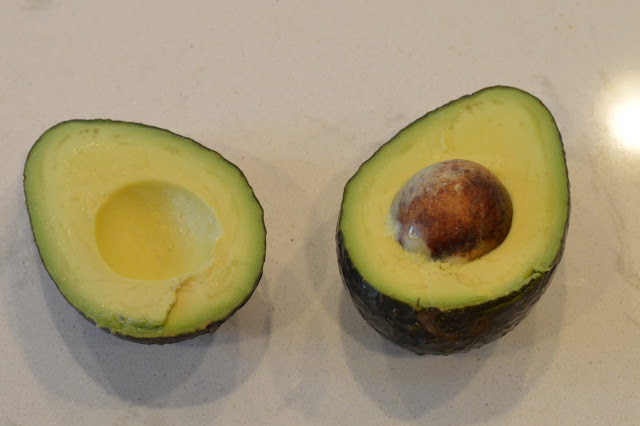
1 avocado, diced
1 pint cherry tomatoes, halved
shredded Monterey Jack cheese, for garnish
Tortillas {I used corn}
Spices of choice {cumin, chili powder, salt and pepper, etc…}
2-3 tablespoons olive oil
Any other taco toppings you desire

{directions}
Preheat the oven to 450 degrees. Add the portabella mushrooms, zucchini and red onion to a large bowl and mix with olive oil and spices of choice. Transfer vegetable mixture to rimmed baking dish that has been lightly coated with cooking spray. Roasted for 20-25 minutes, stirring the vegetables at least two times. Meanwhile, wrap the tortillas in foil and place in the oven for about 5 minutes to warm. To assemble tacos: add the roasted vegetable mix and top with the cherry tomatoes, avocado and cheese, if desired. Makes about 6 tacos. 


….

Here are a few of my other favorite Mexican dishes to celebrate Cinco de Mayo:


….

Thanks for stopping by and Happy Cinco de Mayo cooking!

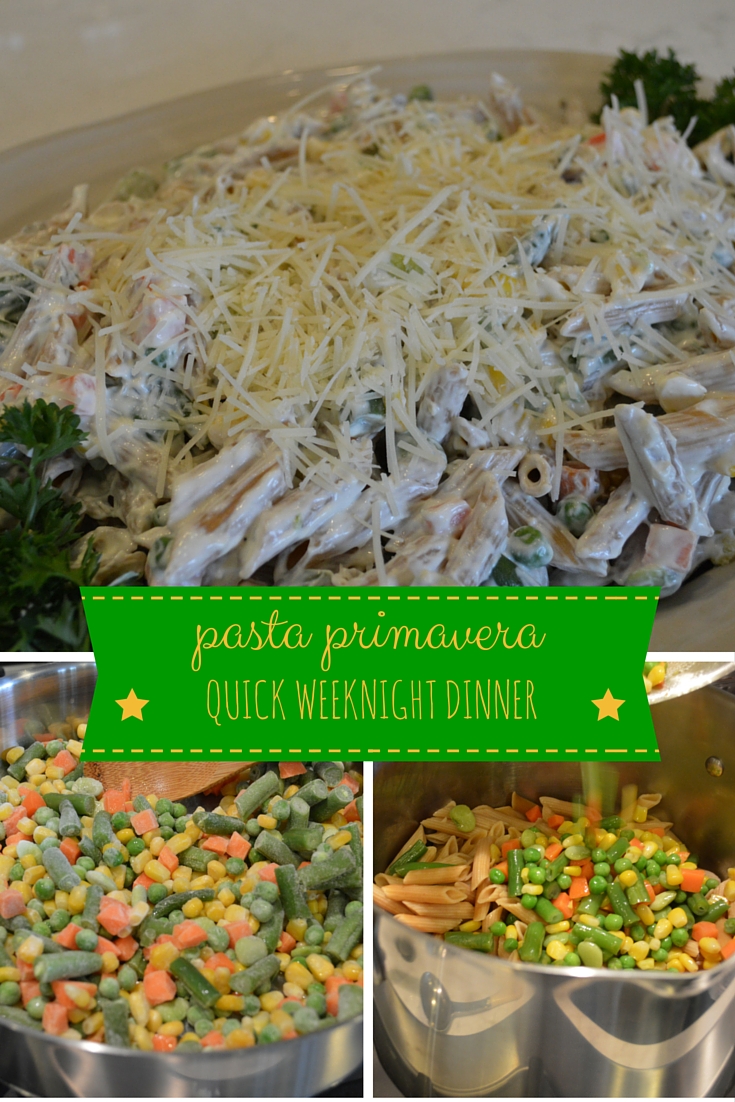
Weeknight Dinner: Pasta Primavera

weeknight dinner pasta primavera
The weekly dilemma: what to make for dinner. I don’t know about you, but I struggle with this question every week when it’s time to make the grocery list. Trying to come up with a healthy, delicious and quick dinner every night of the week is definitely not easy, so today I wanted to share with you my latest quick and easy weeknight meal: pasta primavera!

Read More

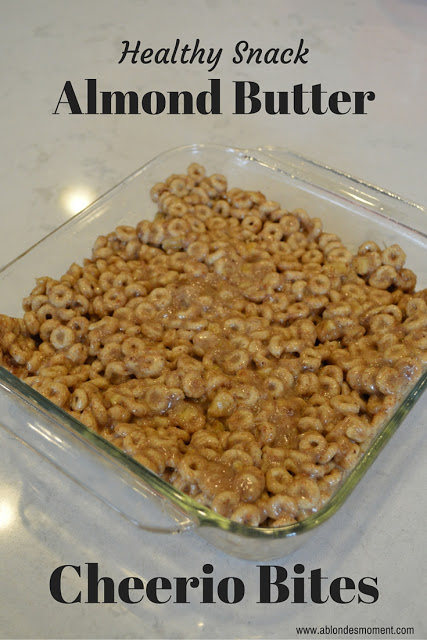
healthy snack: almond butter cheerio bites

almond-butter-cheerio-bites

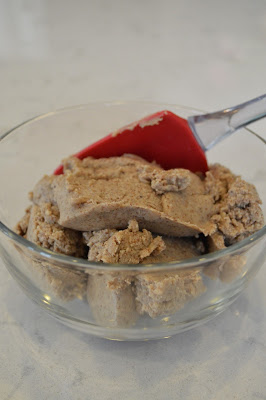
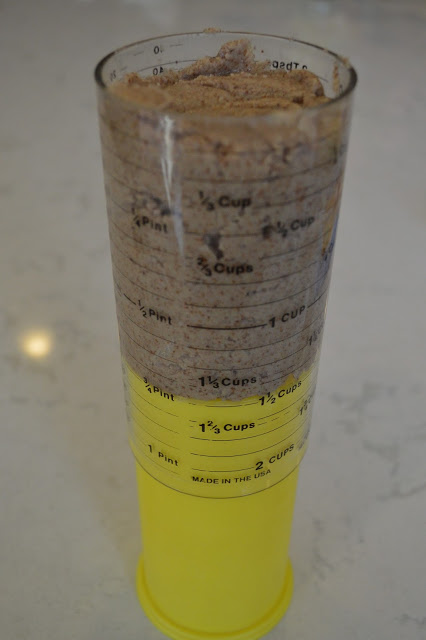
I’m sure by now you have caught on to my obsession with peanut butter {exhibit A, exhibit B}. But, as much as I love peanut butter, it can be pretty high in calories. Over the past year or so, I have really been loving almond butter, too. Although, I do not love the price! A few months ago, I decided I was going to try to make almond butter myself. I mean, all you need are almonds and a food processor! Much to my surprise {I was pretty worried for the first two minutes watching the almonds and how they were NOT transforming into a creamy texture — just give it time, it eventually will!} it was easy, delicious and super cost effective!

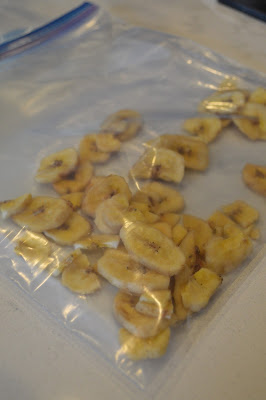
One of my favorite snacks growing up were peanut butter Cheerio bars. My mom made them for most tennis matches throughout high school and college — they were definitely a crowd favorite! A few weeks ago, I was thinking about these delicious snacks and thought I would recreate this famous recipe with almond butter instead of peanut butter. To make it a little healthier, I also used honey as the sweetener {instead of sugar} and added the banana chips for an added crunch. I have been snacking on these yummy treats for breakfast and/or {mostly just and} lunch for the last few weeks, and let me tell you, they are so addicting! So if you are looking for an anytime of the day, healthy snack, try this easy recipe — the hardest part is making the almond butter! 🙂

homemade-almond-butter-recipealmond-butter-energy-bites

 how-to-make-almond-butter

cheerio-energy-snacks

almond-butter-energy-bites

almond-butter-banana-chip-recipealmond-butter-energy-recipe
 almond-butter-cheerio-recipe

how-to-replace-peanut-butter-for-almond-butter

almond-butter-cheerio-bites

Almond Butter Cheerio Bites


{what you will need}

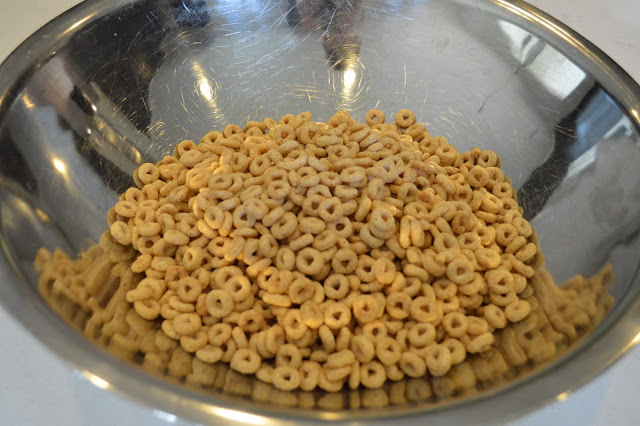
6 cups Cheerios
1 cup Karo
1/2 – 3/4 cup honey
2 8 ounce bag almonds {makes about 1 1/2 cup almond butter}
1/2 cup banana chips, crushed {more if desired}


{directions}
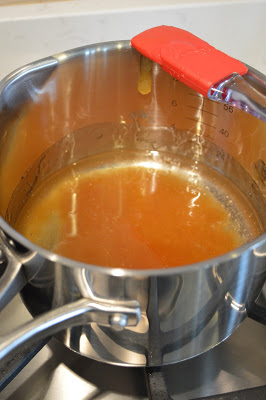
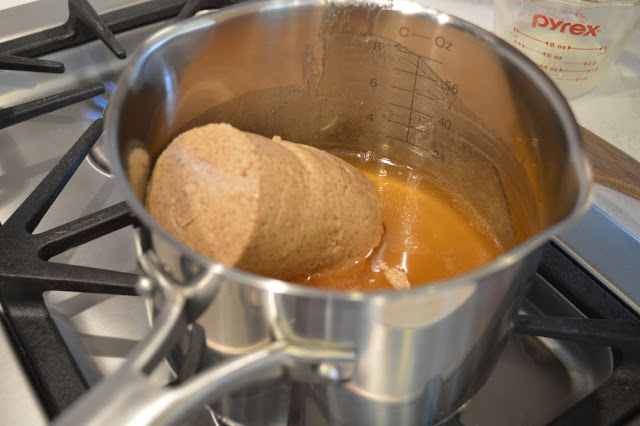
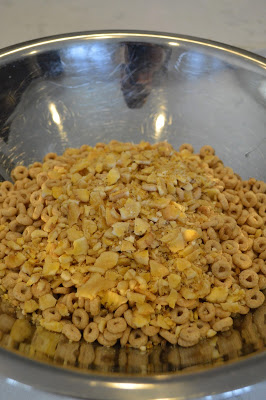
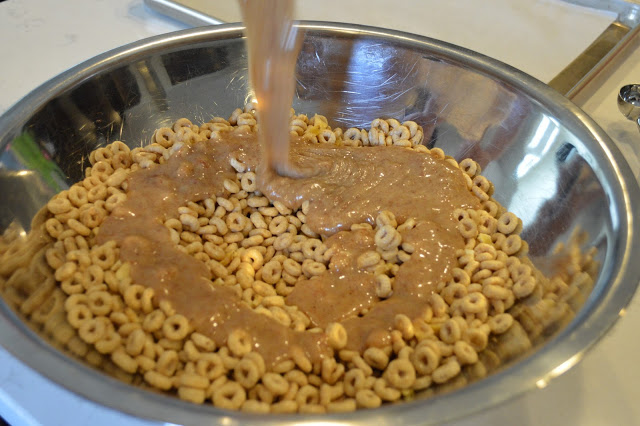
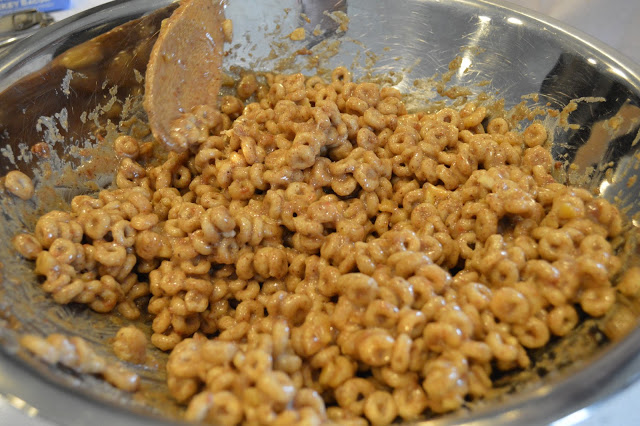
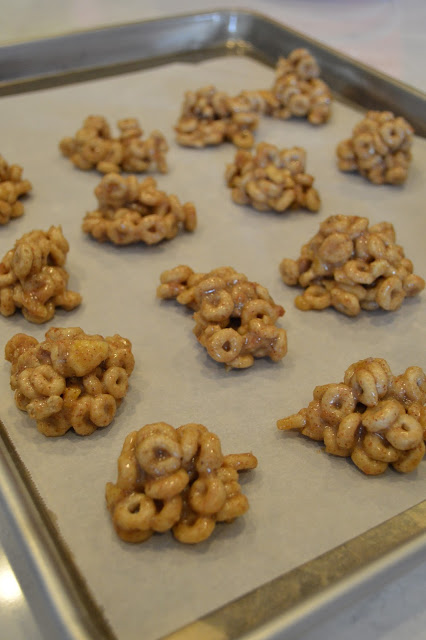
Begin by making the almond butter: place almonds in a food processor and allow to run for 8-10 minutes or until desired consistency is reached {you may need to stop the food processor to push the almonds down towards the blade every so often}. Once the almond butter is a smooth and creamy texture, measure out 1 1/2 cup {mine made exactly this amount}. Melt the Karo, honey and almond butter together in a small pan over low heat until completely combined. Meanwhile, place the Cheerios in a large bowl and add the crushed banana chips; combine completely. When the almond butter mixture is combined and melted, pour over the Cheerio mixture and mix together with a rubber spatula, working quickly because this is a pretty sticky mixture! Line a baking sheet with wax paper. Form the Cheerio bites into 1 tablespoon clusters and place on the wax paper. You can also place the Cheerio mixture into a greased pan and cut into bars/squares {as pictured at the top}. Place in the freezer for 30 minutes to set. Serve at room temperature and store in an air tight container for up to a week. 
Print Recipe HERE


….

Thanks for stopping by and have a great Tuesday!

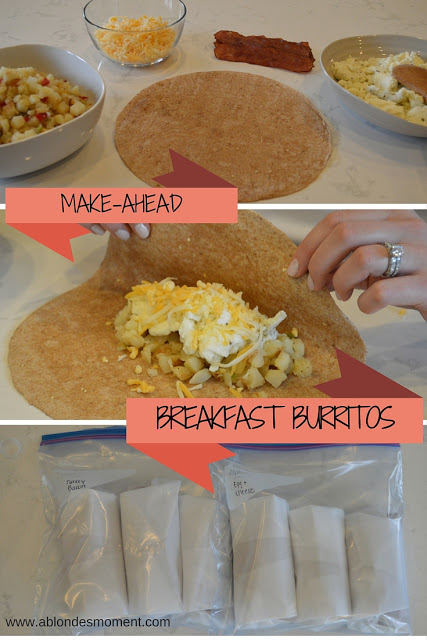
make-ahead breakfast burritos

make-ahead-breakfast-burritos

Last week, I shared a make-ahead lunch recipe for the work week {post HERE if you missed it} and this week, it’s all about a make-ahead breakfast idea! I don’t know about you, but my mornings can be pretty crazy. With lots to do in the morning before facing a long commute to work, anything that can simplify my morning routine is welcomed. 

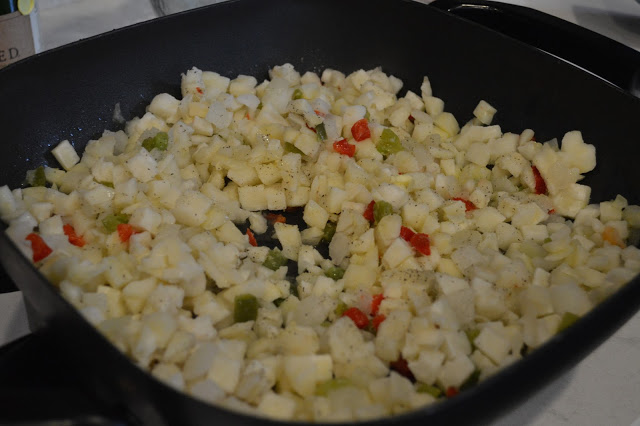
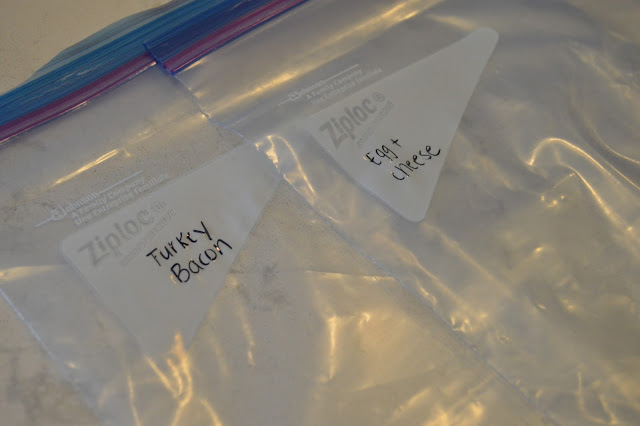
These, prepare in advance, keep in the freezer breakfast burritos are the perfect “grab and go” breakfast that you can even take and eat on the road. And the ingredients are totally up to you! I used breakfast potatoes, cheese and egg whites in each of the burritos and added turkey bacon for my husband for half of the burritos. Wrap the burritos in parchment paper and store in a freezer bag for up to 3 months, and when you are ready to eat one, just microwave it for 3 minutes and breakfast is done!

frozen-breakfast-burritos

make-ahead-breakfast-recipes

egg-white-breakfast-ideas

hashbrown-burrito-recipe

breakfast-meal-prepping

make-ahead-breakfast-burritos

healthy-breakfast-ideas

healthy-breakfast-burrito

make-ahead-breakfast-recipes

easy-breakfast-burrito

how-to-wrap-burrito

breakfast-burrito-recipe

how-to-wrap-breakfast-burrito

frozen-breakfast-recipes

frozen-breakfast-burrito-recipe
Breakfast Burritos

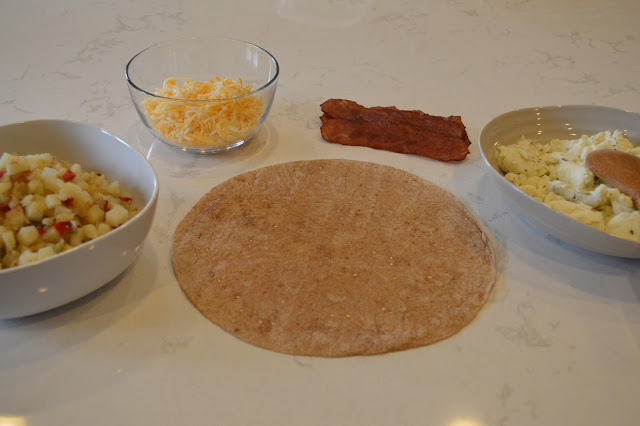
{what you will need} 
1 – 16 ounce container egg whites {I used Egg Beaters}
1 – 28 ounce bag frozen hash brown potatoes {I used the potatoes mixed with peppers & onions}
1 – 16 ounce bag shredded Mexican cheese
6 burrito size tortillas {I used whole wheat}
3-4 slices turkey bacon, more if desired
2 tablespoons olive oil
1 tablespoon butter
Cooking spray
Salt and pepper, to taste
2 freezer bags
Parchment paper

{directions}
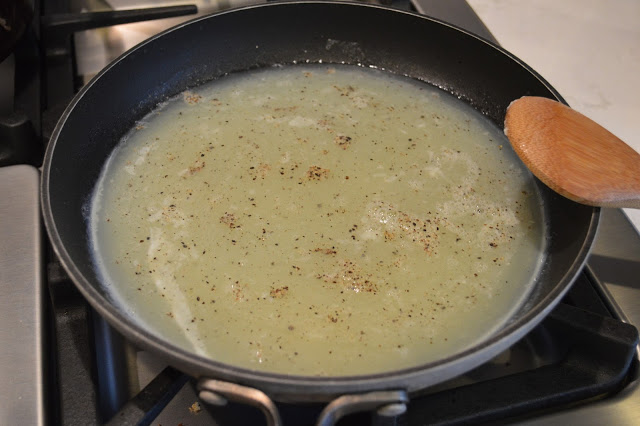
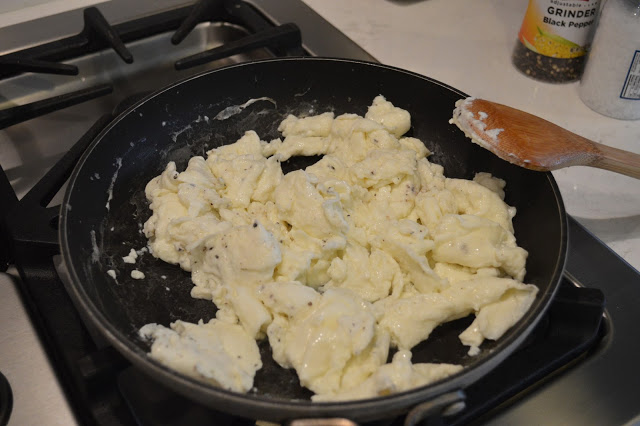
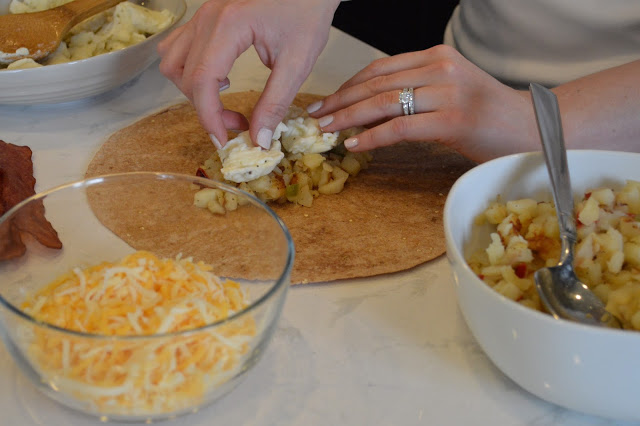
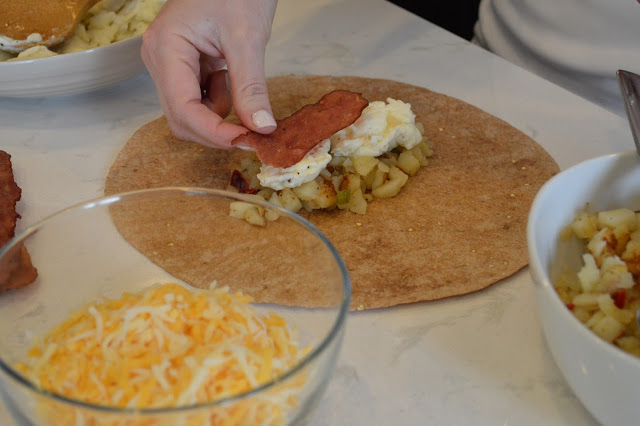
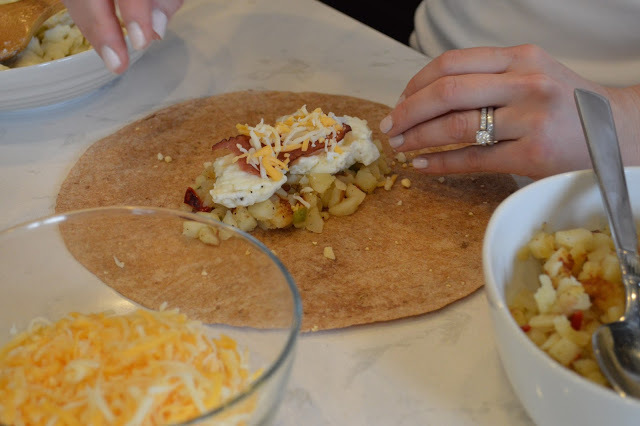
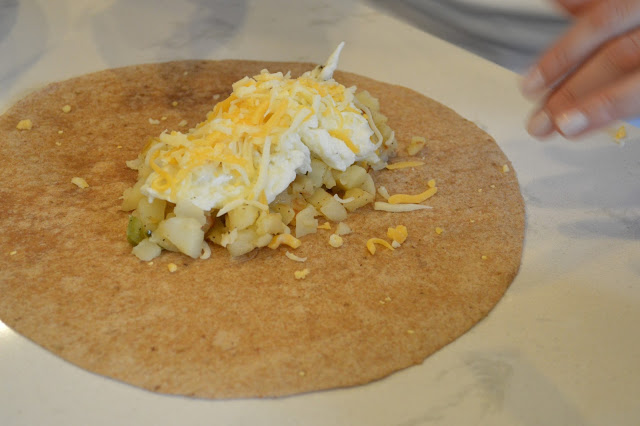
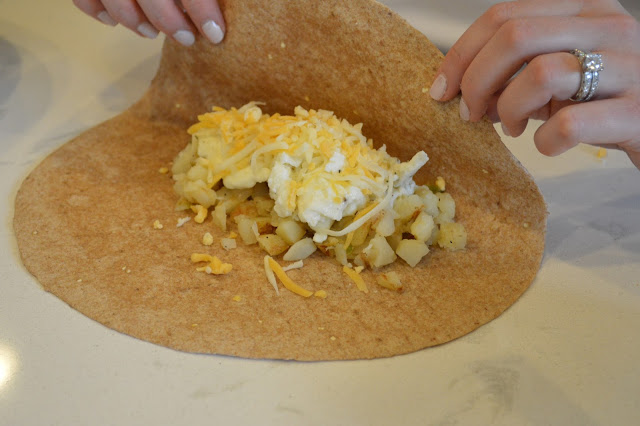
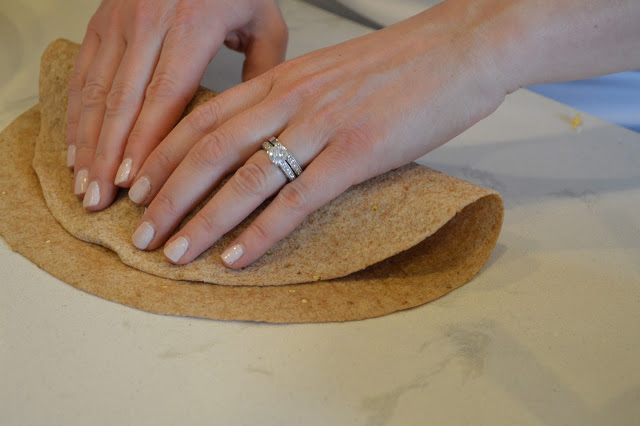
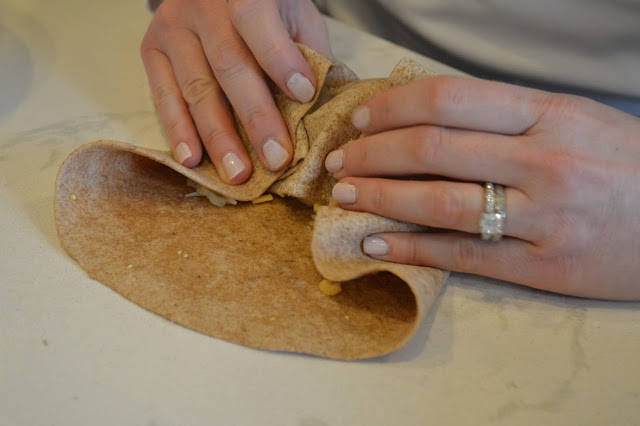
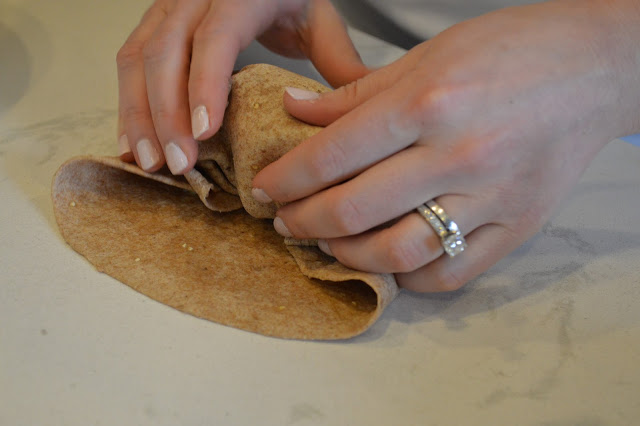
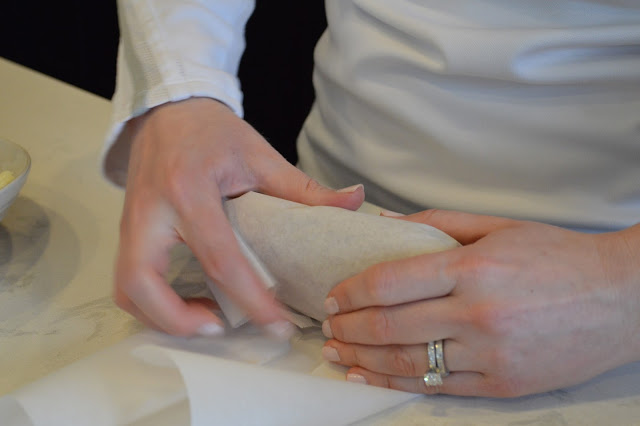
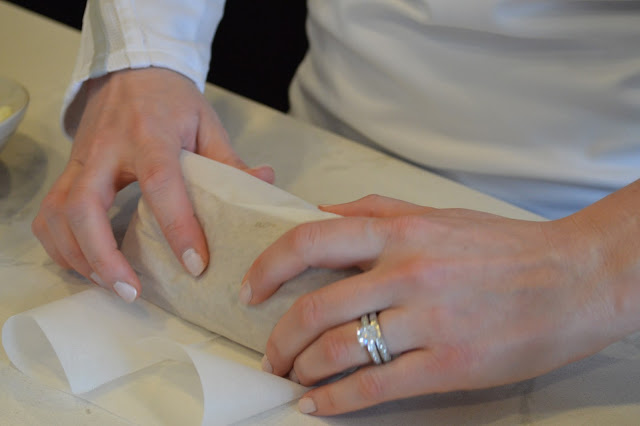
Spray nonstick skillet with cooking spray and heat on medium-high heat. Add the egg whites and season with salt and pepper. Allow to cook until fluffy and just set, about 3-4 minutes. Remove from the heat. {I used an electric skillet to cook the hashbrowns, but if you don’t have an electric skillet, you can use a regular skillet, just be sure to remove the eggs and set them aside first.} Add the olive oil and butter to the electric skillet and set heat to 350 degrees. Add the hashbrowns and stir occasionally, season with salt and pepper. Cook for about 20 minutes, until the hashbrowns begin to brown. To assemble burritos: Place a tortilla onto your work surface and spoon the hashbrowns, eggs, turkey bacon {if using} and cheese into the center of the tortilla in a rectangle shape. Fold the bottom of the tortilla tightly over the filling and then fold in the left and right edges of the tortilla. Roll the burrito up to the top edge until completely sealed. Place the burrito in parchment paper and roll until tightly wrapped. Place parchment paper-wrapped burritos in a freezer bag, waiting until the burritos are completely cooled to place in the freezer. Store in the freezer for up to 3 months. To heat burrito: Remove burrito from the parchment paper and wrap in a damp paper towel. Microwave until hot, about 3 minutes, before serving. 

PRINT RECIPE HERE

….

Do you have any shortcuts that help make your mornings go easier? I would love to hear in the comments section below. Thanks so much for dropping by and happy meal prepping!